How to Mill Boards Four Square - A Free Video from the Center for Furniture Craftsmanship
When it comes to lumber, you’ve probably heard the terms S2S, S3S and S4S. These terms describe the surface finish of hardwood. (Surfaced on two, three of four sides) When you surface lumber, you’re making sure each board is smooth and uniformed in thickness.
This video was produced for its free video library by The Center for Furniture Craftsmanship in Rockport, Maine. The Center is a nonprofit, international woodworking school dedicated to providing the best possible education in wood craftsmanship and design.
How to Mill Boards Four Square with Tim Rousseau
In this video, Tim Rousseau, an instructor at the Center for Furniture Craftsmanship, demonstrates how to use basic machines to mill boards S4S or four-square. S4S lumber is suitable for a variety of decorative projects including furniture, picnic tables, decking, railings, fencing and more.
#2 How to Mill Boards Four Square from CFC on Vimeo.
Step #1 – Getting Rough Lumber
The first step is getting rough lumber. Rough lumber needs to be crosscut to length or a little over length to what your final part will be. You can do that with either a hand saw or a circular saw.
Using a t square or other measuring tool, draw a line where you want to cut the board. Clamping the board down with a bar clamp will help keep the board from moving around as you make your cut.
You can cut stock quickly using A simple hybrid tooth saw. If using a circular saw remember they don’t like to turn, they don’t like to be backed up into the cut and are very prone to binding if the work is supported incorrectly. To prevent this always make sure the piece you’re cutting falls off the side.
Many make the mistake of inserting the blade into the wood before the saw is turned on. What you want to do is have the blade back so when you turn the saw on it can freely spin up, then slowly go through, and make your cut.
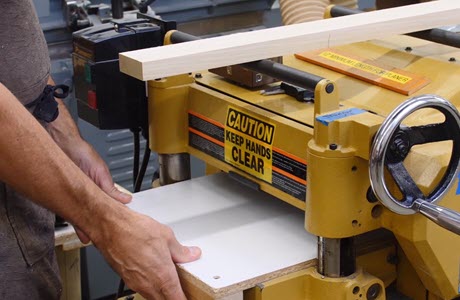
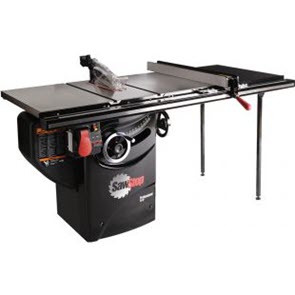
Other steps in the milling process involve rough ripping at the bandsaw, flattening the face at the jointer, making parallel faces using the thickness planer and finally trimming and truing using a table saw. We walk through each of these steps in depth in the above video.
Related Product Categories


Keep the inspiration coming!
Subscribe to our newsletter for more woodworking tips and tricks