Video: Clay Human Skull
In this video, David Picciuto uses a laser to carve a three dimensional skull prop that he fills with modeling clay.
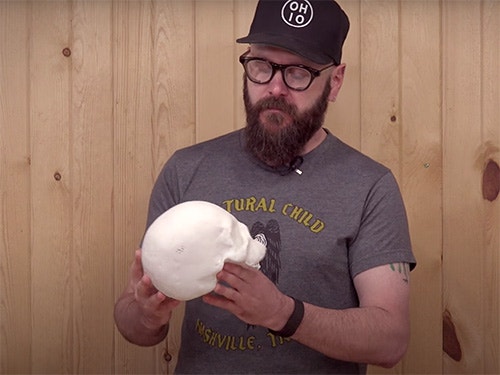
David Picciuto makes a spooky skull project out of laser carved cardboard and modeling clay. A fun project for halloween or scares any time.
You can find more great projects and techniques from David Picciuto at his website.
Featured Tools:

David Picciuto: We're going to make a cardboard and clay skull using a laser cutter. That's right, a laser cutter. Check it. Today's video is sponsored by Rockler Woodworking and Hardware, create with confidence. For this project, I'm going to download a 3D model of a skull from Autodesk 123D. You do need to be signed in to download it, but the account and the file is free. You will also need to download 123D Make from Autodesk. The app is completely free, and it's what we use to slice up our model.
Open up 123D Make and import the STL file we previously downloaded. Here, we can move around and examine our model. In the object size selection, we can change the overall size of our skull. I'm going to make mine slightly smaller. Then we'll jump over to the manufacturing settings. I'm going to use 10-inch by 10-inch sheets of cardboard so I'll input that into the bottom dialogue box. The thickness of my cardboard is 3/16th of an inch.
Next, I need to choose my construction technique, which is stack slices. Now, I'll choose my slice direction that'll give me the best option when it comes time to glue up. You want to avoid tiny pieces if possible. The areas in blue are potential issues which means they may not have enough surface area to adhere to. You do want to find that sweet spot that works best for your model.
Over in the right column, you'll see I need 17 10x10-inch sheets with a total of 80 parts. You can change the layout arrangement to nested, which will reduce the amount of sheets needed and that's objects within other objects to save space and pages. I'll then export my file into a multi-page PDF. Here's the PDF. The lines in blue will be cut all the way through and the lines in red will be engraved in the cardboard and will assist in the assembly. The tiny blue circles will be used for registration alignment.
To get the file over to my Full Spectrum laser, I opened the PDF in a compatible program. Here, I'm using Inkscape which is a free vector drawing application. I have a 15-page PDF and I can only send one page at a time to the laser cutter. I choose which page to open and hit OK. From Inkscape, I choose file/print and choose the Full Spectrum driver which shoots it over to my laser software.
Here in the Retina Engrave laser software, I need to choose Vector Cut, and I can assign cutting strength to the different colors of the art. The blue lines, I want to cut all the way through so I set a speed of 22 and a power of 40. This was determined by a test I ran earlier. For the red lines, I use a much lower power and faster speed so the laser doesn't cut very deep into the cardboard. Hit start and let the laser do its thing.
You need to open up each page of the PDF separately and send it to the laser. Once you have all your pieces cut, you can go back to 123D Make and it will give you a guide to each layer of assembly. Some layers will have multiple pieces and will be labeled as so. Layer 10 has three pieces, 10-1, 10-2, and 10-3. As you work through the assembly, you can click the next step in the timeline to see how your physical model should look.
Starting with layer 1, I will attach it to layer 2 using t-pins in the registration holes for proper alignment. I'm using a bookbinding PVA glue which sets pretty quick, allowing me to proceed to the next layer right away. There are 30 layers total which takes maybe about an hour and a half to assemble.
I then add a layer of air-hardening model clay over the entire model. I ended up removing the bottom jaw as there wasn't much detail in it and it wasn't structurally stable. Once dried, I sanded the rough spots and added another layer of clay to cover up any remaining traces of cardboard. Dipping it in water helps it spread easier and allows me to smooth it out.
A little bit more sanding to finish it off. I'd like to thank Rockler for sponsoring this video. If you're interested in getting into laser engraving and cutting, check out the Full Spectrum package that Rockler offers. If you don't have a laser cutter, you still have a couple of options. You could print the templates and attach it to the cardboard and cut it with an X-Acto knife. You can also take the files to a local makerspace. Now many public libraries also have laser cutters.
What am I going to do with the skull? I want to age it. I want to make it look old. If you have any techniques or suggestions, let me know in the comments down below. Maybe this gets me into airbrushing or maybe I can dirty it up with some soil. It could be a fun video in the future. Let me know what you think. If you liked this video, please help me out by sharing it with your friends. Thanks for watching. As always, be safe, be passionate, and make something.
Keep the inspiration coming!
Subscribe to our newsletter for more woodworking tips and tricks