Video: Practical Cutting Board
In this video, David Picciuto shows you how to design and build a simple, useful over-the-sink cutting board.
David Picciuto creates a cherry and mahogany cutting board with a built-in strainer and explains the process and how to maintain it.
You can find more great projects and techniques from David Picciuto at his website.
Featured Tools:
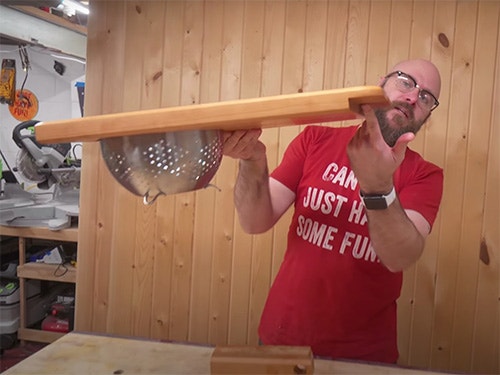
David Picciuto: Cherry and mahogany here that we're going to use to make this cutting board. Part of this cutting board is going to hang over the side of the sink, and it's going to hold this strainer right here, and then the other part is going to hang over the counter that you can slide a plate underneath. I've storyboarded this cutting board. These two outside pieces are going to be cherry, and there's going to be two thin pieces of cherry in the middle here with some racing stripes made out of mahogany. I'm going to cut that up here on the table saw.
This is why I have the storyboard because this kind of allows me to see what the racing stripes are going to look like before we glue this up. I've seen Spiceworld. I have, too. It's fun Spiceworld is a good movie.
Eric Don't they have like a big van?
David: They do all kinds of crazy stuff in Spiceworld. I'm sure it's better than Lord Of The Rings. Eric, hand me my book.
Eric: Oh wait, the book you wrote?
David: The book I wrote.
Eric: You literally wrote the book.
David: I wrote the book on cutting boards. You're not going to find another cutting board book out there. I wrote the book on cutting board. People are going to be like, "You can't use long grain on cutting boards, it's going to fuck up your knives." If you want to make an end-grain cutting board, there's three, or four of them in this book that I wrote. Let's talk about end-grain cutting board. The only people who have end-grain cutting boards are woodworkers, and their families.
Most chefs do not use end-grain cutting boards. Good cooks will sharpen their knives. All materials are going to dull your knives. While all this is drying, we went to the store and we found this colander. We're going to see if we can make this work. It's been sitting for about an hour and a half, going to scrape away some of the glue here, so that doesn't get caught up from my planer. There's a little bit of wobble to it. Now, we're going to run it through my planer.
I have this board here that I'm going to use as a sled. I'm going to tape it down, and I'm going to put a wedge in there, and then run it through the planer, and that will give me a nice flat top. Then I can take the sled off, flip it over, and plane down the other side.
We're going to cut the hole for this out. Eric thought we could cut around the handles here, and I think after some back and forth in my head, I want to remove the handles. I just want to cut a nice perfect circle in here. I'm going to see if these guys will pop off if not we'll work with it.
We want to come in about like that. We're just going to drill a hole in here, so I can get my jigsaw blade in it. All right. Now that fits in there nice and neat. I'm going to route a little lip on here, so that sits flush. As you're cutting your vegetables it can fall right in there.
That fits in there real good right now. We're going to round over the corners. We're going to put a round over on all the edges, and then I'm going to create a little lip over here where a plate can slide in just a hair for cutting vegetables and fruits, and whatnot inside and onto the plate.
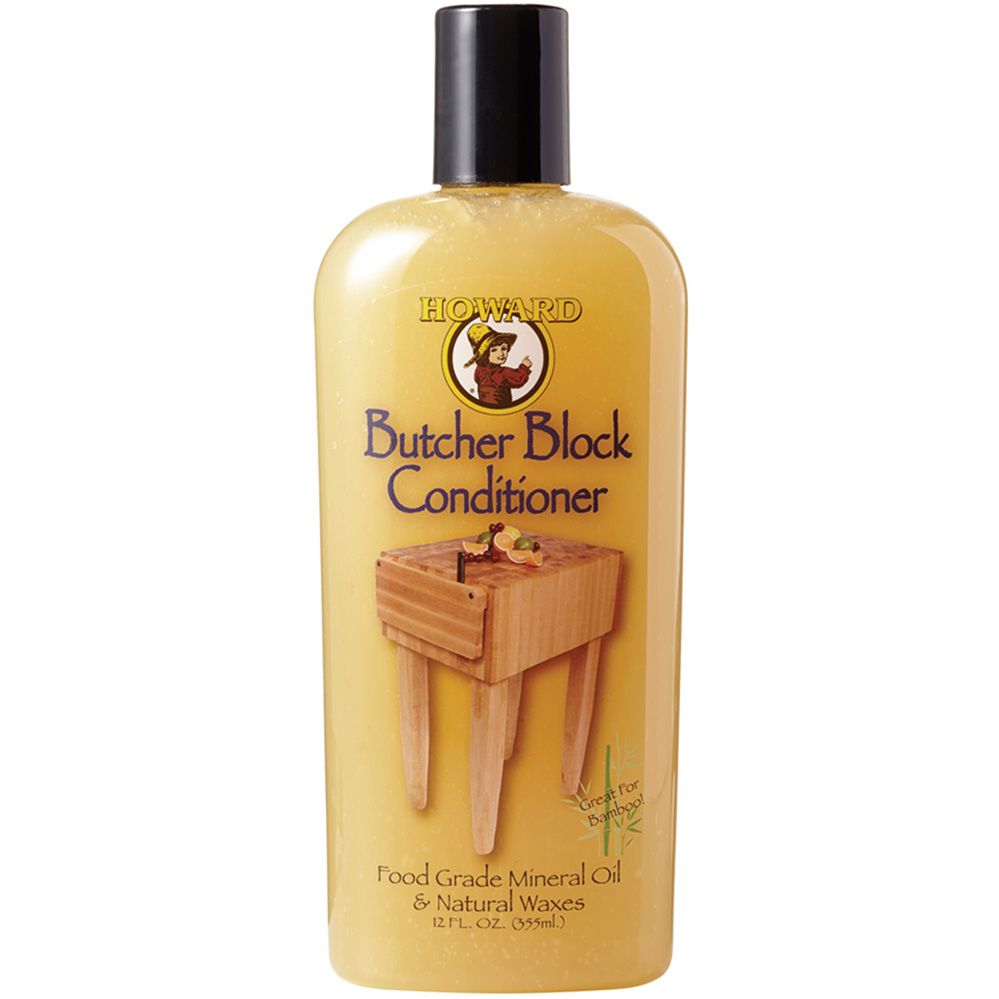
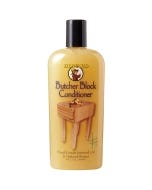
What I'm going to do is I'm going to take some food grade mineral oil, and coat it on here, and then put a coat of Butcher's Block Conditioner on top of that. This stuff is a little bit thicker and will leave more of a film. What I've done many times in the past is just use this stuff, one coat of this stuff, and then I will take like 50% this, and then melt some wax on the stove, and then coat it with that. That gives it a nice waxy protective film.
All cutting board finishes are not permanent, there's always going to be maintenance. How often do you have to refinish them? It really depends. It depends on how you're using it, how often you use it. When you see it looking dull just put a new coat of oil on there. Just keep some of this in your kitchen, and you can always coat this, whenever. You can coat it after every washing.
Don't throw it in the dishwasher, wash it by hand. Alright, so there it is. We made this, what, in an afternoon? All in one day, super quick, simple, easy. This is one of those things that you can customize to your kitchen. Customized projects they're so fun because they're made just for you. So cool. We found this at Bed Bath & Beyond. If there's an Amazon link I will put it in the description, otherwise you can probably find any kind of strainer that'll work.
My favorite feature is this little lips that I made here that goes over the plate, so you can scrape your vegetables, and fruits, or whatever right onto the plate. Very cool. This is the only book that you're going to find on cutting boards. There are, I think, 15 projects in this book. We go over types of finishes, how to finish a cutting board, how to maintain a cutting board, what wood you don't want to use in cutting boards, and, I don't know, it's a fun book. I will have links to the book down in the description. This particular project is not in the book. There is one that's very, very similar, but it doesn't have the lip. It's a little bit smaller, but it is an over-the-sink cutting board.

Keep the inspiration coming!
Subscribe to our newsletter for more woodworking tips and tricks