Video: Building a Double Sink Bathroom Vanity - Part 3
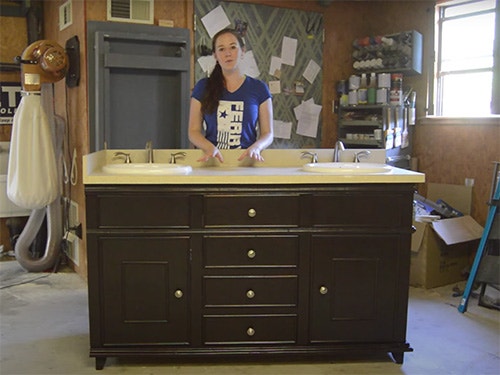
In this video, April Wilkerson tackles the third and last part of her double sink bathroom vanity project.
This time, April adds the feet, applies the finish and builds the countertop for her parent's double sink bathroom vanity
You can find more great projects and techniques from April Wilkerson at her website.
Featured Tools:


April Wilkerson: This is what I left the vanity looking like at the end of part two. Now if you remember I was having trouble getting the doors to sit at a 90 degree. Everybody recommended a stop block so that's exactly what I installed. I grabbed these ones from fast cap and just made my own little block assembly. I attached it to the cabinet to where the door lined up flush and then screwed them down. Now my doors sit flush. However, the top is very secure, but the bottom has play. I went ahead and installed a second one so this way if the door gets kicked or bumped it's not going to damage that hinge.
Next, I started working on the feet. I first cut a strip at the table saw then cut it into pieces at the mitre. Then I took three pieces and glued them together four separate times. This is to create the thickness that I wanted for the feet.
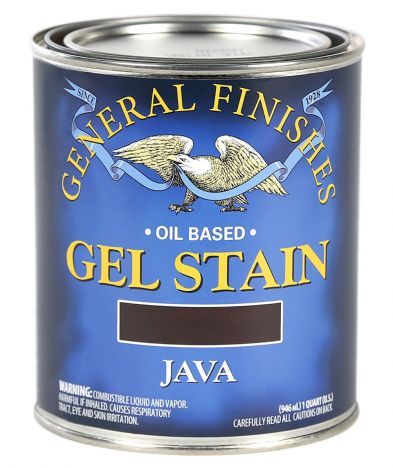
While letting those dry I started working on the back. I first cut two boards to length, then added a few pocket bowls. I test fitted them, but I'm not actually going to add them until after I'm done with the finish. To start prepping for the finish, I first went through and added wood filler to all of the nail holes and the trim, and then I went through with some sandpaper and just smoothed it out. I also went through and taped off the doors because I only want to paint the front face and edges. Then I started staining. My folks requested the color Java so I once again use the gel stain by General Finishes. By this time the blocks were dry so I made a template for the design and feed and just traced them out.
I used the bandsaw to cut them out and then I belt sander to refine the shape. I then applied a coat of stain and let them dry. Once they were dry I applied glue to the top surface, placed it underneath the cabinet then pre-drilled and attach it with this group.
Now to start working on the counter. I first grabbed some three quarter inch construction grade plywood and used my track saw to cut it down. Once the board was cut to size, I cut some additional strips to add to the perimeter so that it looks thicker than what it is.
I flipped the counter over and added the backsplash pieces in place just to make sure that everything looked as it should. The happy clap means it does. [chuckles] To install the sinks, I first put them in position and traced around them, then I came three quarters of an inch inside that line to actually make my cut. I would test fit the sink and look inside to see where it was catching, then I would trim it up a little bit more, then test fit it again until it sat flush. I repeated for the other sink, then started making the holes for the faucets. I used a paddle bit for the spout and a jigsaw for the handles.
My folks picked out some laminate for the countertop so I unrolled it and set it on my workbench. I thought was dirt on the laminate, but it turns out to be a bug, a very dead and a very squished bug.
I moved the laminate over to the counter, then left a two inch overhang on two of the sides. Then came back with my flush trim bit for the other two sides to trim them up flush. This is just to get a rough cut for the laminate I will be using for the top. This way I can work with the leftover laminate to make the additional strips I'll need.
To make the laminate cuts for the backsplash and the edges, I would just hang the laminate over that needed amount and then come through with the flush trim bit to cut the strip. I'm using the edge of the countertop as the guide for the router to actually attach them. I would put down contact cement both on the edge and the laminate piece that I would be attaching. After letting it dry to the touch, then I would slowly and carefully apply it, then come back with a title roller to apply even pressure. I went through and applied all of the edges first both on the countertop and the back splash pieces. Next I came through with my router and trimmed all the pieces up.
I repeated the steps for the top of the counter as well as the faces of the backsplash pieces. Now since this is a big piece I first put down dowel rods to help me out because this isn't something that you can lay down and then just shift into place. I would start on one end and slowly remove the rods as I was applying it down.
After it was applied I once again came through with a router. To reveal these holes I first drill through and then came back with my router. I guess a flush trim bit and laminate just really go hand in hand. To add on the backsplash, I simply pre-drilled and then attached it with some spruce. Then I came through with some clear silicone on all the seams just to make sure that it was sealed. Then lastly, I applied three coats of clear finish. Now, I'm not actually going to be attaching the countertop or the sinks until I get to my parents' house, just because I don't want to take the chance on something breaking while I'm hauling it down to them.
In a few weeks I will be shooting that as well as the install process, but I can't tell you how happy I am. This was a very intimidating project, a very challenging one, but it was also very rewarding. There were so many things that I've never done before and so it just means that I learned a lot in this build.


Keep the inspiration coming!
Subscribe to our newsletter for more woodworking tips and tricks