Video: Making a Back Lit LED Sign
In this video, April Wilkerson designs and constructs a back lit LED bar sign.
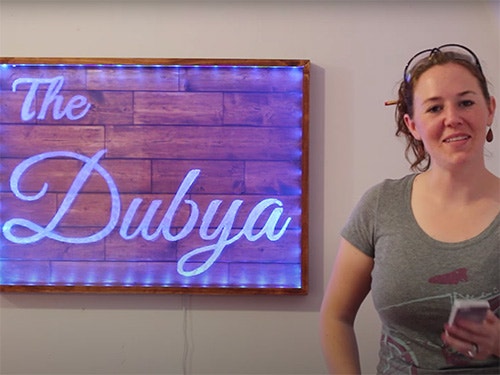
April Wilkerson created her own custom bar sign out of scrap wood, avoiding the need for neon by using stenciled lettering and LED light strips.
You can find more great projects and techniques from April Wilkerson at her website.
Featured Tools:


April Wilkerson: Cool. In this video, I'm going to be showing you how I made this backlit LED sign, and it's controllable through my phone. The first thing that I did was make a stencil. I went to a local Kinko's and had my design printed off to the size I needed it. Mine says the Dubya, but, of course, yours could say anything. I taped it down to my dining table. Then, I also went through and taped the front side of all of the lettering. This is just to give it some rigidity while I'm cutting it out and using it as a stencil.
Once that was done, I used an Exacto knife to start the cutting process. I did make sure to place a board underneath the stencil, so I wouldn't be cutting up my table. I also made sure not to lose the inside pieces, because they will be needed. For this project, you could use a piece of glass that you could etch, but I, personally, use plexiglass. I bought a piece a little bit larger than what I needed and cut it to the exact size I wanted it, making sure to use painter's tape, so that it comes away with a nice clean edge.
Then, I laid the stencil on top of the plexiglass and taped it into place, then used a Sharpie to trace the design. However, whenever I started the actual etching process, you'll see here it was just way too difficult to get rid of all of the black Sharpie marks, and it was taking way too much time. I decided to change tactics and instead place the stencil underneath the plexiglass and use fingernail polish remover to remove the Sharpie marks. This worked a lot better.
I would first go through and outline all of the letters with a smaller finer tip - this one here - and then come back with a thicker piece in order to fill in the inside. Now, I'm not going for a lot of depth here. I'm just going for a nice etch-looking surface. The process really does go really quickly. You just need to make sure not to move the plexiglass and to be looking at it from straight on if you can. Once I was satisfied with the etching, I used some sandpaper to smooth it to the touch.
I set that aside and started making the back using quarter-inch plywood for the backer material. Then, I found three eight-foot joints of tongue and groove quarter-inch paneling. I cut them to the exact size needed at the miter saw, but I was actually one piece short. I had extra material, but they were too short. To work around this, I took all of the material to the miter saw and just cut them up into random different links. I try not to think about it too much, because I really wanted it to be a random pattern, so I would just set them on the saw and randomly chop.
Then, I took the pile of pieces to the backer board and started dry fitting a pattern, trying to stagger the joints and just get a pattern that looked really random. Once I was satisfied with the look, I moved all of the pieces aside, making sure to maintain their position, and then glued them into place. I added a little bit of weight and then let it sit to dry. While it was setting up, I looked around to see what I had on hand to start making a frame.
I first cut them to size at the miter saw, and then changed up my table saw blade for my dado stack, so I could start cutting in some dadoes. I cut in a dado along the front that will hold the LED strips as well as the plexiglass. Then, I cut in a rabbet along the back, which will hold the back, which I just left to dry. Once all the slots were cut, I turn my blade 45° and made a miter on all of the ends. To add reinforcement to these miter joints, I am going to be using a biscuit. I just use my biscuit joiner to quickly go through and add a slot to each mitered cut.
For the glue-up, I'm actually only gluing the two sides to the bottom right now. This top piece here is just a dry fit. This is so the top will be free later on for me to slide in the plexiglass. I used a ratchet strap and my right-angle fences to let this dry. By this time, the back was ready to be cut to size. I clamped it down and used my track saw to get a nice, clean-cut on the two edges that had the overhang.
I think that's going to be it for making the back. After letting the frame dry a little bit longer, I tested the plexiglass just to make sure I wasn't going to have any problems. After seeing that it was a nice fit, I took the plexiglass out and gave the frame a coat of stain. Then, I glued and nailed in the back.
Next, I went through and started dry-fitting the lights. Now, I'm using some OSRAM LIGHTIFY Flex lights. These are LED strips that can change colors. They come with adhesive on the back, where all you have to do is peel and stick. Once I verified that the placement of them was going to be correct, I started peeling off the backing and sticking them permanently into place. I'll show you in just a few minutes how they work. With the lights in place, I had my husband come and hold the top into place for me so that I could slide the plexiglass sign into place.
With that in its spot, I was now able to glue and clamp the top into place. After letting that sit for about two hours, I plugged the lights in, which I probably should have tested before I actually installed them, but I didn't even think about it. Doesn't that look cool? On the back of the frame, I actually left enough room so that I could place this little controller, and it would still be flush. To hang the actual sign, I'm going to be using a French cleat. I located the studs and put a cleat on the wall, put a cleat on the back of the frame, and then just simply hang it into place.
All right, now, it's time for the really cool part, plugging it in and playing with the lights. What I really like about these lights is that you're able to just have a huge variety of color choices for them. You can go from blue to pink to red to green. The lights come with this little device called a gateway. It plugs into any standard light socket. It connects to your device through your wifi connection, and allows you to control the devices directly from your phone.
Look at this color wheel. It's not just a standard set of colors. You can go anywhere on the color wheel, and as you drag your finger around, the lights will adjust accordingly, or if you want, you can just simply turn the device off and on. Okay, and that's it. Now, with these LED strips, you can get so creative with the possibilities on projects. You can make a decorative creative night light for your child's room, a backlit art piece, or even a sign for a mancave.


Keep the inspiration coming!
Subscribe to our newsletter for more woodworking tips and tricks