Video: Making a Patterned Plywood Lidded Box
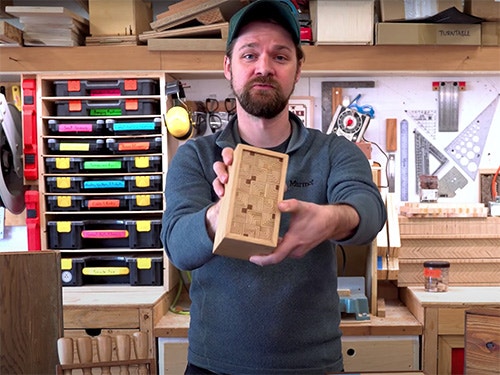
In this video, Michael Alm demonstrates how to build a lidded box with an attractive patterned top.
Michael Alm shows one of his plywood pattern techniques to create the top for a fun box project.
You can find more great projects and techniques from Michael Alm at his website.
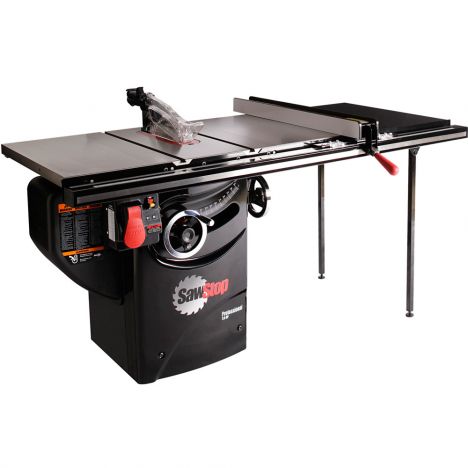
Featured Tools:


Michael Alm: Hey everyone Michael Alm here. This week I'm working on a pattern plywood lidded box. This is a super fun build and it incorporates one of my favorite pattern plywood panels on both the front and the back. I'm going to show you how to make this. I also wanted to talk about just box-making in general because it's super fun. It's a great way to just improve your skills. As a woodworker, I find myself returning to box making over and over again and I find myself improving a whole lot between different boxes.
It's cool to see all of these in front of me. My skills have definitely improved and I'm going to show you how to make this specific box so you can experiment in your own shop.
The pattern that I'm going to be using for this design is the woven squares pattern. This one uses the 45-degree miter. I cut it on two sides of a piece of Baltic birch plywood and then I cut those strips into thinner strips leaving a little bit of a flat spot on the inside. That will allow me to glue in a contrasting piece of hardwood later and it's going to add a little bit of visual interest to the design.
To make the strips easier to manage during the glue-up, I cut them in half down to about 12 inches. Then I tape two of them together at the mitered seam and glue them up. I want to make sure that that joint is nice and clean so I cleaned it out with a toothbrush and then add rubber bands to hold it together as it dries.
After a few hours of dry time, I can then take off the rubber bands and the tape and then sand off any excess glue that might be on there. As I mentioned before, I'm going to be adding some contrasting woods into this joint. For that, I'm going to cut down some ash and some mahogany. I cut these strips so they're slightly wider than that inner seam that area that cleaned out with the toothbrush earlier and I'll trim them to fit later. I can then glue the pattern plywood pieces and clamp the contrasting strips into place.
With the parts out of the clamps, I can trim off that excess. This is going to remove any glue squeeze out. It's going to make sure that they're all exactly the same size and that's going to pay off when it comes to doing the final pattern glue-up. With everything squared up, I can then start trimming out the individual tiles. I use a stop lock on my crosscut sled and a pencil with a big eraser. I can batch through these really really quickly and really safely. As you can see, it makes a ton of pieces. It doesn't really take that long to make this pattern. It just looks like it's time-consuming.
In the full video that I covered making these patterns, I also cover how to make different patterns using these same tiles. Make sure you go check out that video after you watch this one. I also cover how to make this jig and a bunch of other details that you may find interesting. The main thing that I've found from doing this several times is that it's best to lay out the pattern before starting to glue up because if you wait until the glue up to do the pattern, I've always messed them up that way.
This is way easier. You just slide them into place as you apply glue and then you don't really have to think about it.
With the pattern plywood panel out of the clamps, I can then go over and sand it. For this, I'm just using a palm sander and taking off the excess glue trying not to shape it too much. After that, I'm going to go over to my table saw and resaw it. This is actually my first time experimenting with resawing pattern plywood and it worked great. I've been afraid of doing it, but it seems to hold up really well.
I had hoped to finish off the resawing on my bandsaw but it's just not tall enough, so I went over to my workbench and brought out a Japanese pull saw.
The resaw cuts left a little bit of a proud spot in the middle and that was easy enough to take care of with the palm sander. I'm only going to be using one of these panels on this project and I'm actually going to cut that panel in half because it's way bigger than I need for the tee box. I cut it right down the middle and that yielded two equal sections that were perfect for the top and bottom of the box.
Now that I have the top and bottom, I can start making the sides. For that, I'm going to be resawing this piece of ash.
I want to lock the pattern plywood panel into the side panels with the dado track and for that, I'm just going to be using the curve of my table saw blade. You may notice that I'm not doing a whole lot of measuring on this. Most of what I'm doing is just marking and using the material thicknesses that I have. For that, I just make a mark and then cut it again with the curve for the table saw and sneak up on it until it fits really nicely.
With the sides milled, I can start cutting the miters. I've got a miter sled here on my table sub latest tip to 45 degrees. I cut the first miter and then I make a measurement with the pattern plywood panel inserted. I find when cutting these small pieces, it's really handy to have a side support off of the miter sled, and for that, I just used a piece of three-quarter-inch plywood. That worked great. I sneak up on the cut for the first panel just to make sure that it fits exactly how I want it to and then I can use that panel to trace out the next one.
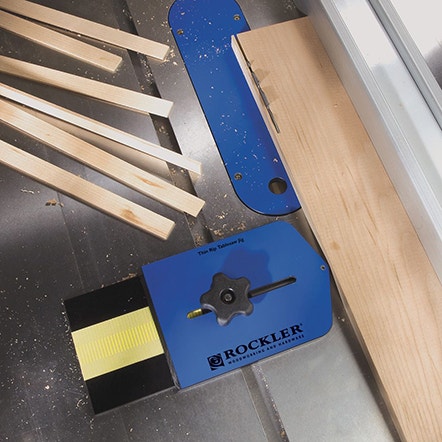
Since miter joints are not the strongest joints when they're just straight glued up, it's always a good idea to reinforce them. I like splines. I think they look really good and I built this jig to cut out the spline notches on your table saw. I put out a video on the subject a couple of weeks ago so make sure you go and check that out. I also have plans available for this jig on my website. For cutting the splines themselves, I like this rocker fin rip jig. It's super handy, easy to set up, and it makes for cutting these thin splines really simple and really safe.
Once the splines have had time to dry, I can trim them flush with the Japanese pole saw. I rough sand the splines with a sanding block and then go over that with a palm sander. If you've been sitting there wondering why I glued this thing up into a solid block, this is why, you can easily cut the lid off at the very end. It's one of my favorite tricks for making boxes. This way you have a perfectly fitting lid that's exactly the same size as the base.
Now at this point, I could just attach hinges and call it done but I'm not going to do that, I want to do a mahogany liner in this and this will also act as the catch for the lid. I'm cutting down a couple more scrap pieces of mahogany that I have. These are already super thin, I need them to be a little bit thinner so I've double stick taped them down to a board and I'm going to bring them over to my drum sander and sand them to thickness.
After that, I can pry them off the board. I have to be really careful here because you can easily split this grain. Once I get those off, I can just take them over to my cross-cut sled and trim them to fit.
These panels are super thin and they can flex a little bit so I cut some backer board, some quarter-inch plywood to sit inside as a clamping surface so that they'll sit nice and flush on the inside of the box. I slowly worked my way around the inside of the box gluing one in, waiting for it to dry, removing the clamps, removing the backer board, and then gluing in the next one until I had all four sides installed.
At this point, all that's left to do on the box is to sand and finish it. I sanded it all the way up to 320 grit and finished it with a coat of oaties oil. I have to say I am thrilled with the results of this, I hope that other people are going to try this out and just check out how good that pattern plywood looks.


Keep the inspiration coming!
Subscribe to our newsletter for more woodworking tips and tricks