Video: Mixing and Pouring Deep Pour Epoxy
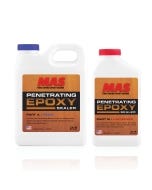
Epoxy resins come in different formulas. MAS Deep Pour Epoxy consists of three parts resin to one part catalyst.
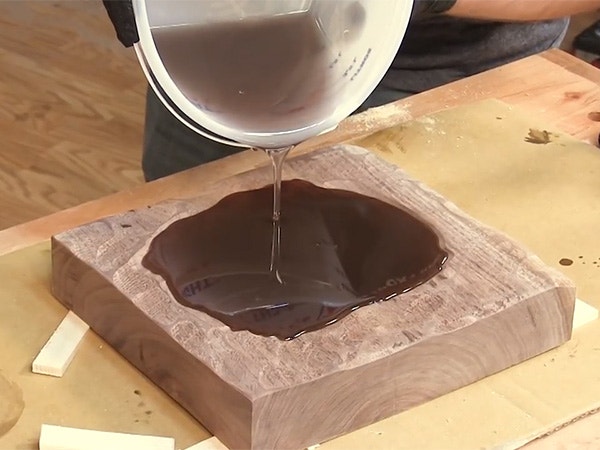
Two aspects of this product are its relatively thin consistency and its long cure time. Those combine to make a deeper pour more successful by allowing air bubbles the time and ability to escape. MAS Deep Pour Epoxy is specifically designed for molding, encapsulating and creating deep pour castings, such as those used on live edge river tables and ocean tables. It cures slowly to a clear, glass-like finish that resists scratching and yellowing. The extended gel time minimizes exotherm and improves air release for the clearest possible results. For ocean and river tables, MAS Deep Pour is the epoxy resin to reach for. In this demonstration, Derek from MAS Epoxy shows us how to prep, mix and pour Deep Pour epoxy into a large void.
Video: Mixing and Pouring Deep Pour Epoxy - Video Transcript
Rob Johnstone: I'm Rob Johnstone from Woodworker's Journal but I'm here talking with Derek Shurson from MAS Epoxies. Rockler is bringing in a Deep Pour Epoxy from MAS and I think it's really cool. Lots of people are really engaged in this new technique. Derek is going to teach me how to do it. Can we pour in this little block here?
Derek Shurson: Yes, we sure can.
Rob: What's the first thing we need to do?
Derek: First thing we need to do is make sure everything is level, so you get a completely level pour when it's all finished up. We'll basically shim it up the sides and then we can start mixing the epoxy. Give it a go.
Rob: Let's give it a go. Let's see how we're doing here. How level doesn't need to be?
Derek: I would say it-
Rob: More than that? More like that?
Derek: Yes.
Rob: All right. Now we got it level. This idea of a deep pour, how do you know how deep you can actually pour a layer of epoxy? I've heard quarter inch, one inch, two inches. I don't know how you make that determination.
Derek: Yes, the Deep Pour system is mass and temperature-sensitive. The rule of thumb I always would explain to people is, the warmer the temperatures, the thinner you should pour, and the cooler the temperatures like around 60 degrees, the thicker you can pour. There are ways to manipulate the system. I've seen guys do two-inch pours at 60 degrees at night, and then they shut the heat off in their shop and they're able to stall that reaction.
Rule of thumb, in the warmer temperatures, if you're working above 75 degrees, you don't want to go over a half-inch, depending on how big of a void you're filling. With this piece of walnut right here, we'll be able to do this all in one shot since it's only about two inches deep and probably about nine inches wide. We shouldn't have any problem with this, but if you scaled this up to, if this was about two-and-a-half feet wide and two inches thick, you would want to do an inch at a time and right around 70 degrees.
Rob: Just a couple of questions. Is this stuff going to, if I touch it with my skin, is it going to burn me or anything like that?
Derek: Once the resin and the hardener are mixed, we always recommend wearing gloves just because all epoxies are corrosive and it can be hazardous, but we always want to make sure we're being safe, so we always wear gloves. Once the epoxy start to react, with this system, it's going to be a very long time but if you were to get anything on your hands, you can just wash it off with some denatured alcohol, warm soapy water, and you'll be fine.
Rob: Derek has already given me some advice on a bigger pour that I'm going to be doing later, and he had told me that I should use this, what's it called?
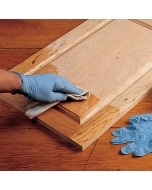
Derek: The Penetrating Epoxy Sealer. It's a two-to-one mix ratio, the viscosity is very low. It has the consistency of water. This was actually designed for restoring and restructuring dry or rotted wood. What it does is when it goes into the wood, it's so thin that it's actually bleeding into the wood grain. Once that sets up and cures, it's basically creating an eggshell barrier to where once you pour the Deep Pour Epoxy any air or moisture left in the wood, it's not going to kick out any bubbles, or foam, or anything like that.
Rob: You mentioned, even though we're not going to do it, that this would have been a good place to use the penetrating and why is that?
Derek: Yes, its just like a safety concern as far as like your piece, I know wood is not cheap, and if you were to skip a step prior, you could potentially get bubbles and foam. It is fixable, you're just going to have to sand it down a little bit and do another pour. The penetrating epoxy is basically the first step as to eliminating risks of air, moisture, and foam coming out while the epoxy seals.
Rob: All right, well now we're going to get busy mixing some epoxy. Somehow we have to figure out how much resin it requires to fill this little weird bowl that I carved out. How to put in and you have to have the right ratio of this stuff to this stuff, and how do you go about figuring that stuff out?
Derek: Correct. This system is three-to-one mix ratio by volume or weight, by volume is three-to-one, by weight it is 100 grams part A resin to 28 grams part B hardener, so it's slightly three-to-one but by weight, it's just a little bit different because the weight of the resin is heavier than hardener.
Rob: I must have a lot of resin in here.
Derek: Another way to calculate how much you're going to need to fill up the void is we actually have a resin calculator on our website at masepoxies.com. You can just type in MAS Epoxies resin calculator, and you basically type in the dimensions of the project you're working with, and it calculates the exact amount of gallons that you'll need for projects.
Rob: All right. Now we're going to be doing it by volume when we mix it up here, right?
Derek: Correct. I'm getting 32 ounces resin and then we do 11 ounces of hardener.
Rob: Do you need to be worried about getting bubbles in it or anything at this point in time?
Derek: Luckily, with the Deep Pour System, it self-releases air on its own with the extended working time. Most more simple systems such as like one-to-one systems two-to-one, if you mix it too fast, let's say like a power drill, if you were to [power drill whirs], you're going to whip a ton of air into that and it's going to take a while for those bubbles to release to the surface. Whereas with the Deep Pour System, it is so low on viscosity that when you're mixing it up, it has the consistency of water basically.
When you pour it, it's very clear and you will notice that all the bubbles will start to rise onto the surface and pop on their own. It wouldn't hurt to hit it with a heat gun or a torch because that could just eliminate them even more, but for the most part, we designed it to self-release air.
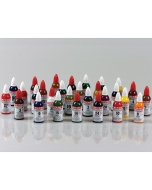
Rob: Nice. That's a big problem for a lot of folks. We're going to be adding some Mixol to color this. I know that that's compatible with your system. What about dyes? Are dyes compatible?
Derek: Yes. We usually recommend like a mica powder or alcohol ink, Mixol's a great example. It's very dense, so a little bit goes a long way just like other mica powders. The difference between, let's say Mixol and a mica powder, the ink will be more translucent and won't settle in any way, whereas a mica powder, if you were to let it sit and not stir it occasionally, everything will settle to the bottom and you won't get that pattern, so there is a timing aspect that comes into it if you want to create a certain pattern. We'll just lug this into a bigger bucket here.
Rob: We're going to mix in here, it's already pre-measured so we don't need to worry about them.
Derek: Pass me the stick please. Again, the hardener, it's very, very thin, so it has the consistency of water basically.
Rob: Now we start to stir. Can I stir it with a popsicle stick? Oops.
Derek: Yes, you sure can. If you want to eliminate some time, you can always take a power drill with the mixing attachments.
Rob: Well I'll use that power mixer but I'm going to put some of this stuff in there. It's a brown Mixol, just a drop?
Derek: Yes, I'd probably do about one or two.
Rob: See how that looks? Now Mr. Power Mixer.
Derek: Again, just to be safe and not be able to get epoxy all over the place, you want to usually just put it in very slowly and then slowly start, and make sure you're really working around the edges and on the bottom.
Rob: Mixing it thoroughly is an important detail.
Derek: Correct. A lot of user error is when epoxy isn't correctly mixed, some people might get soft spots. Mixing is a very huge part of this to make sure everything reacts correctly.
Rob: Can you overmix?
Derek: No, you can't overmix, but with other systems like one-to-one, if you were to pour this much epoxy in this large of a quantity, and you were to mix too long, eventually the chemicals are going to react and it's where they start to kick off. That is not good when you're ready to pour, if your epoxy is starting to gel, so with this system I usually mix for about, with a power drill, probably about one or two minutes. If I were doing it by hand, it would probably be more like five minutes.
Rob: Wow. Well, that's important for me to know, because I've got a few gallons support in that piece behind me. This is giving us a consistent color. What if I wanted to put streaks of color into some epoxies, how would I go about doing that?
Derek: Well you can mix and match colors. You can also mix and match, like a pigment and an ink, just mix all them in mica powder. The mica powders, you don't really get a very flat color with those. Everything's going to have some metallic shine to it, so some people will put it in a little bit of mica powder into their inks to kind of give it some more shine or glimmer, or flair I guess, but yes, you can mix colors to kind of create your own.
Rob: We've used a few containers here. My people, woodworkers, are pretty thrifty and they're looking and they say, "Well, we can't throw that thing away." Can you reuse these articles or do you really need to keep the chemicals from getting in touch with each other, and what use does this denatured alcohol have?
Derek: Another great thing about mixing with a drill is that, once this epoxy will harden on there, you can basically soak it in some denatured alcohol and just kind of stir it around in the coupling so, and then it will basically just pop right off and you'll be able to reuse it. The same thing goes for the mixing buckets. Whatever is left in this that cures, you can basically just squeeze the bucket and it'll pop right out in the form of that bucket, and you can just go ahead and reuse it. We do recommend just wiping it out with denatured alcohol, just to be safe and make sure everything's-
Rob: There's no chemicals left behind.
Derek: Correct, yes.
Rob: All right, but these littler pieces, they should probably be thrown away.
Derek: Correct, yes. Since we did the two-pour method, one just has resin and one just has hardener, we could clean them out with denatured alcohol and reuse them. My past experience, I just usually toss them. It just depends on what availability you have, two plastic measuring cups, and things like that.
Rob: Okay. Cool. Now, we get to pour. I'm going to let you do that, okay?
Derek: Sounds good. Real quick, I'm just going to take this mixing stick and stir it around this denatured alcohol to clean it up a little bit. That way we can reuse it.
Rob: Nice, Nicely done, now, we're going to pour.
Derek: Yes, epoxy's all mixed up. Usually, when you're pouring the Deep Pour, since it's very watery, you want to go as slow as possible, you don't want to splash in there and have overpour or anything like that. I'll give it a go here. That really does flow very, very smoothly, almost like water. It would go a little bit more.
Rob: But it's going to flow right over here, isn't it? Somebody got too aggressive with his carver.
Derek: With deep pour, the thinner the layer, the longer it will take to cure since its mass and temperature-sensitive. It's going to cure from the center out. Whenever I want to check after, let's say 12 hours, I would take a popsicle stick and poke it right in the center, or with my finger, of course with a rubber glove on. You can tap the center and on the edges, you'll notice it'll be very gummy. This could be hard and this could be kind of gummy since it's so thin. Again, mass and temperature-sensitive.
Rob: If I build up an outer rim, and then I pour another one, I should wait at least 24 hours?
Derek: Correct, yes.
Rob: Then I can test it to see if it's tacky. If it's really hard, say it got warm in here, it got really hard, then I need to put a little bit of tooth on and then pour again? Okay.
Derek: Yes, and then between layers whenever you sand, you always want to wipe down with the denatured alcohol just to make sure your surface is very clean. Yes, you can already start to see the bubbles self-releasing on the center of this here.
Rob: What does this do for us?
Derek: The torch, that'll eliminate any surface bubbles.
Rob: Let me give it a try.
Derek: We can go ahead and wave it over and it'll turn into like glass.
Rob: I don't want to get too close.
Derek: It's usually about four to six inches off the surface.
Rob: Is that good enough? I see about a bubble there. Chase them until they're gone.
Derek: Again, with this system, we designed it to be self-releasing. Over the next couple hours, you're going to still see these bubbles come up and just popping on the surface by themselves, which is great. We don't have to tend to it, unlike other one-to-one systems where you would most likely need to torch every 10 minutes for a total of 30 minutes, but that should turn out pretty sweet.
Rob: That's awesome. 24 hours from now, we can pour another one and that's it. Well, Derek, thank you so much for running us through the basics here. This is going to be an exciting new opportunity for Rockler customers and I can't wait to see what they get done with it.
Derek: Yes, looking forward to it.
Rob: Thank you.
Keep the inspiration coming!
Subscribe to our newsletter for more woodworking tips and tricks