Video: Using Beadlock Joinery
In this video, David Picciuto shows how Rockler's Beadlock Joinery system helps you make strong joints.
Make strong joinery at a good price! David Picciuto explains how easy and useful the Beadlock Pro joinery system can bin in your workshop.
You can find more great projects and techniques from David Picciuto at on his website: makesomething.com
Featured Tools:

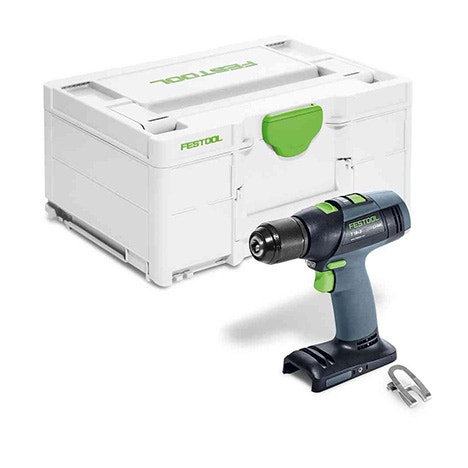

David Picciuto: Welcome to Make Something. I'm David Picciuto. Today, I'm going to show you what could potentially be your new favorite joinery technique. Typically, when I'm doing a butt joint like this, if I'm using plywood, I will use pocket hole screws. If I'm using solid wood, I will use the Festool Domino. Sometimes I'll use pocket hole screws on solid wood, but usually, I'll use the Festool Domino
The reason I like using the Festool Domino for this is it's really quick to set up, it's easy to use, and it's actually a pleasure to use. The problem with the Festool Domino is it takes this special tool which might be out of the budget for a lot of hobbyist woodworkers. The way the Festool Domino works is it creates a mortise in one piece, it creates a mortise in the other piece, and then you have this floating tenon that gets pounded into this piece, and then this piece gets pounded in there, and you have a really strong joint.
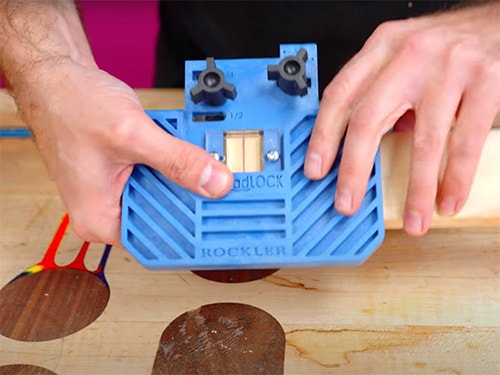
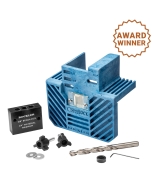
Today, I'm going to show you Rockler's Beadlock joinery system which also uses a floating tenon that's going to go into one piece, and then into the other piece, and it's going to create a strong joint just like the Festool Domino. It just uses this jig and a drill.
For example, let's say we're going to make a base frame and we're going to do a butt joint like this, and we want the floating tenon inside there like that. I already have my line marked in the middle there and then on the inside, just so I don't screw up, I know that I want my tenon to go in there, and my tenon to go in here. This jig comes with the drill bit that you need. It's got a depth stop collar on there. I set that using the handy little guide on the back of the jig. This is going to get clamped to the board. I will line that sight line with the line that I drew. Clamp this down, and drill in those five holes, will give us the mortise that will accept this tenon.
I've got the jig clamp to the board and I'll throw this in the vise here and then draw out those three holes. Once I drill those three holes, I can take this, move this to position B, tighten that down, and drill out the final two holes.
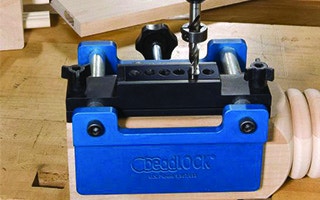
Let's take a look. That will accept- Ooh, you hear that? That's a nice tight fit. Now, we got to do the same thing on this piece, except we have to go into the end grain. I'll throw this into my vise. I'll clamp that down. I'll move the jig back to position A, tighten that down, throw this on here. Again, I'm lining up that sight line with my pencil mark. Then I can take a clamp, clamp this down and repeat.
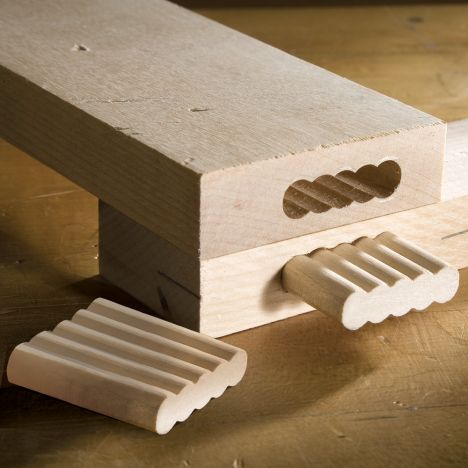
We have those three holes drilled, so we loosen that, move that to position B, tighten that down, and drill our final two holes. Now, we can take the jig off so we can add a little bit of glue in there and then pound that in.
That is going to be a really strong joint. The kit comes with a case, the jig, the insert, and the drill bit. That will give you this size tenon. The really cool thing about this kit is if you need to make a smaller tenon or a bigger tenon, you can add on to it and the case already has room for it. There is the half-inch insert as well as the quarter-inch insert, and those come with the drill bit. Then on bigger, odd-size pieces, you'll either have to make spacers or Rockler also sells spacers, and they also go into this case, which is nice and handy.
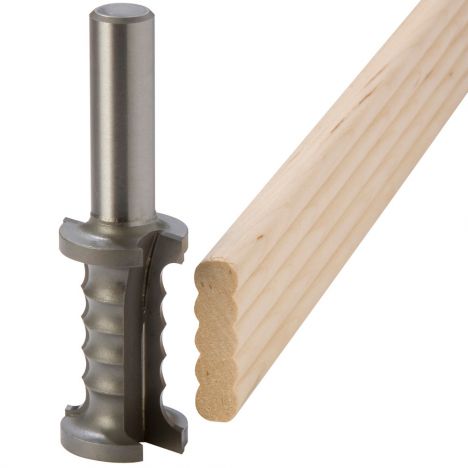
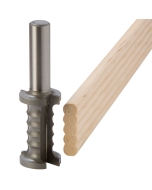
As far as tenons, you can buy them from Rockler. This is a 2-inch stock, and then they have the 12-inch stock, which you can then cut to length. You can also make your own tenons with a special router bit that you can get from Rockler. I will probably never make my own tenons, I'll just buy them here.
I want to give you an example of using the bigger half-inch drill bit and the spacers because I have this base that I'm making that just needs a bigger, stronger tenon, so let me show you that. As you can see, this piece is a lot thicker, and if I just put it in the jig as is, it's not going to drill those holes in the center, so I need to add a spacer to the jig, and then that will align this in the center of the board. Throw that in there. Then throw in the insert and then screw that in. That spacer right there offsets the drill guide.
I use the larger half-inch Beadlock joinery tenon with the spacers to make this bed riser. If you're wondering why does a dog bed need a riser, it's because where this is going to sit, I need to be able to mop around it or if he spills his water, the bed doesn't get wet, but that's not the point of this video. What I love about woodworking is there are multiple ways to do nearly everything. If you want to work fast, there's a method for that. If you want to slow down and enjoy the process, there's a method for that. You can also work within different budgets. The point today was to just give you more options to have in your tool kit.
The Beadlock joinery system is just as strong as the Festool Domino, but it's like 1/10th of the price, maybe even more than that. It takes a little bit longer to set up than the Festool Domino, but if you're on a budget, this could be the perfect joinery technique for you. I do want to mention that I am bringing back the second channel. I just got this project car, it's a 1967 Chevrolet Impala, that I will be restoring. If you want to see what I'm going to do with this car, go check out that video. All right, folks, that is going to wrap it up. Hey, Wally, say goodbye. Hey, Wally? As always, be safe, have fun, stay passionate, and make something. You like your new bed? You do?

Keep the inspiration coming!
Subscribe to our newsletter for more woodworking tips and tricks