Video: Cutting Notches for Lap Joints with a Circular Saw

The fastest way to crosscut a notch or dado for a lap joint is to use a dado set and table saw, but you can make the same cut using a circular saw and chisel.
Skill Builder Video
Cutting Notches for Lap Joints with a Circular Saw - Video Transcript
Speaker: These would be dado joints as they go across the grain, you could just simply call them mortises or a lap joint, which is technically what this is. We cut these with that dado cutter in a very easy pass, one pass to define the one side, one to define the other and then multiple passes to take out the middle. Very easy, very fast. However, you can do it without the table. It'll take a little bit longer, but you can do it a lot more quickly than you think with a circular saw and a couple of bench chisels.
First thing we're going to do is mark a straight line on our workpiece because this is where we're going to start, and you want it to be square, make sure this line is square. whenever possible, I like to use the work piece itself to set up the cut. I'll do that by putting this on my line, my square line that I just made and mark the other side nice and dark, so I can see it. What we'll do is we'll cut these sides to define our mortise here. I'll do some relief cuts in the middle and then we'll check that out. I've set my blade to this depth here, it matches the workpiece. Now, at this point we've defined our mortise, both sides are there and you'll see that when we come back, it should fit right on the money, but before we move this we will score it several times. It doesn't really matter how many times you do this, but the more these relief cuts you make, the faster your chiseling will go.
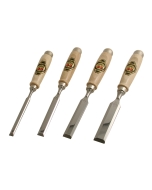
I'm going to start by going vertically and scoring the bottoms of these cuts. Now to press that into the wood and I really need to strike it. Cedar is very soft. We're going from here and that looks pretty good. Looks like we got that scored on there. The reason I'm doing this is when you chisel things out, I want to make sure that will splinter as little as possible, you saw where they came out, cedar splitters a lot. Going to clamp this to my bench. Just to keep it solid and I'm going to start with a wide chisel. Again, I'm going to set that right in that score mark because I want to define that a little bit better. Now I'm just going to start chopping out waste. I'm starting this vertically simply because it's easier, but I'll switch the horizontal in just a couple of moments.
Now, you can see how easily that chips out in chunks. I'm not obviously going to damage my workbench here. I'm not going all the way down. There we go. As you can see, it really clears out nicely with those relief cuts. I'm going to switch to horizontal or a little bit more control, I can see where I'm going. Pair of bench dogs to hold the work and you can use any size chisel you want, I've got a smaller one here. The bigger one takes things out more quickly, but it doesn't give you as much control. I might want to switch to one of the smaller ones in a moment. Now, you can see where I put that relief cut that's helping to keep things nice and neat on the outside, helps avoid tear out. Coming from the other side to get these. I've got these pretty much out, so I'm going to switch to a smaller one.
What we're doing here is we're just getting lowered down into where those relief cuts were, those are your guidelines. They start disappearing, you're going to far. At this point, I'm just kind of cleaning the bottom off because we're getting pretty far down, and let's see what happens. This will be glued and screwed into place. Very simple. Try it, you might like it sometime, it's not as fast as a table saw with a dado cutter, but if table saw breaks, if you don't have a dado cutter, give it a try sometime.

Keep the inspiration coming!
Subscribe to our newsletter for more woodworking tips and tricks