Outdoor Cedar Planter Project
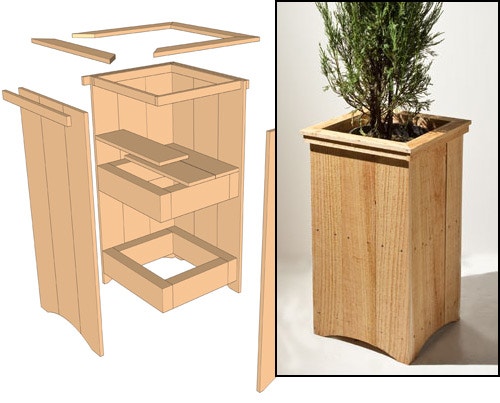
A good weekend project (easily done in a day), this planter will showcase an outdoor plant.
This planter is made from dimension lumber that can be found at your local supplier. The side panels are made from fence siding that is 1/2" thick and about 5-1/4" wide. Because this lumber is milled roughsawn in quantity, the sizes can vary a bit from board to board. Be sure to verify your measurements as you go.
Start the planter by making the interior frames from the stringers listed in the Material List below. Just cut them to length. Next, screw them together as shown in the Exploded View drawing below. These two frames are the core of your planter. Use an exterior screw, such as galvanized or decking screws — you don't want them to rust and discolor the wood.
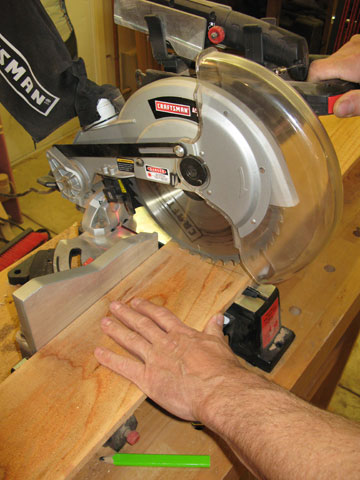
Now grab the fence siding and cut all the sideboards to length as shown. When they are all cut, you can begin screwing them to the frames that you just made.
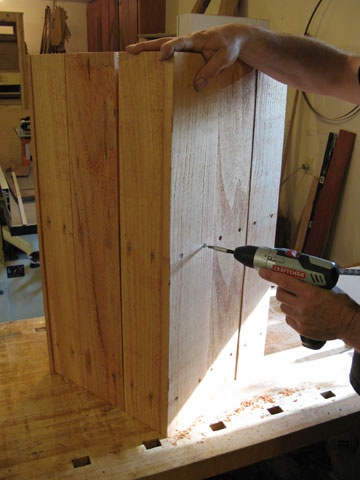
Place the first, or upper, frame 12 inches down from the top of the sideboards. Screw the sideboards to the frame with two screws per board.
Attaching the sideboard to the frame will take a bit of fitting. Lumber such as this will vary from piece to piece in actual size, so take your time and space the boards nicely on the frames. There will be some overhang on the corners of narrower sides (this will be addressed later).
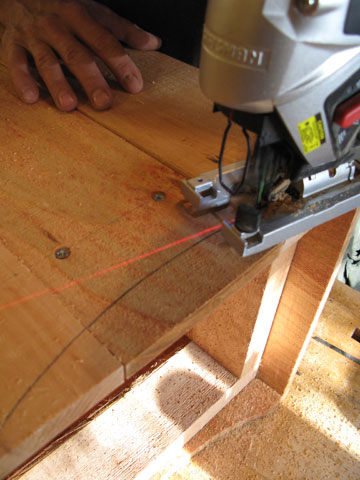
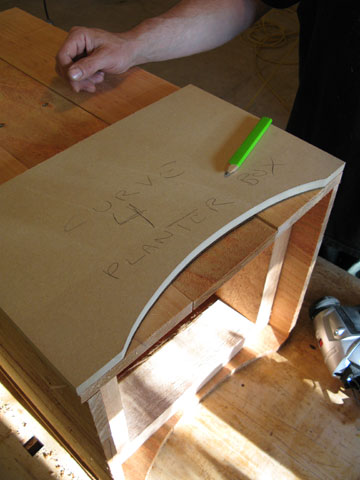
A decorative curve is cut into the bottom of each panel. Start the curve about 1-1/2" in from each corner. The shape of the curve is not as important as being consistent with the shape, so make a template from scrap lumber of some sort, cut it to match the width of the planter, and then cut a nice sweeping curve into it. Transfer the shape onto the planter. Then use a handheld jigsaw to cut the shape into the planter side.
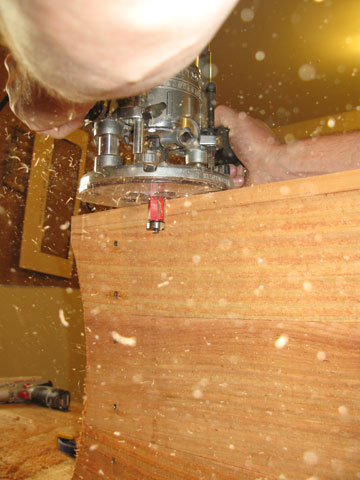
As mentioned earlier, there will be some overhang at the corners of the planter. You could deal with it by trimming the side boards before you screw them to the frames, or you could insure a perfect corner by trimming them with a router after they are attached.
Just chuck a pattern routing bit with a bottom-mounted bearing into your handheld router and set it to trim the overhang. Be gentle as you make this cut. Cedar is such a soft wood that it can be easy to mar your wood with the bearing if you push too hard.
Once that task is done, you can go ahead and secure the inner and outer trim around the top of the planter. Although the lengths are listed in the Material List, for pieces like this it is always best to measure your actual project, just to be certain everything will fit well. Cut the pieces to fit and attach them with screws.

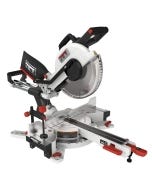
Now you can go on to make the final pieces, the mitered trim. Again, it would be prudent to measure your project rather than simply cut the parts from the Material List. Use a powered miter saw to form your pieces. Once you have mitered and fit the parts to the top of the planter, nail them in place with galvanized box nails.

Cut a few boards to sit loosely on top of the upper frame to act as a floor for your potted plant and the construction steps are done.
Many folks choose not to apply a finish to outdoor cedar projects; they just let them grey naturally. But if you would prefer, you could apply any deck sealer or exterior finish — the choice is yours.

Cedar Planter Material List
| Part | Thick | Wide | Long | ||
| Short Stringers (4) | 1-3/4" | x | 3-3/4" | x | 10-1/2" |
| Long Stringers (4) | 1-3/4" | x | 3-3/4" | x | 15" |
| Side Boards (12) | 1/2" | x | 5-1/4" | x | 32" |
| Inner Trim (4) | 1/2" | x | 1" | x | 14-1/2" |
| Outer Long Trim (2) | 1/2" | x | 1-1/8" | x | 16-1/2" |
| Outer Short Trim (2) | 1/2" | x | 1-1/8" | x | 16" |
| Mitered Short Trim (2) | 1/2" | x | 2-1/8" | x | 17" |
| Mitered Long Trim (2) | 1/2" | x | 2-1/8" | x | 18" |


Keep the inspiration coming!
Subscribe to our newsletter for more woodworking tips and tricks