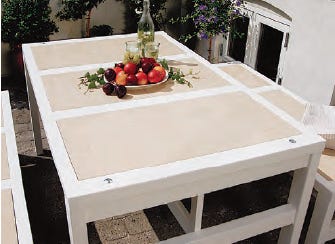
Project: Patio Furniture Table and Bench Set
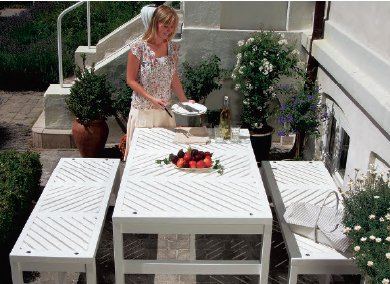
This project lays out a modern and durable patio/picnic table which is relatively inexpensive and can seat up to six.
Outdoor furniture made of wood has just the right look for many decks and patios. It usually blends well with other architectural elements and the landscape, while having a nice substantial quality to it.
For the Patio Table and Bench Diagrams and Materials List, click here.
Sadly, plastic and metal furniture sets are the common backyard choices these days because they're easier to move around and less susceptible to damage from the sun, snow and rain.
This table and bench set solves the negatives usually associated with wood. It comes apart, so no piece is very heavy.
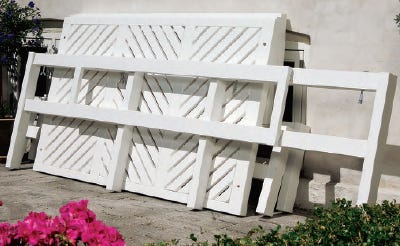
Disassembly is simply a matter of loosening a wingnut at each corner. The furniture also folds flat, making it possible to store the entire set in your garage, shed or basement during the off-season — something difficult to do with other "fixed" furniture designs.
Indoor storage, combined with a tough outdoor enamel finish, will keep this ensemble looking great for many years of seasonal use.
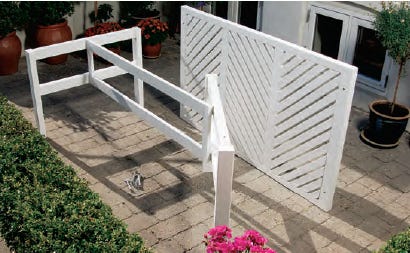
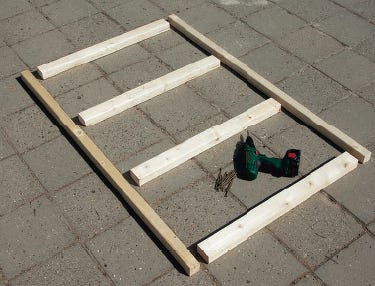
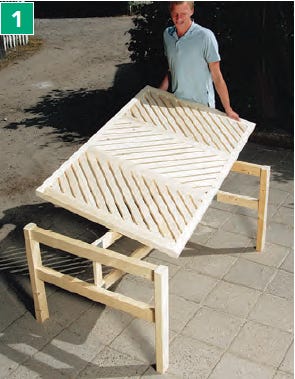
Building the Leg Assemblies
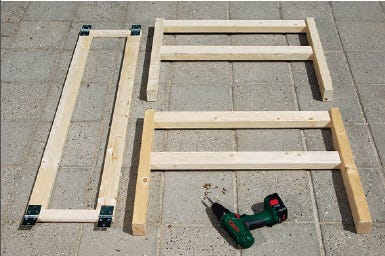
The table and benches are both built in the same way (only the dimensions are different), making construction quite simple.

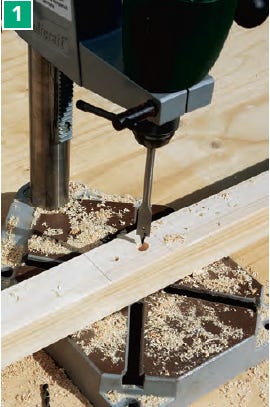
Begin with the leg assemblies. I used 2x Douglas fir kiln-dried lumber for the legs and rails (pieces 1 and 2) and 1"-thick pine for the crossbrace parts (pieces 4 and 5).
Cut your workpieces to the lengths specified in the Material List and assemble the six leg frames and three crossbrace frames using 3" galvanized wood screws. For a more finished look, I counterbored all of the screws and covered them with wood plugs (pieces 6).
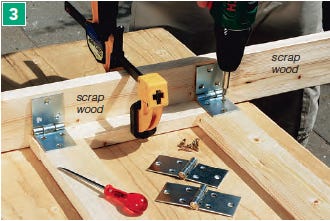
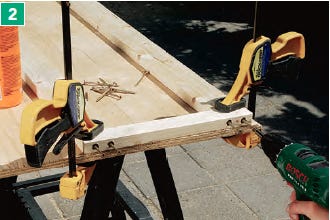
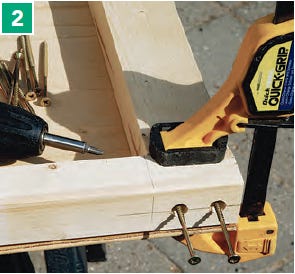
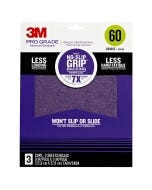
Break all the sharp edges of the legs and braces with 100-grit sandpaper before you bring them together with pairs of galvanized hinges (pieces 7).
Mount the hinges on the same side of the crossbrace frames so the leg frames will fold the same direction for flatter storage.
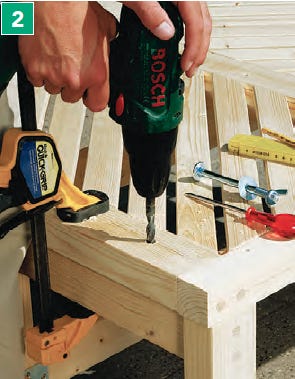
Making Table and Bench Tops
The frames for the table and benchtops are also made of 2x lumber.
Select stock that is clear or with only tight, small knots. Rip the edging (pieces 3) for the table and bench tops, then join the rails and edging with 3" counterbored wood screws to make the three top frames (table and benches). Plug the screw holes.
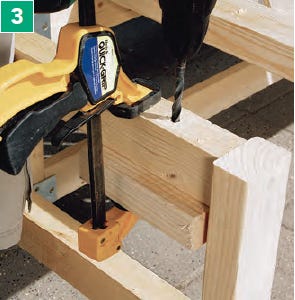
Next, cut angled slats that fit inside your table and bench frames. Miter-cut their ends to 45°.

With the frames on a flat surface, work from a middle slat out, marking and cutting one slat at a time and spacing them 1/2" apart.

Next, cut the long and short cleats (pieces 9 and 10) to size. They'll support the slats from underneath.
Drive 1-1/4" galvanized deck screws through the cleats — one screw per slat — to fix the cleats to the slats, then screw the cleats to the bench and table frames from the inside.
Note: You could substitute outdoor tiles for the slats to take this design in a different direction.
But you will need to modify the frame sizes to suit your tiles and add additional cross supports to stiffen thinner tiles.
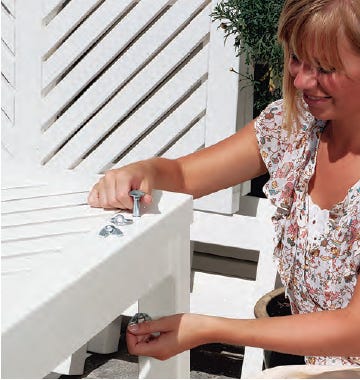
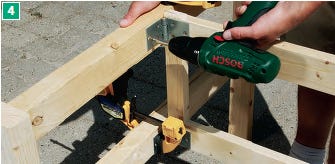
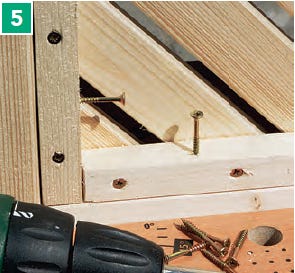
Fastening Tops to Subassemblies
Attaching the table and bench tops to the leg frameworks is easy.
Set the tops in place on the frames, adjusting for an even overhang. Make sure the leg rails and frame rails are square to the crossbraces.
Drill a single, 1/2"-diameter hole down through the end rails of the tops and into the top rails of the leg frames.
Then, remove the top and extend these holes clear through to house a carriage bolt, washer and wingnut.
Finishing Up with Primer and Paint
To keep the finish on your furniture looking good for years, you'll have to take some care when painting. Be sure the wood is dry before you begin. Then apply several coats of oil-based primer-sealer to all exposed, bare surfaces (especially the end grain). Take care to seal the end grain well. It's a good idea to allow the primer to go into the pre-bored screw holes, too. Finish up with several coats of a quality, oil-based enamel, allowing the paint to dry thoroughly between coats. (Use fine steel wool to de-nib the paint between coats if needed.) An occasional waxing will afford an extra measure of protection.
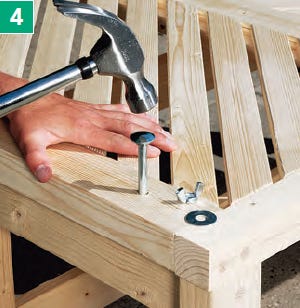
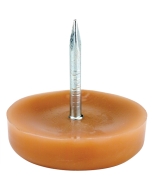
If your patio tends to be damp, consider adding nylon or metal glides to the legs to keep water from wicking up into the wood.
Keep the inspiration coming!
Subscribe to our newsletter for more woodworking tips and tricks