How To Apply Stain to Highly Figured Hardwood

Learn how to apply stain to highly figured hardwoods.
How to apply this finish:
1. Sand the project up through the grits until at least 320-grit. It is a good idea to sand pieces that will be hard to reach before assembly.
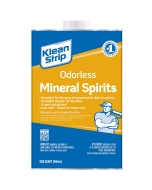
2. Wipe the project with mineral spirits to check for glue splotches. Sand the glue away if found.
3. Apply a coat of aniline dye mixed with water to the surface. Flood it on with a staining sponge, and wipe it off with shop towels.
4. Apply a sealer coat (Zinsser Sealcoat) of a shellac-based finish by wiping: flooding the surface with finish and wiping it off.
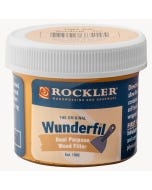
5. If you have any nail holes, cracks or defects in the wood, fill them now with a wood filler putty that matches the color of the stained wood (sand smooth).
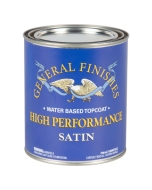
6. Apply at least two coats of a wipe-on polyurethane.
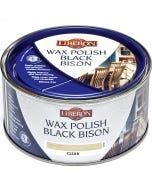
7. Optional: After the finish has cured for 72 hours, apply a coat of high-quality paste wax and then polish it off.
Supply Checklist:
Video: How To Apply Stain to Highly Figured Hardwood
Rob Johnstone: Today, we're going to demonstrate how to add color to highly figured hardwoods like curly Maple or fiddle back maple. Staining, highly figured hardwoods can produce some disappointing results if not done properly. Today, I'm going to show you how to get it right. As you know, the key to any great finish is proper surface preparation. In this case, it means sanding. I recommend that you start with the 80-grit and work all the way up to 600-grit or even finer. Here's a tip to get great sanding results and save time.
Move the sander slowly across the surface, about one inch per second. Most people move the sander far too fast. Neither moving the sander faster nor skipping grits will save you time on this task. Remember, as you advance through each grit, your goal is simply to remove the sanding marks from the previous grit. There's one more step to do before we start applying color to the project. That's to look for glue spots that may have survived the sanding process.
The way I do that is by wiping on mineral spirits to see if any of them show up. The reason why you need to worry about it if you find one like this, what will happen is the color won't absorb and it'll come out as a blotch. If you find one, you need to grab your sandpaper and sand all the way from 80-grit right back up to your 600-grit, then you're ready to apply some color.
First, if you have drawers or a drawer front like this one, disassemble them from your project and finish them separately. You'll get much better results and it's much easier. I mentioned earlier that staining highly figured wood can be tricky, and that's because the wood fibers that make up the grain that we call highly figured are bent and twisted, if you will. For that reason, they don't absorb liquids stains like typical pigment stain evenly.
Now a lot of folks use a pre-stain or a wood conditioner to make their pigment stain work better on highly figured woods but the result is often bland and the color depth is limited. That's why I think an aniline dye works so much better. Basically, the molecules of an aniline dye are so much smaller that they absorb evenly across the curly greenwood. So, how hard is it to use an aniline dye? Not at all, let me show you.
You need to mix your dye in the water to get the intensity of the color that you prefer. One note, the color of the wet dye is the hue you will see when you apply a clear finish over the dried dyed wood. To apply the dye to your project, simply flood it on with a sponge or a wiping cloth and then wipe off the excess with shop towels. Check for even application and then let it dry overnight.
Now the dye has dried and we've actually polished down the raised fibers with some 600-grit sandpaper, and now we're going to apply our first coat of clear finish. We're using a Zinsser Sealcoat for that. It's a specially modified shellac and what's great about it is it's going to dry really quickly and build up a film coat in a hurry so that we can get on with the process. Just like you did with a dye, flood it on to the surface and make sure the whole thing looks wet and then towel it off and let it cure. Don't worry if you see a little bit of the color rising onto the rag, that's perfectly normal.
Now with the dye on the project and the first coat of clear finish, if you have any nail holes or cracks, now's the time to fill them. Take your putty and if it's a perfect match out of the can, use it straight that way. If you need to mix colors to match the hue, that's the way to go. Put it in, let it dry, sand it off. With the holes filled, we're going to apply our next coats of clear finish. We could just build up shellac, shellac is a perfectly durable finish, but some people like the extra protection of polyurethane.
We're going to apply at least two or three coats of a wipe-on poly. Apply it just as he did with the shellac, flood it on, make sure you get everything looking nice and wet. Then, towel it off and allow it to cure. If you, like me, used an oil-based polyurethane, then you need to dispose of the rags properly. You need to lay them out in a flat layer and allow them to cure until dry to avoid spontaneously combusting.
Now, if you use water-based poly or shellac, you can just throw those rags away wet, no problem. That's all there is to it. You've successfully added color and a clear finish to highly figured hardwood. I've got another tip for you. After the polyurethane is cured for at least 72 hours, go ahead and put on a coat of high-quality paste wax, rub it on, wipe it off, it'll feel so great and add a lovely low luster to the project. I hope you've learned a couple of tricks here. Thank you for watching.


Keep the inspiration coming!
Subscribe to our newsletter for more woodworking tips and tricks