Table Saw Taper Jig
If you're a woodworker aiming to enhance the precision and safety of your tapering and straight-line ripping tasks, The Rockler Taper/Straight Line Jig is a tool worth considering. Designed to simplify complex cuts, this table saw jig offers versatility and user-friendly features that cater to both novice and experienced craftsmen. Often you'll need to rip tapers when making legs that get more slender from top to bottom, like the shaker end table, or the angled back slats on an Adirondack chair. This jig also makes it safe and easy to rip a straight edge that is parallel to the opposite edge.
Shop All Table Saw Jigs
Cutting Tapers and Straight Edges on the Table Saw
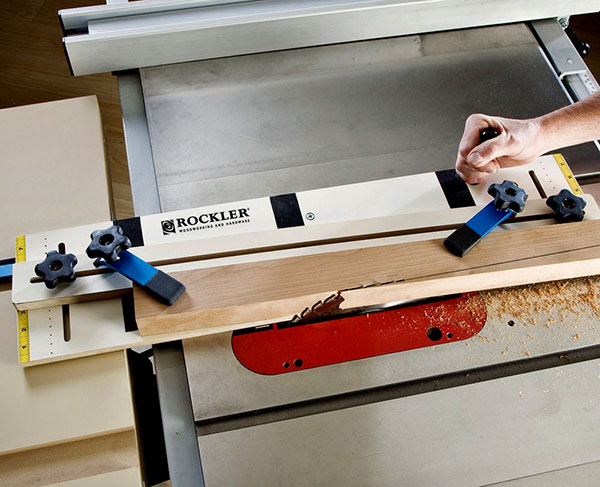
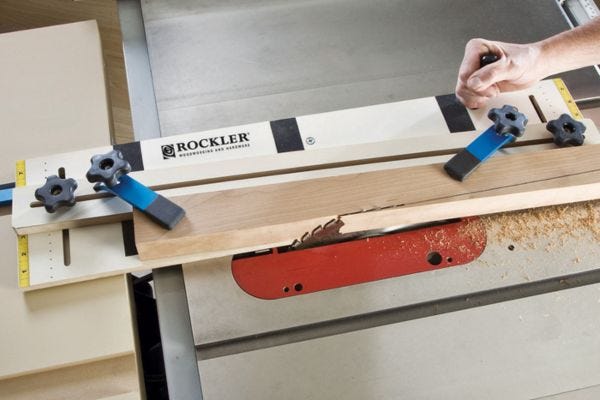
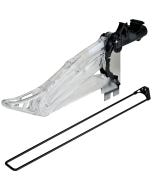
This Rockler Taper / Straight Line Jig is safer than many old hinge style jigs. This bar underneath rides in the saw's miter slot so the jig doesn't rely on the rip fence at all. It always tracks parallel to the blade through the cut, and the workpiece rests on the jigs base instead of directly on the sawed able, to help immobilize it.
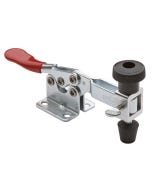
An adjustable fence supports the wood from behind, and two metal hold down clamps lock it in place securely. Setting up this jig can make a taper cut a simple. Start by marking the face of your workpiece with the angle you want to cut, and then wrap those layout lines around to the edge and end. Then set the workpiece on the jig base, and adjust it so its layout marks align with the edge of the jig closest to the blade. Now, carefully slide the jigs adjustable fence over and against it and tighten down the fences to star knobs.
Make sure the backend of the workpiece is flush against the fences adjustable metal stop. When the hold-down clamps are set and tight, start the saw and push the jig through the cut.
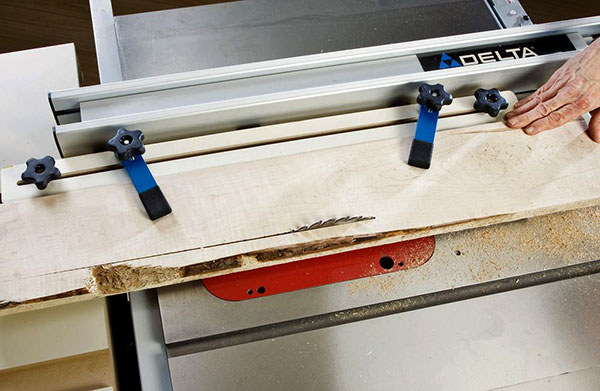
If you need to cut a straight edge that is parallel with the opposite edge of the board, remove the miter bar under the jig, clamp the board to the jig base and use the table saw fence to guide the jig through the cut.
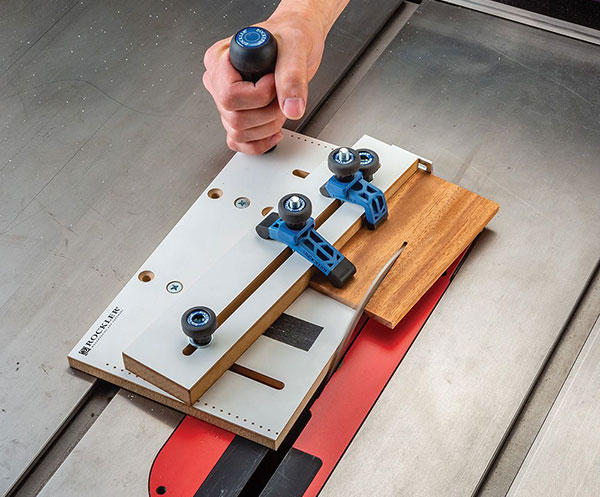
For smaller workpieces, Rockler's Small Parts Taper Jig lets you cut precise tapers on small parts, lending lightness to blocky legs on chairs, sofas and occasional tables. It's also great for whipping out a handful of shims or opposing wedges for workholding applications. Its compact form factor is easy to store, easy to carry and easy to operate, especially on smaller machinery. The miter bar can be located in three spots to fit a wide range of saws, and features nylon set screws to remove the slop. Our comfortable Easy-to-Grip handle makes for comfortable, smooth-sliding operation, while two specially-designed compact hold-down clamps ensure your work won't slip, and allow cutting of narrow parts.
VIDEO: Learn how the new Rockler Small Parts Taper Jig makes cutting tapers in small work pieces safer and easier.
Tips for Using. Taper Cutting Jig
Reader Question:How do I safely use a tapering jig? Can you give me any advice about using a table saw taper jig?
Michael Dresdner: In the film The Mask of Zorro, the elder Zorro is about to teach his student the art of true swordsmanship, and asks him scornfully "Do you know how to use that thing?" The younger man nods, and answers matter-of-factly "The pointy end goes into the other man.
Taper jigs are a bit like that. The simple answer is that you place the wood you want to taper into the notch of the jig, with one side along the angled side of the jig, and move the wood and jig past the table saw blade. The jig should be set so that it clears the blade and both the bottom and top of the tapered board are the widths you require.
Some taper jigs run in a table saw miter slot; others use the table saw fence to set the distance of cut. If you have not guessed already, this is the time to cut a lot of scrap wood until you understand the consequences of each different setup. I don't know what your taper jig looks like, but please make sure that when it is in use, your hands are nowhere near the blade, and the wood being cut is secured in some way.
Rob Johnstone: I just love your question, because it is such a familiar situation to me. I've just bought (or made or was given) a widget, and now I have to figure out how to use it. And Michael's answer is very practical. In fact, I would even go so far as to recommend that you put the jig on your table saw with the blade fully lowered and make a few passes just to see how the geometry of your system works. Sometimes it can be just a bit counterintuitive.
You can make a taper jig, or you can buy one that's all set to go, like Rockler's Taper Jig. The store-bought jig has a few features that would take a little time and thought to replicate in the shop - the angle scale and the adjustable stop, for example. But whether you build or buy, be sure to make a few dry runs before you start cutting. It's extremely important to understand the relationship between the jig and the blade throughout the range of angles the tool covers. After that, you might consider making a few cuts in a nice, wide piece of scrap to get a feel for the procedure. With a little practice, you'll be all set for projects that require accurate, perfectly straight tapered cuts.
Keep the inspiration coming!
Subscribe to our newsletter for more woodworking tips and tricks