Video: Bent Lamination Sneaker Display Shelf

In this video, Chris Salomone is building a sneaker display shelf using a woodworking technique called "Bent Lamination"..
Chris Salomone tests out his ability to create bent laminations in this project to create a shelving unit to store his sneaker collection.
You can find more great projects and techniques from Chris Salomone at his website.
Note: The contest referenced in this video has ended.
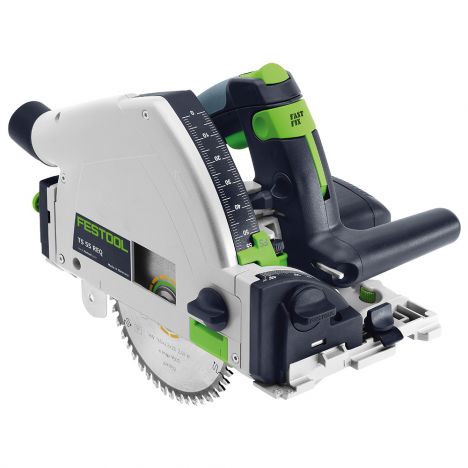
Featured Tools:


Chris Salomone: On this episode, we're going to make a shoe display shelf using a woodworking technique that's always intimidated me, bent lamination. This actually isn't my first bentwood project. About a year and a half ago, I made a bent lamination hat rack. More recently, recently, I made the Nintendo Switch cabinets that used another technique for bending wood, kerf cutting. Also, if you listen to the podcast that I'm on, the Modern Maker Podcast, then you've heard us talking about the next challenge, the Rockler bentwood challenge, which officially launches today.
Go check out the podcast or stay tuned to the end of the video, where I'm going to give out more information about entering deadlines, prizes, and all that good stuff. The first step in the process is building up a form. To help me do this, I'm going to use my X-carve. You certainly don't need a CNC to do this. In fact, if you want to see me make a similar but much smaller form by hand, go check out that hat rack video where I go over the process. Once my template was finished, I could use that to start creating the first layers of the form, which is going to act as a template for the rest.
Actually, here, this might explain it better. The finished form is going to need to be shaped like this. There's a top in the bottom that allow for a quarter-inch of material between them to be shaped. The little templates that I made so far are essentially a third of the total form. The next step was to trace the shape out three times end to end to make the complete shape that I needed. Now, this is where I ran into my first problem. I'm going to be using a template router to make the shape, and I realized here that I wasn't going to be able to make a smooth transition along the curve.
The easiest solution that I could come up with in that moment was to make a copy of my template because if I have two of them, I can fully support the curves as I route. I quickly cut out another chunk of MDF and made a duplicate of my template by tracing it out, jigsaw proud of the line, and then template routing it. While I was doing that, I realized that I've been watching a lot of these videos but have never subscribed. I paused the video, hit the subscribe button, and made sure to click the notification bell as well.
That way, I'd get messages whenever I put up a new video, then I could get back to it. At this point, I was pretty confident that I had what I needed to proceed. I started roughing out the MDF chunks that are going to become the form, first by cross-cutting them to length, and then by using my table saw to rip them to width. Now as you'll remember, a few steps back, I traced out my entire shape. Here I'm using my jigsaw to cut right down the center of that line, which is going to give me the rough shape for my first top and bottom pieces of the form.
The only thing that you want to be careful of here is not to go over the line. I'm just making sure that I stay plenty proud. Next, I'm going to take two of my template pieces and tape them on the form piece side by side so that I can start template routing. Here you can see the benefit of having two template pieces to make that transition nice and smooth. After it was half-finished, I stopped and moved the template to the other side so that I could continue routing. The last thing to address was the fact that my templates have a curve at the end, but the actual form needs to be straight at the very end.
To make this, I just taped a little piece of scrap with a straight edge onto the form and routed that flush. I forgot to film it but you get the point. At this point, the first layer of my forms are done. Now this layer is going to actually become my template. What I can do is use this piece to trace out the shape of the rest of my layers. Then I can jigsaw them out, screw them to the form, and flush trim them on the router. Each of my forms is going to be seven layers thick. That's 12 times of repeating this exact process, which is pretty boring and repetitive.
Building the forms out of MDF made a fair amount of dust. I decided to give my shoes a quick vacuum before I moved on to cutting out my laminate strips. I'm going to be making my strips out of Walnut veneer that I got from Rockler.
You could certainly make your own, but it's pretty tough for me to make strips this thin and wide with any consistency. Honestly, with the amount of material that would become waste aka sawdust with me doing it, it would probably cost me more too. To cut the strips to length, I used a straight edge along with a pizza cutter, taking several passes to get through the material. I also put a self-healing mat so I'm not cutting directly on the concrete. Also, I think this thing is actually called a rotary blade, but it really does make short work of pizza.
Next, I used my band saw to cut them to width, and here I'm leaving them about a half of an inch wider than what I want the finished shelf to be. That's because there's going to be a lot of slipping and sliding when I go to glue these together. This way I'll be able to trim off the parts where things become misaligned and still end up with a wide enough shelf. Speaking of gluing things together, that's the next step. Now I was pretty anxious about this part, so I waited until I had an extra set of hands in the shop to get it done. Enter self-proclaimed tape ball long shot expert Sean Boyd.
The contractor told me that removing that attic and moving it up, was going to remove some of the structural integrity of the building and they would have had to do some special things to brace it. We're at 8' 2'', which is a huge improvement over 6' at the previous shop.
Now for all the worrying that I did about this step, I have to say that it actually went amazingly smooth. I think it took us about 17 minutes start to finish, worked perfectly and didn't really make much of a mess at all. Definitely, confidence-inspiring to try out more bent lamination projects. [music] With the bent shelf out of the way, the next step was to make the flat shelf that goes in the front. Thankfully, this was a really simple and straightforward process. It was really just a matter of cutting the piece to size and then plaining it to the finished thickness.
To attach the two together, I decided to use some eighth-inch still rod epoxy din at four different points. I started by drilling a hole in the bent shelf at the lowest point of each of the two curves as well as towards the two ends. [music] Here, I'm using the metal rods to make an indentation on the flat shelf so that I know where to drill to attach them. You want to be pretty accurate with this but the bent shelf has a little play in it. If your holes are a tiny bit off, you can still muscle them together. At this point, I could cut my shelf to its finish length and attach the two together.
Now obviously, this project is more about displaying sneakers rather than storing them. I think that both are equally important but often confused. That's not to say that a collection can't be beautiful. Just do a google image search for sneaker collection and you'll see all types of stuff from hoarding to breathtaking and everything in between. I would urge anyone anybody passionate about collecting anything to consider having a place where you store things and a place where you display them.
Think of that display area as a much smaller, curated, and ever-changing contribute to whatever it is you're into. One week you might want to display your 1s, the next it might be your 3s or 4s. Maybe you're feeling colorful or deflated and could use some pumping up. Some carbs might help with that. The point is, you can keep them dead stock or rock them until the tread comes off but whatever you do make sure you have fun with it, express yourself. When your wife says you can't display them in the dining room, just do it.
Just kidding but wait, I forgot to talk about how I mounted the shelves. I guess that's because I didn't. Truth is I'm not exactly sure where I'm going to put these just yet. That said, my idea is to put a few L brackets on the underside of the curved shelf. You can see here that even being held just by the back portion of the shelf, it's still plenty strong. The shoes don't really weigh much. Also by locating them here whenever the shoes are on the shelf, it'll hide the hardware.


Keep the inspiration coming!
Subscribe to our newsletter for more woodworking tips and tricks