Video: Building A Modern Bench
In this video, Chris Salomone builds a modern shoe bench.
This is a fairly advanced woodworking project. This bench features lots of angles, but hopefully it will be a good learning tool for some of you out there.
You can find more great projects and techniques from Chris Salomone at his website.
Featured Tools:
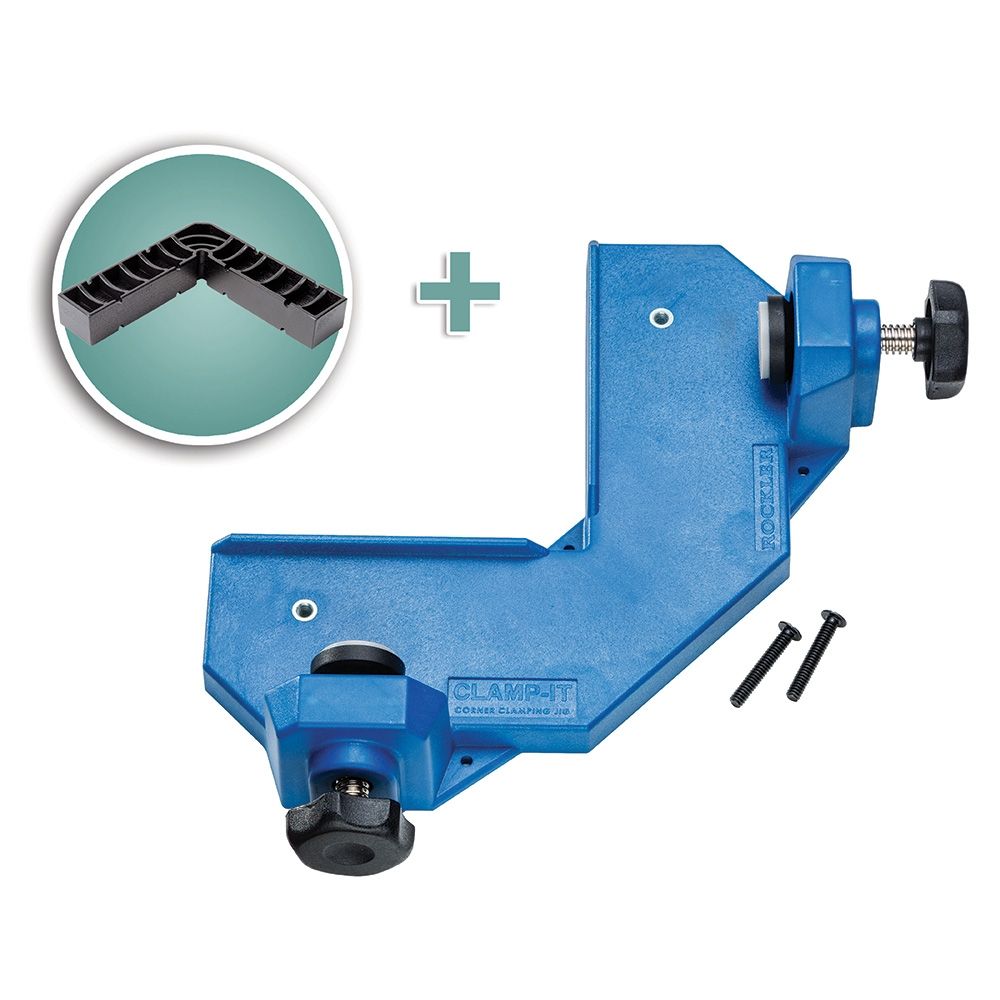
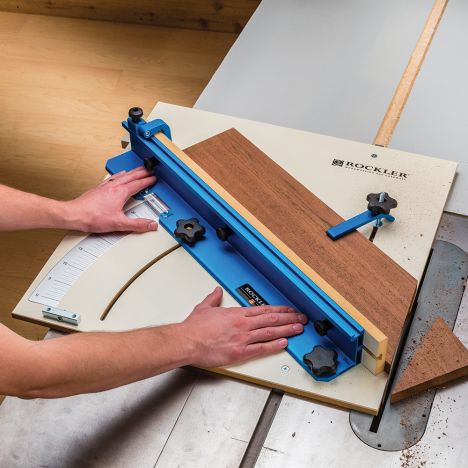 Rockler Tablesaw CrossCut Sled


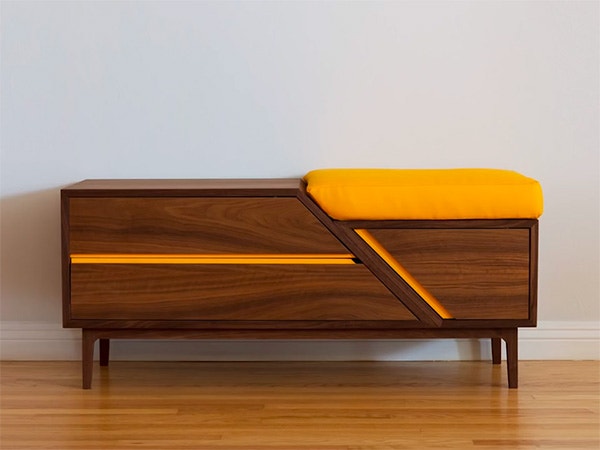
Chris Salomone: Today, we're going to build this shoe storage bench, which I promise is not actually black-and-white, on Foureyes. There's a lot of interesting things going on with this piece. Lots of weird angles, the way that the doors function. We're going to get into all of that in a minute. For me, my favorite aspect of this piece has to be the color. In particular, the seat cushion and the insides of the handles that you see me painting here. Anyway, all in due time. For now, let's start building.
We're going to start off with the cabinet portion of this build. This cabinet is actually two boxes that are side by side. In these shots here, I started ripping one clean edge on my boards and then flipped them around to rip a second clean edge and lock in the final width of 16 inches. If you're wondering how I landed on that dimension, I used science.
Next, I busted out my crosscut sled and started breaking all of my pieces down into chunks that are just a little bit longer than what they'll be in the end. Any time that I'm working on a piece like this with a bunch of boards that are all different, I make sure to give myself a little cheat sheet to help keep track of things. Anyhow, with all of my pieces cut out, I could move on to cutting my bevels. These are what's going to give them their finished lengths. There's actually quite a bit going on here, so let's cut away to a drawing to help explain things.
If we throw everything else away to focus on just the two cabinet pieces, we can start to see what's going on here. Here are our two boxes. Each of them has two right angles and then a combination of angles that gives them the 45-degree slant. If we break them further apart, you can see that both are essentially the same thing, only reversed, or upside down, I guess.
Basically, we're going to need to cut two angles on each box with the blade tilted to 67 and 1/2 degrees, and two angles on each box with the blade tilted to 22 and 1/2 degrees. Making the 22 and 1/2 degree angled cuts is pretty straightforward, but for the 67 and 1/2 degree angles, we're going to have to cut out the pieces vertically. If we reorient the pieces in the drawing the way that we're actually going to cut them with one piece flat and one piece vertical, you can see here that the angle of the blade is exactly the same. Basically, the blade doesn't change, the workpiece does.
Back to real life. Here, I'm setting my blade to 67 and 1/2 degrees, or if you went according to the dial on my table saw, 22 and 1/2 degrees, and then locking it in place. Then I started by making all the cuts that I need to make with the workpieces vertical and then moved on to making the others with the workpiece normal, or horizontal. After all those had been cut, I could cut the remaining angles that are a more standard 45-degree bevel, to make up the right angle miters. These are also the cuts that are going to finalize in the length of each piece. I started out by marking the individual lengths and drawing a 45-degree line where I need to make the cut.
Next, I cut out all but one angle on each of the two boxes. In my case, that ended up being the 45-degree on the top piece. That's because I want to cut this one to fit. Some people have asked me, from seeing other videos, how I determine the length of a particular piece when it's angled. What I usually do is cut three of the four sides to a predetermined length and then cut the last one to fit, like you see me doing here. Basically, SketchUp or math or any other method that you use is going to get you 98% of the way there, but there's going to be a compound of little errors that you've made up until this point that's going to change what the math tells you. In the end, I always say just do yourself a favor and just remove small shavings until it fits just right, rather than shooting for a specific size.
Next, to get ready for the glue-up, I cut some domino mortises into my case. The problem here is that there isn't a domino small enough to go through these faces. I used this little cradle jig to shorten a few of the smallest dominos from 30 millimeters to 24 millimeters long. I'm not sure what that translates to in the imperial system, but I think it's something like maybe 6 yards. I don't know, maybe it was 4 miles. I can't remember.
Anyway, after shortening those, then on the domino itself, I set the depth of the cut to 12 millimeters, or half of 24, which is normally reserved for offsetting dominos, and then I cut away. Finally, the last thing that I did before gluing was cut some strips of hardwood to cover the front edges. It was starting to get late, so I called it a night, or at least I thought I was calling it one.
It's like 2:00 in the morning and I can't sleep, so I'm going to work. Back out in the garage, while the rest of the world slept, I did a little more quiet work, which entailed actually gluing the edging on. This was about as far as I could go before I needed to start making noise, so I stopped there. The next morning, I cleaned everything up and then got to the glue-up.
The only real trick here is that I drew this 45-degree angle on my workbench that I could use to eyeball that things were lining up nicely as I tightened everything down. With the cases set aside, I could turn my attention to the doors. I started off by cutting out two chunks that would yield my three doors. What I'm doing here is basically just getting them close to the finished height that they'll need to be.
Next, I set my crosscut sled to 45 degrees and made a cut on one end of each of the two chunks. Like I said a minute ago, this piece is going to have three doors. The smaller cabinet gets one door that's hinged on the right side, and the bigger cabinet gets two doors that are hinged on either the top or the bottom. Next, I took the one big chunk that will make up the two long doors and cut it in half. At this point, my doors are pretty close to their finished size.
Before I went any further, I made some marks where I need to mortise in my hinge hardware. Over at the drill press, I bored out the material and installed the hardware. Finally, I could start cutting the handles in the drawers. What I'm looking for in the end is a gap of about an inch for my fingers to be able to get into and grab this little angled edge of the door to open them. After marking everything out, I tilted my blade to 15 degrees and made cuts along the appropriate edges.
After I'd finished that, I put my blade back to 90 degrees and ran the pieces vertically to clear out all the material. By the time I'd finished doing that, I could take my two cases out of their clamps and attach them together as one unit. I actually forgot to film myself installing this shelf that you see in the longer cabinet, but it was pretty straightforward. Just a matching angle cut on one end and then some little blocks on the underside to hold it all in place.
The next day, I could start building the base. I started by milling down what will become the feet into a small board that's just a tiny bit over an inch and a half thick. Over at the table saw, I ripped them into strips that are, again, just a tiny bit over an inch and a half wide. What I have at this point are pieces that are a bit over an inch and a half by a smidge over an inch and half. Next, I adjusted my fence to exactly an inch and a half, took a shaving to finish off the thickness, then rotated the piece, and took another shaving to finish off the width. Now, they're exactly the same.
The last thing I did before I adjusted anything was cut this piece of scrap plywood to the same dimension. Then I could get out my crosscut sled and cut them into pieces that are six inches long. Okay, let's go back to that scrap piece of plywood. I used that to draw all the angles that I wanted to replicate on my feet. This is my template, I guess. After I had it all drawn up, I cut it out and used that to transfer the marks onto the two inside faces of each foot.
Next, on my bandsaw, I followed the line to make the first offcut, then taped it back together, rotated it, and made the second cut to get the finished look that I was going for. Here, you can see it blurry like a bigfoot in this shot. The last thing that I had to make were the stretchers. I cut out another chunk of wood, milled it flat, ripped it into strips, and then crosscut the pieces to length. Then I could glue the base together.
While I'm doing that, I just want to give a quick thanks to Rockler for sponsoring me again this year. Over the next few months, you're going to see a few videos from me that I'm doing with them. They've always been really awesome to work with. They're also a great place for pretty much anything related to woodworking. When you need something, even if you're not sure what that something is, go browse their stores, either in person or online, because chances are they've got it.


Keep the inspiration coming!
Subscribe to our newsletter for more woodworking tips and tricks