Video: Building a Speed Boat without Plans in 5 Days - Part Two

In this video, Michael Alm and Jason Hibbs complete their five day, no plan speedboat construction project.
Michael Alm and Jason Hibbs complete the construction of their five day speed boat, finishing the body, adding the mechanical parts and taking it for a spin.
You can find more great projects and techniques from Michael Alm at his website.
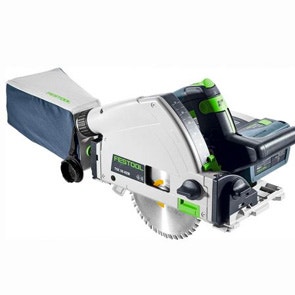
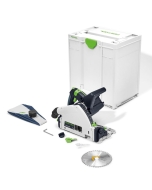
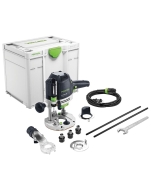
Featured Tools:


Michael Alm: This is the second part of the five-day boat build, where I joined Jason Hibbs of Bourbon Moth down in Oregon to build a cocktail racer-style speed boat in only five days. We don't have any plans and we have very little boat-building experience. When we left off, it was the end of day three so far, we've cut out all the ribs added in some chimes, the keel, not the spine.
Thank you everyone in the comments and we've cut out the cockpit. Both of us know that if we don't have the boat together, by the end of the day on day five, we won't have enough time to apply, finish, and that finish won't have enough time to dry so that we can get in the water before I have to head home. Fair warning, if you are a boat builder, boat enthusiast, or anyone who knows more about boats than me and Jason, which I imagine is quite a few out there, you may have to look away at certain sections of this video because honestly, we were just moving as fast as we could and making decisions just as quick. Main thing was just to get the boat done in five days.
Day four was all about skinning the boat in quarter-inch plywood. I will say that this was the most nervous we were about anything in the whole project, just because we'd spent three days up to this point, lining everything up and guessing at the skeleton of the boat, but there was a good chance that it just wasn't going to work. Then the plywood is going to buckle in weird spots.
Jason Hibbs: We are a little shy on the bottom.
Michael: Right off the bat. We missed our measurements on the port side of the boat. We got to put above. We don't have it here, or it's there. Dang, it. Fortunately, we flipped it over to the starboard side and managed to get enough out of the plywood to just barely make it on that side. We traced it out from the back and cut it out with the jigsaw.
Using the now starboard panel as our template. We can then cut out the port side again and this time am leaving a little bit extra room so that we don't mess it up again.
After making sure that the sides fit real nice, we laid on another sheet of quarter-inch plywood and traced it out for the deck. We wanted to do this now because once those panels start going on, it's going to get harder and harder to trace this out. We could then start gluing on the panels and for the glue-up, we're using TotalBoat Thixo. This is a two-part thickened epoxy that mixes in the tube.
It's literally the only reason we were able to get this boat done this quickly. If we had been standing around mixing up pots of thickened epoxy, this would've just taken forever. We also, to speed up the process, ran behind and started nailing off all of the panels. We used a staple nailer for this, and I know this isn't traditional to boat building, but again, we're just trying to move as fast as possible. Once we got one panel done, we glued on the other panel and started removing the clamps almost immediately. We left the panels a little bit wide because we knew that it'd be pretty quick to just go back over the top of them with a templating bit and a palm router.
Jason: Up to you. Roll it. So light. All over my ship.
Michael: After flipping the boat over, I scraped off all the excess Thixo while Jason went behind with the Palm router, we could get close to these edges, but since they're beveled, I had to touch them up with the Palm sander as well. We learned our lesson from the first panels, not to just go for it on the first try. For the bottom piece, we just took a piece of scrap. It's actually the layout panel, that we used before.
We tried a bunch of different things. What ended up working really well was a laser level to get this straight line across the front. When it's unfolded, it's curved. When it's laid down, it needs to be straight. This got us right in the ballpark so we could trim it out with the jigsaw. Now we had a template that we could use for the actual panels.
This first bottom panel turned out to be a challenge to get to lay down. It really didn't want to sit flat, especially on the bow, wanted to tear the staples clean out of it. We ended up having to resort to screws.
Jason: Should I try and put a screw in there.
Michael: I think you're going to have to do something I'm just curious, what's going on the opposite side.
Jason: Or do we let it be, and then just fill it with Thixo and just bring the other one to that 'cause that's where it wants to be.
Michael: That's going to be super strong just from its own tension.
Jason: Yes. I could bring it down a little bit. Leave it.
Michael: I'm inclined to agree with your leaving it and then trim to it. It was at this moment that we coined the term, the Thixo fixo. [chuckles] We did this a lot throughout the boat. Thixo came to the rescue, just filling in those gaps that are a result of imperfectly, building a boat in five days. In an effort to stabilize the cross braces in the boat. We ended up stapling through the bottom of the boat, which worried both of us, that it might leak.
We didn't really have much of a choice and we came back and backfilled it with more epoxy to hopefully prevent anything from happening. We still had the template from making the first bottom panel. We just decided to flip it over and test it out, to see if it would fit, had no idea how symmetrical that this boat really is. We were actually pretty surprised that it was really close. All we did was we cut an oversized panel, slightly oversized, and went ahead and glued it on. We knew that the bow was going to give us trouble just based on the first one and trying to get that line in the center to meet up. [chuckles] It wasn't really working.
Jason: We are going to sand it down anyway. Sand it out.
Michael: We started working on the old Thixo fixo again. There were definitely some gaps in the ribs, just because we guessed at the shape of them. They weren't too far off, but definitely, the Thixo added a little bit of extra strength in there.
Jason: Oh, let's fix some lumps.
Michael: At this point, we considered putting the deck on, but we realized that there was so much to do to clean up the bottom, that we just focused on that for the rest of the night. Jason ran around with the trim router, and I ran around with the sander, sanding off any excess glue. We also filled a lot of the holes with wood filler and started making the trim for the boat. We know that there's going to be a lot of trim on this boat, and the trim functions as an extra layer of protection from leaks and stuff.
We had a bunch of mahogany that we just trimmed down, and this actually took quite a bit of doing. Jason worked on designing this multipart piece of mahogany that would go over the front as a bow stem, and this covered up all those weird gaps and stuff. We glued it up with Thixo, taped it out, let it dry. Then, once it was dry enough, we've bent it over that curve and nailed it on with a 23 gauge nailer. We didn't want to use really big nails at this point, because again, we're trying to fill the holes, not make more of them. I went back over the top of that with basically a bead of caulk with the Thixo, smooth it out, and then we could add a few more pieces of trim before calling it a night.
Day five is the last build day. Jason and I were super tired at this point. We've been working for four days straight, staying up super late just to get this far. We knew that if we didn't get it done by the end of the day today, that we wouldn't have enough time to put finish on it. If we didn't have enough time for finish, it wouldn't dry in time to put the motor on and all that. It basically just wouldn't get done. This was the crunch day, and we just had to work until we were done.
We started off by soaking the inside of the boat with some teak oil. This is just in case water gets inside. We only got one coat on, but it was better than nothing. This is the last chance that we have to actually reach up inside of the boat before we put the deck on. We rough-trimmed the deck using a jigsaw, and those measurements that we took earlier when the boat wasn't all glued together. That was enough to get us into the ballpark. Again, we're going to use the trim router on this, and that is going to just allow us to have a little bit of flexibility on it.
The plywood that we're using on this build is called Okoume Plywood. It's made by TigerPLY, and it was donated to us from the Hardwood Centre in Albany, Oregon. This is a marine-grade plywood. It's perfect for this style build. It also looks like mahogany, so it's going to match our mahogany trim, which we also got from the Hardwood Centre. If you're in the Willamette Valley area, go check them out. They're super nice people, and they have a great selection.
Since we're not going to add any trim to the top of the deck, we wanted it to look really nice, but we also knew that we had to add staples to it. We came up with this idea of me drawing out each individual staple. Then Jason following up behind me and firing them into the marks that I had made. This ended up looking actually pretty nice. It kind of is a stitched effect across the top of the boat.
I'd say at this point, it's probably around five or six o'clock. We still have to eat dinner, and then we've got to trim out the bottom of the boat too. We're getting pretty tired, and honestly, we're running out of time. You can see that the trim is-- It's just not going to be perfect. This boat just is not going to be perfect. Jason and I are starting to accept that, but we're doing the best that we can with the time that we have.
Honestly, I think we did a pretty solid job considering. One of the hardest pieces of trim to add in was right here on the bow. It was just a weird shape that we just basically traced out and made in multiple pieces. If we could steam bin something or had the time to really put into this, we would have, but we started to have to make sacrifices. Ultimately, it's a five-day boat build.
We have to wipe the wood and thingy above her. Well, it's day six, and I think we have a boat built in five days. There's still sanding, and finish work, and all sorts of other stuff to do, but we hit our goal, we hit our mark of getting it ready for finish before the end of the day. Once we got it sanded up, it actually turned out looking pretty good.
Jason: You ready?
Michael: Yes, that bow looks so awesome. We figured the only way that we're going to get a bunch of coats of finish on this is if we suspend it from the ceiling. Jason put some hooks in the ceiling, and we attached some ratchet straps to it. Again, this is why we needed that loop in the front of the bow. Once it was hanging up, we could just slide the table out from underneath, and get ready to start finishing.
Jason: Water into like a loose ball like this.
Michael: Okay.
Jason: Every time it starts to get dirty...
Michael: Using some tack cloth, we went over the surface of the entire boat to pull off as much of the sawdust as we could, and then we started prepping our varnish. We're using the TotalBoat Lust Varnish on this. I like this stuff a lot because it's got a very quick dry time, which we need because we want to get at least five coats on this boat today. We thinned out just the first coat of it, which was recommended by the manufacturer. We went over the boat, I started by laying it on with a roller. Jason tipped it off with a natural bristle brush.
Oh, my neck's going to be-- After a couple of hours, we were able to knock back the finish with a little bit of sandpaper and then go over it again. After this point, we didn't knock it back again. We just kept layering finish over the top of finish. Every racing boat needs to have some sort of graphic on it, and Jason designed this real quick one morning while we were working.
I was just really excited to put it on. It was late, I was tired, but this gave me a little bit more energy to apply the graphic, tied the whole boat together. Talking about what we should name it, we settled on the old-fashioned because Jason's Bourbon Moth, and we both really like whiskey, and old fashions, and the type of boat is a cocktail racer. It all just came together at once. I'm super happy with this. It was nerve-wracking putting it on because it was kind of a one-and-done. We had a couple of wrinkles in it but for the most part, I think it just came out awesome. We wanted to get the graphic on just before our final coat so that we could just encase it in that varnish and it just adds that little extra bit to just tie the whole boat together. [silence] I can hear the comments. I've been reading the comments where's the patterned plywood? [chuckles] I got up really early the next morning after we were varnishing until I think two o'clock in the morning. I got up at six and I started [chuckles] making patterned plywood with this scrap Okoume plywood that we had leftover.
I couldn't leave it alone, there had to be some patterned plywood in this almost entirely plywood boat and I decided to shake it up a little bit. I decided to do a pattern that I kind of have done before but I kind of haven't. I wanted this pattern to look somewhat like waves and I also wanted to incorporate the mahogany so that it had this classic look to it. I used a couple of strips of the Okoume plywood and then added in a mahogany strip, a couple more strips of Okoume mahogany strip until I got three mahogany strips in the center of five sandwiched glue-ups of plywood. After that Jason joined me in the shop and we got back to working on the boat.
Jason: Look at you.
Michael: Hour and a half?
Jason: How's it look?
Michael: Looks pretty good. You can definitely see some stuff. [silence] A big part of this day is just setting up all the mechanical elements of this boat. I wanted to give a shout-out to my brother Keith who was essentially on speed dial the entire time because he knows way more about boats than either Jason or I do. He answered how to get this steering mechanism to work and basically where to start with setting it up so that the outboard motor turns left and right with a steering wheel. Thank you, Keith, that's the whole reason that we were able to do this. The steering mechanism came with instructions but we had to modify them quite a bit because our boat's a lot smaller than most boats.
Jason: Yes, that would work.
Michael: If you missed the first video, we bought an outboard motor off of Amazon. This was the only one that could get to us in time. It said it was a 3.6 horsepower and when we got it, it said something different on top.
Jason: This is four horsepower on the top.
Michael: Then it's a four-horsepower. In order to mount the steering mechanism Jason made up this little bracket, it's basically just two C-clamps on a little ledger and this is just going to hold that metal rod which is going to control the left-right motion of the motor as you turn the wheel. [silence] We installed it and very quickly realized that we installed it a little too close to the starboard side of the boat so we ended up loosening it up, shifting it over but it worked out great.
Jason: All right, cool. Do you want to drill a hole in that plate and get that mounted?
Michael: The plate that Jason is talking about is something that my brother warned us of, is that there's no central mounting point to this motor which means that there's no way for us to connect the steering mechanism directly to the motor so we need to fabricate something. Jason doesn't have any metal shop tools in his shop, no welders or anything like that but he does have Justin from Rainfall projects just down the street.
We made a template in Jason's shop and brought it over to Justin and inconvenienced him a little bit. Thank you Justin for knocking this out. We were obviously very tired at the time and he was gracious enough to give us of couple beers and [chuckles] just weld this thing up. Justin has an amazing youtube channel. I found out about him through the winter garden channel. He made parts of the marble machine X. He's a really impressive welder and this is definitely below his pay grade.
Back in the shop Jason started working with the bracket that Justin made for us and I went back to the patterned plywood. I had to get this stuff knocked out inside of this day. It's definitely one of the fastest patterned plywood panels I've ever made but I'm really happy with the results. Jason suggested that I use his Kapex which is not a tool that I have in my shop and I will say that it was really convenient for cutting these angles. You'll also notice that I'm cutting it at a 30-degree angle rather than my usual 45, this is going to give it more of that natural wave-like pattern that I'm looking for. It's really cool, I might do some more of these 30-degree patterns in the future.
I sanded off all the glue squeeze out and then I could use a template that I pulled off of the dashboard of the boat to trace out my lines so that I know where I want to cut. I then used the track saw to cut a flat edge that I could reference against on the table saw then used the table saw to cut the opposing side. Once those were cut I could start resawing it and fortunately, I had enough that if something went wrong I'd have actually two panels. It's easier to glue them up thicker early on and then cut them down. I've found that resaw panels are actually surprisingly strong.
The dashboard required a very specific sized hole so I used this adjustable hole saw from Rockler, this worked like a charm but it was terrifying. [silence] Honestly surprised that this panel did not explode in the drill press I then could start trimming it out on the bandsaw. I was really careful with this. I trimmed a little bit away from my line and then I could sand it up to fit later.
Since the dashboard had already been varnished we decided on Thixo. We did sand the dashboard a little bit just to get that varnish knocked back but the Thixo was definitely the right call. We laid it into place and I checked the fit beforehand to make sure that it was nice and tight and then we could nail it into place with a couple of strategically placed 23 gauge nails.
Jason: I'm trying to figure out what line would be the most.
Michael: Probably the mahogany.
Jason: It's probably good I'd say. You going to put that little cap on the steering wheel.
Michael: If you want to see how Jason assembled this full steering mechanism you're probably going to have to go to his channel because I was too busy making patterned plywood to film all of it but I'm sure he's going to detail it completely in his video, so after you watch this video go and check his out. At this point, we were down to all the little tiny details things like handrails and deck boards.
We found these really cool handrails at west marine which I think made the boat look way way cooler and also the deck boards we ended up putting in are all mahogany. They're leftover from all the trim boards. We had just enough to make this work. I trimmed them out really nicely with a round-over bit so they looked professional. We also used finish washers to drill them down to the deck and hit them with a little bit of teak oil too.
Jason: For example in my boat I teak oiled the inside and all the pieces with eight coats of teak oil.
Michael: Not one? It will not surprise you at this point we are completely running out of time. The last thing that I had to do was apply a coat of finish to the patterned plywood. Unfortunately, I only got one coat on this I would have loved to get five or six because I think it would start turning all iridescent but it still looked pretty darn good.
The boat performs great except for its underpowered. It's just not a big enough motor. We knew that going in. It was the only motor we could get in time. We really didn't have a choice. It's four horsepower. I'm guessing we could use seven or 10 horsepower on that boat and do great. Look forward to that. That's going to come out, eventually. I'll go down and tune that boat up with Jason and we'll get it so that it actually runs really well.
Other than that, I am super happy with that build. It was so fun to work with Jason. I cannot wait for our next collaboration which is definitely going to happen. Let me know in the comments down below what you'd like to see us build next. Also, big thank you to my Patreon supporters. Thank you for allowing me to go down to Oregon. You're really the reason that I can do this stuff. Thanks so much. If you want to join the Patreon, there's a link right here. I'll catch you on the next one. All right, let's put it on Craigslist.


Keep the inspiration coming!
Subscribe to our newsletter for more woodworking tips and tricks