Video: DIY Coffee Table in Two Styles
Build a coffee table using hairpin legs or make your own legs, Chris Salomone offers advice on how to do both.
Chris Salomone built a simple woodworking project - a coffee table using hairpin legs and a shelf. If you're looking for more of a challenge you could opt to make your own legs as well, which is also demonstrated.
You can find more great projects and techniques from Chris Salomone at his website.
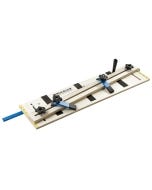
Featured Tools:
Chris Salomone: Today we're going to build two different versions of a DIY coffee table. Believe it or not, I've actually never built a round wooden top so I figured with today's project, I'd rectify that by building two of them. I guess one is technically a shelf but the same process applies. In these shots, I'm taking a couple of pieces of four-quarter white oak and cutting them into various lengths. We'll go over why in a minute but after that was finished I headed over my table saw where I first ripped each of my pieces to about nine inches wide and then flipped them 180 degrees to rip each piece along the other end at eight inches.
What I'm trying to do here is get two circles out of my pieces. They need to be 36 inches and 30 inches in diameter respectively. I calculated it out and these were the boards I needed to cut to yield that. Next, I laid things out and marked where I could install some dominos and then started assembling everything. Here no matter what you're using, you just want to make sure that you're really careful about where you place things so that you don't end up exposing them when you cut the circle. Speaking of that, after they were dry I could start cutting the circle.
Next, I could start laying out the pattern that I wanted to cut into my top and those are not my hands. Oh, yes, that's because I actually collaborated with Sam from DIY Huntress and Alisha from Pneumatic Addict on this build. They'll actually both have videos on their channels that go into detail about what they did, so I don't want to spoil it here but just to give you a little preview, I'll say Sam did some really awesome pattern work and some staining on the tabletop and Alisha showed us how to bleach white oak and how to spray a finish.
Seriously, if you've ever been looking to make white oak look truly white check out their videos. This right here shows the difference between the bleached and natural oak and it's very significant. I'll link to both videos in the description so that you can check them out after this.
For this project, we wanted to do things a couple of ways. One was fairly straightforward with some hairpin legs. Though they do have a shelf which is pretty unique and the other version is going to have some custom legs. In these shots, I've just been cutting out some blanks that I'll be able to get my legs from. These are going to be pretty standard four-eyes-type legs.
Now, Sam and Alisha had never made some legs like these before so it seems like a good opportunity to show them how I do it. Here I'm marking out my taper on one of the pieces but for the other one, we have to start by cutting the blank into a parallelogram. Luckily there were two, so Sam would make the first one and Alisha could make the second.
After that, we marked out our taper on one of the pieces and used that to set up our tapering jig where we could cut up four legs even though we were going to use three of them. Once you have your jig set up, it's really easy to bust them out. Just cut your piece, flipped it around 180 degrees, and cut your next leg. Then get another piece and keep going until you have enough legs to keep you satisfied.
After that, we used the same process to cut out four more tapered pieces and these will be the upper portion of our legs. Basically, at this point, we have four of each of these two pieces. To join them we're going to using to be using a miter cut. In order to figure out exactly how to cut that, I'm going to hold the pieces together and strike a line on each that should be cut off. Then I take my piece over my table saw and line the cutup with something that I know is parallel to the blade, lock in the meter gauge and then have at it.
Once those were cut out somehow I forgot to film it but we glued them together with the combination of some wood glue and some CA glue. This was just to temporally attach them while we're cutting some splines that are going to give them their real strength. You might notice in these shots that I'm getting a lot of tear-out, but that's okay because this part of the leg is going to be up against the underside of the table so basically you'd never be able to see it unless you did touch the leg.
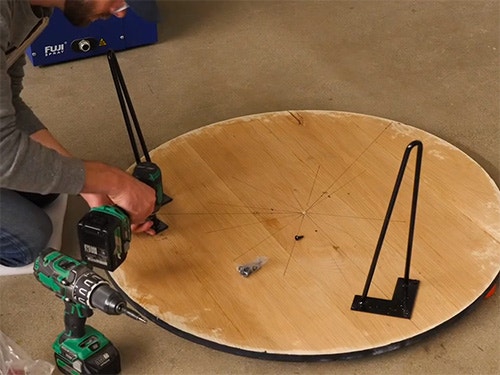
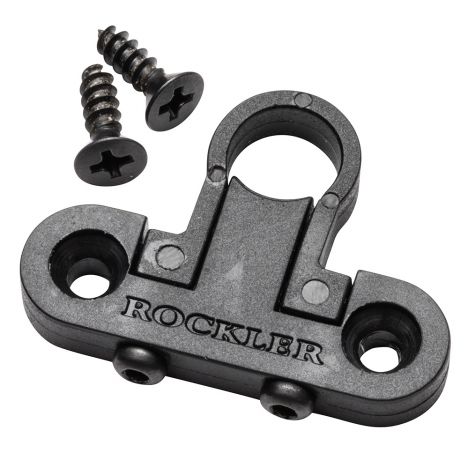
To touch the hairpin legs, you can see I made a bunch of marks on the underside of the table to figure out exactly where to attach them but pretty much I wanted to use my grain as a starting line, and then I added the other two legs 120 degrees away from that first leg. After that, I used these shelf brackets that mount to the hairpin legs to hold the shelf. Honestly, I wasn't sure if these were going to work on a circular table but thankfully it wasn't a problem. Though in these shots I'm actually attaching them upside-down. If I were doing it the right way these screw holes would be countersunk then you could just put a screw through each hole underside of the shelf to hold it into place.
For the wooden legs, I made a pretty big mistake in making these. Basically, I got ahead of myself and assemble them before I'd cut the joinery that I planned to use. My initial idea was to use an elongated washer which you have to mortise in so that the washer runs perpendicular to the grain so each leg would actually take the washer in a slightly different manner but in any case, none of that matters because I would have had to break the legs apart to mortise in the washers.
I think the reason that I didn't consider this is because normally when I build this style of leg, it comes together like this instead of like this. Thankfully for the pictures, we were able to get them to hold in place with just a simple screw. I guess I could argue that for this application, that's actually a fine way to attach them because the legs aren't attached to anything else. Basically, the table is free to contract or expand and the legs will just move with the top.
All that said, I guess I will never officially know because I'm going to use the hairpin legs though as I'm saying that, I think it's further reinforcing my stance because hairpin legs don't consider wood movement for the exact the same reason, right? I guess that proves that three things can work and move independently even if it is for a common goal. Thanks for watching and make sure to watch Sam and Alisha's videos linked below. All right. See you in the next one.


Keep the inspiration coming!
Subscribe to our newsletter for more woodworking tips and tricks