Video: How To Build A Computer Desk
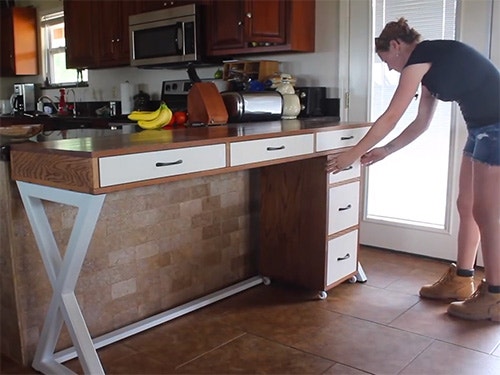
In this video, April Wilkerson puts together a new computer desk with a metal frame and plenty of storage space.
With a little bit of elbow grease and a few good cuts of red oak, April Wilkerson's wood and metal computer desk came together perfectly!
You can find more great projects and techniques from April Wilkerson at her website.
Featured Tools:

April Wilkerson: It is pretty rare for me to be anywhere without my laptop. I end up working anywhere and everywhere but Cody prefers to have a designated computer working area. He's currently using a desk that is a little bit too small, a little bit plain, and has two mismatched filing cabinets, or one is just a scan for the printer. This week I am tackling making him a new desk inspired directly from the old one. This one will fit him and his needs a little bit better but also look a little bit better in the house. The top will be made from solid oak. I took someone by sixes and first cut them to rough link over at the miter then laid out all of my boards on my workbench to mark the location of the biscuits. Or actually something I didn't film but did was I went over to my neighbor's workshop to run all of these boards over his joiner make sure they were flat before I glued them together.
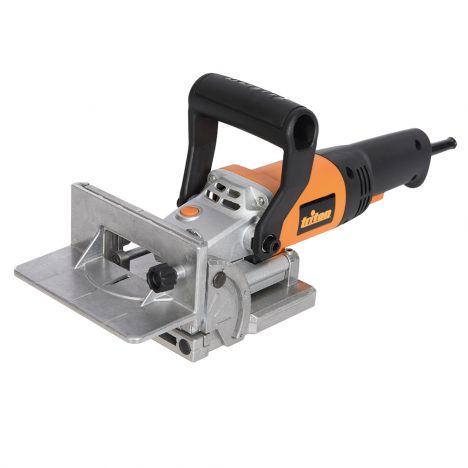
I use the Triton biscuit joiner to cut in all of the biscuit solids before applying glue and smashing everything together. With this being an indoor project I stuck with using Titebond original wood glue. Biscuits do help with keeping the boards aligned when gluing them together but you can still both things by applying uneven clamping pressure. I always lightly squeeze things together with the bottom row of clamp but then use a square to make sure the boards are flat before applying a top row of clamps. Then that's when I go through and tighten everything down to its final pressure. While the top was drying, I moved on to making the base which is going to be made from metal. It's funny how simple this looks, but actually, it's pretty complicated as all of these angles have to be spot on for it to work out, and cutting miters in metal is not as simple as it is in wood.
With a little bit of patience and exact measuring, I got two X's that worked out great. I flipped on my Lincoln 210 mP machine and started welding things together. Taking a lot of time to measure and make sure things were square because even though everything is cut and fits together, it's still very simple for things to shift and you get an out of square X. I used the garage floor is my work surface at this point and was just tacking everything in the place. Once I got the long side of the X tacked I used a framing square to make sure that the second portion of the opposite side was in line with this other half. After getting the first done I repeated the second then moved everything to a taller work service to actually weld the joints completely.
With the ends made and the weld ground down smooth I then welded someone by two material in as structures to join the two Xs. The solid oak glue-up was done drawing at this point so I took everything out of clamps and first went over it using the Triton four-inch belt sander. After removing all of the glue squeeze out I switched over to my larger ROS to run 120 grit sandpaper then switched over to my palm ROS to run 220 grit. After the board was nice and smooth I used my track saw to cut the top to it's needed link then set it aside to start working on the bottom. With the bottom not being seen except for the edges, I decided to use oak veneered plywood for the majority then trim it in solid oak. I cut a piece of ply to size then propped it up on bench cookies so I could apply the edging, which is just some one by oak strips.
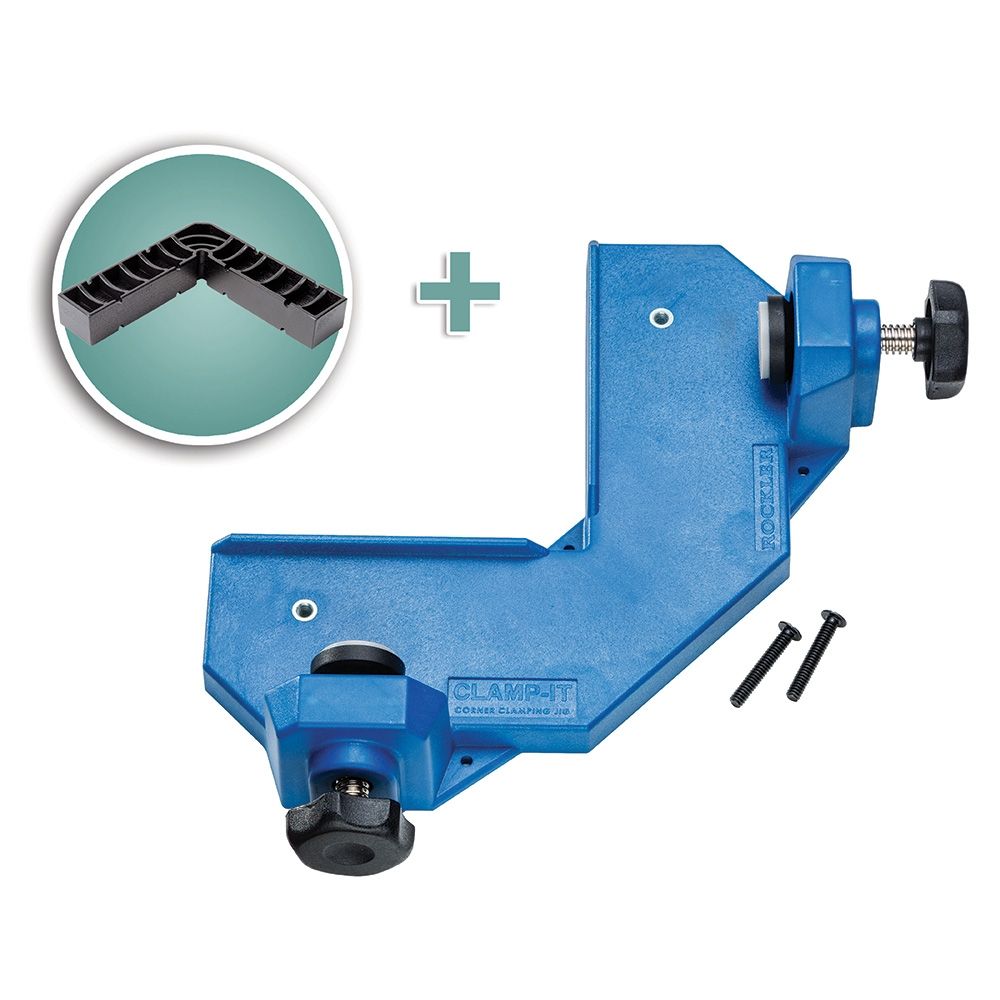
I once again cut in some biscuit slots to make aligning these easier. I applied the glue and biscuits then used the Rockler Bandy clamps to apply pressure while that glue dried. Next day I started making the guts of the desk, all of the metal parts, the dividers and the drawers, I first cut out the dividers at the miter saw then since these edges will be exposed when the doors are open. I took the time to edge band the front edge. To combine the dividers to the back I used the help of these very handy Rockler Clamp-it square jigs. The jig keeps the two pieces square and in place while I screw things together using some pre-drill pocket holes. I attached all of the sliders next, going with full ball bearing kind with the sock clothes feature.
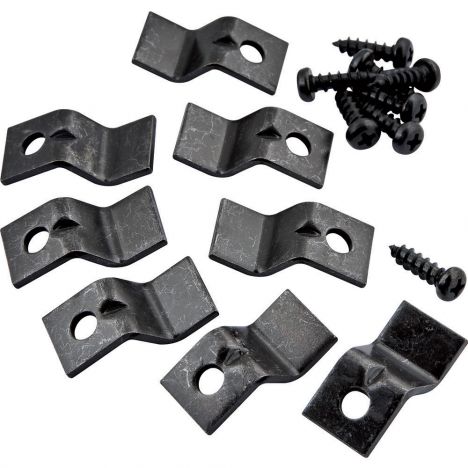
With the topping made from solid oak, I used these awesome Z clip tabletop fasteners from Rockler which will hold the top into place but will still allow the wood to be able to expand and contract without causing bowing or cracking. To mount them, I used my biscuit joiner to cut in some slots on the ends as well as the dividers, making sure to get the height of the biscuit joiner dialed in so the clip would come out flush to the top edge of the dividers. This way it can lay the top down on the workbench face down, then place the guts on top of it and secure it using the other end of the Z club. Of course, if you cut your slots too high then the clip won't be able to be used.
At this point this is just a dry assembly to make sure everything works as it should. I set the bottom in place and then secured it using screws. The last thing to make before disassembling and starting on the finishing stage was to make the three drawers. With this being a computer desk I stuck with a very simple and easy drawer construction method made from half-inch plywood. Since the drawers are so wide and deep, I will have to come back and make some custom organization compartments or all three of these will become standard-looking junk drawer. When I mount sliders I keep both parts together. I slip the drawer in between the sliders then pull out the portion that needs to be attached to the drawer. I attach to the very front screw on both slides then removed the drawer so that I can measure the location.
Make sure the back of the sliders in the same place then place the remaining screws. Something else that helps us to pre-drill to make running in these tiny screws a little bit easier. Now that everything is built, I took everything apart and started on the finishing process. Starting with a coat of stain to give some color to this oak. I went with the color provincial by Aqua coat. Using my Fuji hvlp sprayer to make quick work of it. I started by applying the stain to the bottom side first, then flipped it over to applying stain to the top. I left it to set for about five minutes then came back and wiped off all of the excess stain. I let the stain dry for about five hours then applied a thin code of Dewaxed shellac everything before letting it all set up overnight. The next day I applied a product that absolutely blew me away because of how effective it was.
Now that we've got all the grooves cut for the top and bottom pieces of the door and the drawer, I'm going to cut a tongue that'll fit in the mating groove. Next, we're going to glue the face of our drawers together. I cut a piece of quarter-inch plywood down to size to fit into the grooves, and we'll just apply some glue to the corners. Now we're going to do the same thing with our cabinet doors, except this time we're not going to enter anything into the grooves. We're going to save that for a later step. Next, we're going to route a rabbit on the back of the doors to hold our glass.
It's called grain filler and it's made by Aqua Coat. With oak being such an open grain wood, no matter how much you sand and sand the grain will always have inconsistencies to the look and feel. The purpose of the grain filler is to fill in the low spots of the grain so that once it's dry, it leaves the wood feeling as smooth as any other closed grain wood does. I applied it using a six-inch putty knife scooping out a small amount, then dragging it across the grain. Once covering a portion of the top I'd come back to squeegee off the excess, making sure to do this going with the grain. Total, I applied three coats sanding very lightly in between each coat with 400 grit sandpaper. Here's a shot where I captured the light hitting it and it's just amazing to me how much it looks like a sheet of glass.
Even though the green filler looks and feels like it could be a topcoat. Next, I applied two coats of a waterbase urethane also made by Aqua coat. I chose this topcoat as it's made to be extremely durable and since its water base, it dries super quick, with the top being as deep as it is I opened up the fan on my Fuji sprayer in order to cover a larger area with one pass, but also wanting to apply a thin coat to prevent drips, I also reduced the flow rate by tightening down on the knob on the back of the gun. Once again, I let everything set up overnight to dry then put everything back together so it could be moved into the house. I flipped the top face down on my workbench attached to the guts using the Z clips then attached the bottom.
Now typically when attaching drawer faces, I use a dab of hot glue to temporarily hold it in place while I makes sure the reveal on all sides is even. The downside to hot glue is how thick it is. This time I tried using Titebonds Insta bond CA glue and it worked just as well but didn't push the drawer face off of the drawer itself like hot glue does. This was another thing that I tried new on this project that I really liked. Last thing I had to do was attach some drawer handles and also make some little rubber feet for the bottom of the base. I did this by cutting two squares of different sizes, one to fit inside the tubing and one to fit outside, glued it together once again using that Instabond CA glue.
Now with a little bit of help the desk was moved into place and once it was here I attached the top to the base using right-angle brackets. All in all, I enjoy looking at this desk a lot better than the last one so I am calling it a success, and yes I will have a set of plans on my website if you're interested in building your own. Now I actually ended up making a matching filing cabinet for the project but that's going to be a video on itself so stay tuned if you're interested in seeing that build. I hope that you enjoyed this video and I would love to hear your comments on what you think about the desk in the section below. I will see you on the next one guys.
-

-
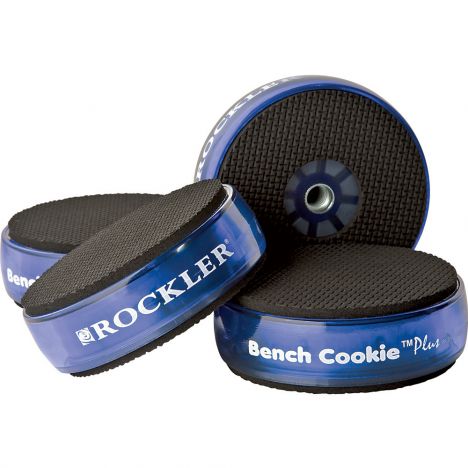
Rockler Bench Cookie Plus Work Grippers, 4-PackSpecial Price $11.99 Regular Price $15.99 Save $4.00
-


Keep the inspiration coming!
Subscribe to our newsletter for more woodworking tips and tricks