Video: How to Make a Shaker Table with Inlay
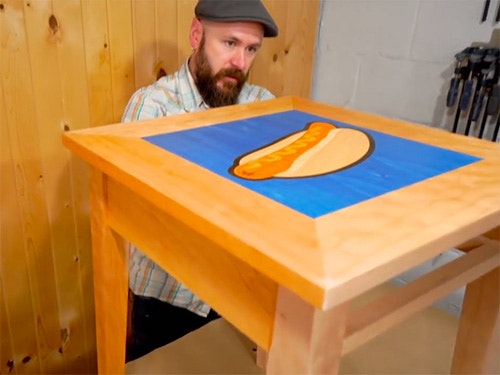
In this video, David Picciuto builds a traditional Shaker table with easy joinery and marquetry inlay.
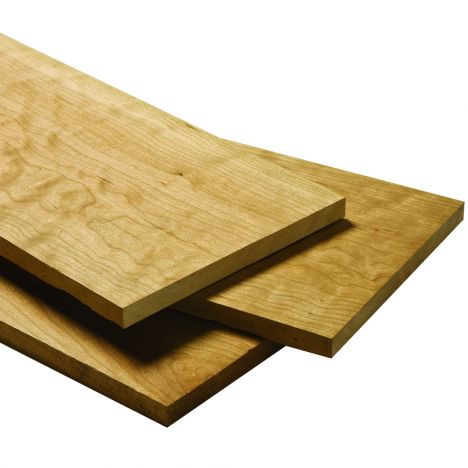
David Picciuto wanted to take a traditional style table and modernize it with some pop art inlay. The legs, apron and drawer are all made of solid cherry. The table top is made from 3/4″ plywood with a marquetry layer of veneer on the top.
You can find more great projects and techniques from David Picciuto at his website.
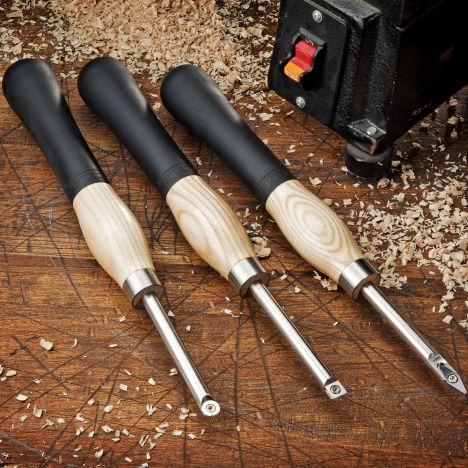
Featured Tools:


David Picciuto: Today, we're going to make a traditional shaker style table with a not-so-traditional feature. We're going to use some marquetry techniques to make this hotdog inlay on the top. You're going to want to stick around for this one.
Today's video is sponsored by Rockler Woodworking and Hardware, create with confidence. I have this two-inch thick piece of cherry that I'm going to use for the legs. To make this a little bit more manageable, I'm going to chop this up over on the miter saw, and then we're going to run this through the planer, and then make our legs over in the tables hall. Let's get started.
I've got my four legs here. I'm going to cut a taper on two sides of each leg, I'm going to use the micro jig tapering jig. Now, I'm going to repeat that on one more side. I've got a couple of pieces of three-quarter-inch cherry. I'm going to cut the aprons here on the table saw. This will be the top and bottom of the drawer. That will be the face of the drawer.
This table, I'm calling it a shaker-inspired table. Not a traditional shaker table because of the joinery that we're going to use. We're going to use pocket holes and put everything together. It's nice and quick, it's really easy. This is something that anybody can do. That gives us a couple of holes to put some pocket screws in for nice, easy joinery.
I don't want this to sit flush with the face, I want the leg to sit about a quarter of an inch proud. What I have here is just a little piece of wood that's a quarter-inch thick that I can use to set that on top of-- I will clamp our legs down here and then we'll screw it together. Glue on the end grain alone would not be strong enough, that's why we have the pocket holes here.
There we go, there's one leg assembly there. Just so I wouldn't screw anything up, I have the outside mark on my legs and the inside because I want the tapers on the inside. I'm just going to glue the third apron in.
The drawer is going to go in here. This will be the drawer face. I'm going to put this in there as a spacer, and then this would be the drawer bottom. Now, let's work on the drawer.
I want to remove the material right here to create a little notch for the drawer side. I have my blade height set to two-thirds of the way up, I have a stop back here that I can use to line everything up. I don't want to stop where the blade is going to be because that's dangerous and that's going to cause a pinch point, and that piece will fly right back at me, fly back at me.
The drawer sides. It'll assemble like that. Now, we need to cut a groove along the bottom to hold the bottom panel. Now, we're just going to glue this guy up here. I've got my clamps all set up.
Cool. Now, we're going to reinforce these joints with some dowels. Let me show you how that's done. The first thing I'm going to do is I'm going to drill two holes, two-quarter-inch holes in there. Then, put some glue, a dowel, and flush trim that. These will be our drawer rails here. As you can see, this doesn't fit, so I need to...
Now that the drawer has something to ride on, we need to keep it from going back and forth. I'm just going to glue little strips on the rails here. When you open a drawer, it wants to drop down, so what I'm going to do is put a top rail in here. Cool. I got this cut off from the leg. I think we're going to turn a knob out of there, let's do that. Let's do that. I'm about to take you to knob town. I have no idea what that means. Here we go. First time I ever made a knob. Now, I'm going to make the top, but we're going to make it extra special.
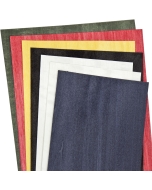
For the marquetry part of this project, we're going to use veneers that I got from Rockler. I've linked to all the products that I'm using in the description down below. We got some natural color, exotic woods here to choose from. This is a variety pack, 20-Square Foot Pack. It's got all these different colors in there to choose from. Look at that, nice burrow in there. Then, we also are going to use some dyed woods here to get some of the colors that we need. I got this blue here that we're going to use for the background.
Traditionally, you'd use a Chevrolet, or a coping saw, or a scroll saw to cut the veneer pieces, but we're going to use some modern technology and cut these all out on the lasers. I have my vector art in Illustrator, and because there is a kerf of the laser that cuts all the pieces, I take everything and I add a small stroke to that to make up for the kerf left by the laser so everything fits on nice and snug.
The first thing we're going to do is tape it all together with this special veneer tape that we're going to use. Why use veneer tape? Why can't you just use masking tape? I'm going to be honest with you, I actually have no idea. I think the veneer tape shrinks a little bit as it dries, pawn the pieces of wood together. I could be totally wrong. I probably should have done my research before doing this, but I took a marquetry class a long time ago, and I left the class with this roll of tape. I've had this roll of tape for years and I've never used it, and so I thought, "Hey, why not use it now?" Here we are, once again not knowing what I'm doing. Can we just have some fun?
This is my favorite part of the hotdog, the little butthole part. A couple of ways to glue this onto the board is to use a vacuum press, which I don't have, which sucks, or some device that has these little things, these columns in the middle that screw down and clap it to the board. What we're going to do is we're going to make some calls and clamp it down to a piece of plywood. We're going to make a sandwich. This would be the bottom veneer, this will be the board that we're going to glue it to, and then this will be the top veneer. Then, we're going to add the bun of the sandwich.
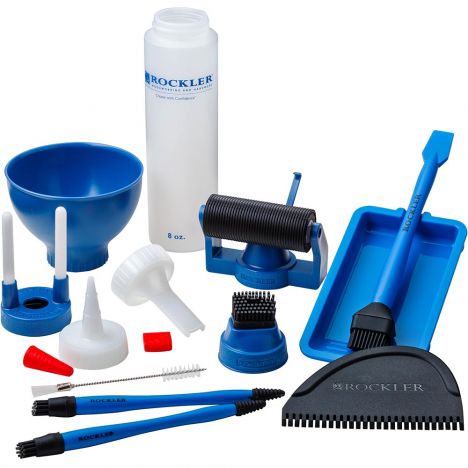
I have these boards here that have a rock to it so when we clamp these boards down, it's going to put pressure down on the middle and then we'll put clamps all around the outside. Hopefully, that will give us some nice even pressure throughout. We have to veneer both sides of the plywood, the top of our artwork and the bottom. That way the plywood doesn't potato-chip on us later in life. Typically, you would use hide glue for this. I've never used hide glue, nor do I have hide glue, so I'm going to use the slow set type bond. I got this little Rockler glue spreader screwed in on the top there. Check that out, that's pretty cool.
Here we go. I'm not going to lie to you, I'm super nervous about this. A piece of plywood, tighten them down. This is one of those things. I want as much pressure as I can get. All right, here we go. Oh, man, that's heavy. I'll clean up these edges on the table saw. We'll put some edge banding on there and do some sanding. This handy little tool. Flushes it up. All right, now I'm just going to pick a pocket hole screw, screw the bottom into the top. I drilled homes up here to access this guy.
We got some shellac here, thinned down with some denatured alcohol. Wait for the big reveal. It's so badass. Just wiping on some real thin coats of shellac, thinned down with denatured alcohol. Wiping on with a cloth. The shellac dries real fast. We can put another coat on here in an hour or so. I would like to thank the sponsor for today's video, Rockler without them I wouldn't be able to do projects like this. If you want to learn more about the laser engravers that I used in this project, visit rockler.com. I'll also have links down below to all the veneers, the plywood, and the cherry used in this project.

Keep the inspiration coming!
Subscribe to our newsletter for more woodworking tips and tricks