Video: Making Floating Wall Shelves
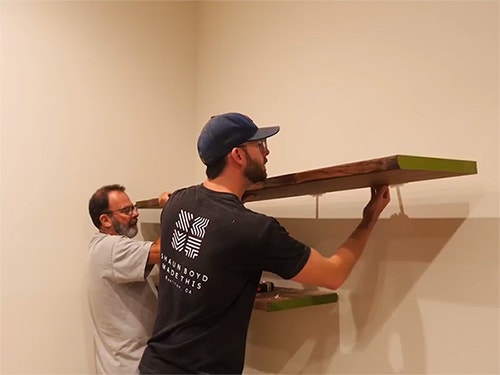
In this video, Chris Salomone creates floating wall shelves that are heavy duty!
Looking for a set of sturdy shelves that you can mount on your walls? Chris Salomone has a perfect solution that is easy to make, looks great and can support just about anything you have in mind.
You can find more great projects and techniques from Chris Salomone at his website.
Featured Tools:
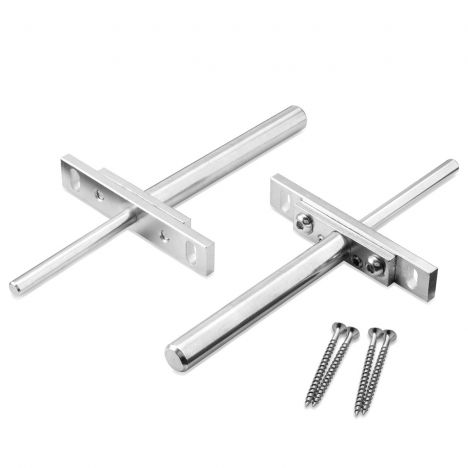
Chris Salomone: In this video, we're going to be building these pretty big, really heavy duty floating wall shelves. I guess the first and main question that people are probably going to have is what makes these shelves heavy duty. The answer is the hardware. Long story short, the way that the hardware works is like this. You have two plates each with a post on them. Let's call them A and B. You attach plate A to the wall by drilling and installing the post into a stud. Then plate B attaches to plate A and your shelf slips onto a post and plate B.
Now, before I settled on using this hardware, I read the reviews and notice that it was a mixed bag. After using them, I definitely have some thoughts, but let's jump into the build and then I'll give you my take at the end of the video.
Over the past year or so, I've built a couple of projects for the channel that have ended up at my parents' house, namely this one and this one. That left us with a rather large empty spot on the wall. I talked to them to see what they wanted to do. My mom said that she'd like some floating shelves. This is the basic idea and layout that we came up with.
I started off by ripping three sheets of plywood into strips that were a little bit wider than I wanted them to ultimately be. It's a really good thing that I left them plenty wide here, as you're going to see in a few seconds.
Here's why. Now, I didn't notice it in normal motion, but as I put weight on them, they shifted quite a bit, and had I made them only as wide as I needed I would have been in trouble. The next day after the glue had dried, I could cut my shelves to their rough lengths. In total, I'm going to be making six shelves and they're going to measure 7'11, 5'9, 5'5, 3'6, 3ft, and 3ft. After that, I ripped them down to their finished widths by cutting a clean edge onto each side of each shelf.
Once that was done, I could set the plywood shelves aside and start working on the fake live-edge. That I'm going to be making out of a piece of eight quarter walnut, which I played down to just a little bit over an inch and a half thick, or the thickness of two pieces of three quarter inch plywood laminated together. Then I could rip them to about an inch and a half wide and cross-cut them to an appropriate length for each shelf.
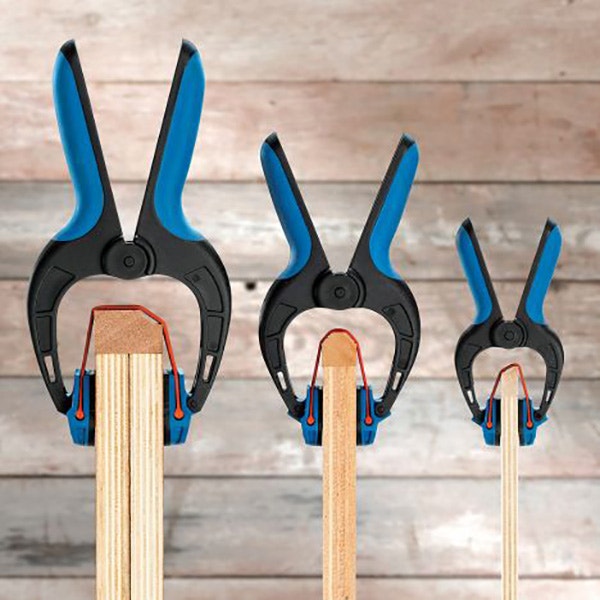
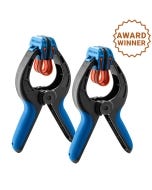
To clamp them up. I used a combination of tape and these bandy clamps. I think I have 12 of these clamps in total, and I wish I could have used them exclusively, but with almost 30 linear feet of hardwood edgy new attach, it just wasn't realistic.
Once everything was dry. I came back with a router to get the hardwood close to flush. I say close because the tape holds the bearing slightly Prod of the plywood, but that last little bit will get taken off when we sand. Next, I could cut everything to its finished length. I decided to use the Kreg ACS for this, just because honestly, for the bigger pieces, it's easier to do it here than it is on my table saw even with the sliding attachment.
Let's start working on the fake live edge. I thought about a few different ways to make these shelves and let my mom pick which ones she preferred. We could have gone with just straight up eight quarter-inch hardwood pieces of Walnut. That would have been cool, but it would also be really expensive so we tossed that idea. Next, I could have used thin hardwood to make a hollow beam, but those actually would've come out visually thicker than we wanted so that was out.
At that point, we had pretty much settled on two pieces of plywood laminated together, but with some sort of edge treatment. The front was really easy to figure out, as you already saw just a piece of hardwood, but the sides were a different story. There, I could have done more hardwood with a butt joint or even some sort of framed iteration with miters, but I didn't really like either of those ideas, to be honest.
Another thought that I had was to try to find a wide board that I could slice into thin strips to create ends that look like end grain but finding a board that was that wide on short notice just was impossible. Then I suggested leaning into the fact that they're fake and just painting them. I'm not really trying to fool anybody. I thought that it might be a nice omage to the fact that boards when they're rough often have their ends painted as they dry. My mom bought it, hook line and sinker, and away I went.
To make the fake live edges, I started by drawing out a very rough idea of the material that I wanted to remove. From there I got rid of the bulk of the material with a jigsaw and then use my angle grinder and a sander to give it the finished look that I was going for. If these were for me, I probably would have painted them some really bright pop of color, but they aren't. My mom picked out pea soup green.
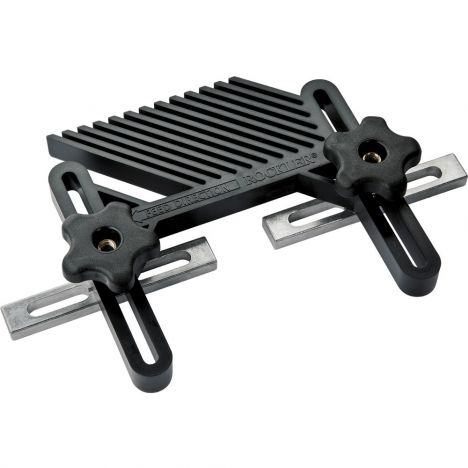
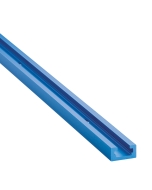
In any case, after the paint had dried, I sanded them, put some finish on, and then I could start installing them. As we've already established, the shelves are heavy. We're going to need some heavy-duty hardware. I found these ones that rock layer cells, which can support 125 pounds per pair. Like I said, the reviews were mixed so I went in with cautious optimism. I started by locating the studs in the wall. Here, you can see that I drilled a little pilot hole just to verify that there was actually wood back there. From there, I held my pieces up to the wall to transfer the marks onto the back of the shelf.
The next step is to drill into the back edge of your shelf to accept the hardware. The easiest way to do this by far, I think would be with a drill press. As it turns out, my drill press isn't quite big enough for how deep I made my shelves. I was worried that even if it was because I had put a live edge on the front, it would throw off the angle that I was drilling. The best way to do this would be to cut these in a lot earlier in the build process, but that wasn't an option for me at this point. Instead, I used a self-centering Dowling jig to start my holes, and that seemed to work out okay.
After those drilled, next, I could use the actual drill bit to enlarge the holes to the size of the hardware and I made sure to go about three-quarters of an inch deeper than the length of the hardware. The reason for that is that the next step is to mortice out a slot using a router, which is going to hide all of the hardware and allowed the shelf to sit, flush to the wall. These don't have to be pretty since you're never going to see them in the end.
Back in the house, I drilled the holes for the hardware to go into the wall. This metal post is what's going to be doing the bulk of the work. Once it was drilled, I could mark two more holes and use some drywall anchors to get everything attached. Finally, you can mount the two pieces of hardware together, pop the shelf on, and you're done.
Okay, so the hardware, the good news is it definitely works, but I think the best comparison in terms of installing them would be something like bloom drawer slides. They're great, but if you give them to your average weekend warrior just doing little tasks around the house, they're probably going to run into some trouble trying to install them if they can get it done at all. Basically, I would only recommend these to somebody who is at least a hobbyist woodworker. I think it's just too involved for somebody with no woodworking experience and or tools.
In terms of the reviews, I would actually be curious to see how the reviewers found the product. For somebody who goes to rockler.com and finds them that way, I have a good feeling, they're probably going to be able to get the job done. I noticed that if I googled heavy duty floating shelf hardware, these were the second result right after an Amazon link. If that's how a person finds these, I think that there's a higher chance that they might have a tough time. I guess another way to say all that is if you're still watching this right now, you're probably the type of person who can handle it.
Okay, so now for a couple of tips or tricks that I found for actually using them. I think that the designers realize that people might have trouble drilling perfectly straight holes in the backs of their shelves, or in the wall. The mounting plates have these little set screws that you can use to shim the post in any direction that you want. Actually, what I found is that having a tiny amount of error in your drilling can actually be beneficial.
On a few of my shelves, I had to use the set screws to make the posts angle slightly outward. Then to slide the shelves on, I could pull it into place and that created stress that makes pulling them away from the wall even more difficult, which is a good thing. This is especially helpful if you can't get it to fit right the first time and you have to enlarge your holes a bit. I did that a few times by just sticking the drill bit in there and wiggling it around back and forth while I was drilling. Anyway, I guess that's about it. Thanks for watching, and I'll see you in the next one.
Keep the inspiration coming!
Subscribe to our newsletter for more woodworking tips and tricks