Video: Making an Upholstered Footrest
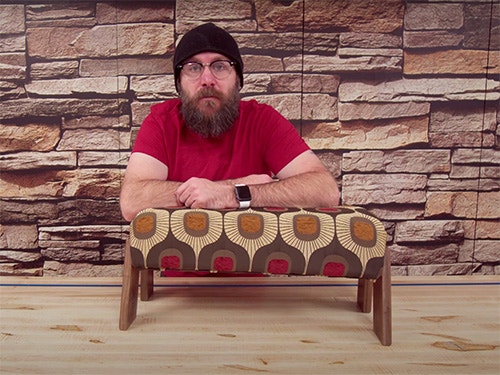
David Picciuto's under-desk footstool is a quick and easy project that allows you to flex your woodworking muscles and learn a bit about upholstery in the process.
You can find more great projects and techniques from David Picciuto at his website.
Featured Tools:
David Picciuto: Hey, it's David and welcome to Make Something where every week we make a new project here in the shop and this week we're going to make this footstool that goes underneath my desk in my office, check it.
I don't have any plans for this footstool but I do have an idea in my head of what I want it to look like. This is a prototype and a finished piece. Meaning that we're going to experiment a little bit and I'm going to make it-- Not everything is permanent, I can change the legs, I can change the top if I need to or want to in the future. My friend Joanne has a fabric store here in town and I got this beautiful gem right here, we're going to use some walnut for the legs, and let's begin by making the top out of plywood and experiment with some upholstery. I don't want anything permanent, I'm just going to screw this in, no glue. Cool. There is our top.
Now we're going to round over the corners so when we pull our fabric and our polyfill that it doesn't have a sharp edge that it's riding against. After getting this together, there's a little bit of flex in there so…I have this high-density foam here that is 22 inches wide, which is the width of the stool top here and so I'm just going to cut the foam here. I have a piece of put on top and then over top of that, I'm going to wrap some polyfill and staple it on there. I want to keep the squareness but I want a little bit of the rounded corners here. I'm pulling this tight and pulling the corners real tight and I'll cut off the excess, I don't need all of that. That's looking good.
Now, we're going to stretch our material over that. I pull it up there. So far, so good. Now I want these corners to be pretty so if I bring this up and then fold this over this way, so far so good. Just keep doing that. We're going to just keep stapling around there. I'll cut off some of my excess and then we'll put another piece along the bottom to clean this up.
It's pretty good. I'm pretty happy with the way that came out. Now I'm going to make the legs for this guy out of some walnut. I got some walnut from kencraftcompany.com. They are my local hardwood supply dealer. You can check them out they do sale online and like I said at the beginning, I think I'm going to make it it's not permanent. In case I want to raise it or lower it or I don't like the look I can change it out. Again, this is a prototype/finished product. We'll see maybe I like it and maybe we'll just use it forever. Maybe I won't like it. We'll scrap it we'll try again. Over here in the miter saw I thought I would try something interesting. We're going to have 45-degree miters this may or may not work. Let's see what happens.
They're all cut at 3 inches wide, these two pieces have a 45-degree miter and then this one was cut at 30 with the thought of it sticking out that way a little bit. If I do that, that means I got to trim this guy about right there and get rid of that and that's going to come out around right here. That means I'm going to push this up, and then chop this off up here, and I think that'll be our leg. Then we'll have to come back and flatten out where they meet the floor. All right, now those fit together, and bring this down here to see what it looks like on the side here.
I like how the front leg swings out that way a little bit and this can fit up against the wall I wanted this one nice and straight. Now I'm going to attach these three pieces, then once they're attached, I can come and cut that flush and it sits on the floor. I don't have a good way to clamp this up. I'm just going to throw some tape on there and let that dry. I need to set the domino for a tighter tolerance on the next one that I do.
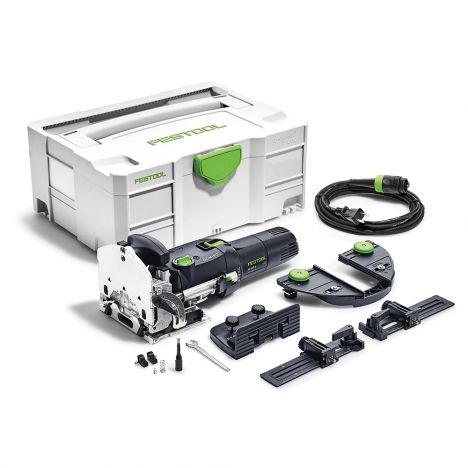
I am super thrilled with the way this came out. This was my first time attempting upholstery and I could not be happier. I really like the looks of this. feet up. Right now the sides, they're only held on by these two screws and when I have plans available for this, I'm going to make a modification. Underneath, there is a board that runs along the bottom for a little bit more strength. This is plenty strong enough for my needs. I could sit, I could stand on this, but I can see over time, if you have kids that are jumping on it or you're putting a lot of weight on there, it could get a little wobbly. It could use some more support underneath. When I do have plans available, I will make that modification. The three pieces here, they were joined together using the Festool Domino joinery system. You don't have to have that, you could use pocket holes. I finished this with a couple of coats of shellac and a coat of wax.
Keep the inspiration coming!
Subscribe to our newsletter for more woodworking tips and tricks
