Video: How to Setup a Simple DIY Photo Studio
In this video, Michael Alm sets up a simple but professional-style photo studio in his garage.
Michael Alm installed a three roll seamless backdrop system that converts his garage into a photo studio in seconds. It also stores out of the way when he is not using it. He will take you step by step through how to install one in your space.
You can find more great projects and techniques from Michael Alm at his website.
Featured Tools:

Michael Alm: Hey everyone, Michael Alm here. This week I'm installing a Seamless backdrop into my garage. I am not a photographer, I am a woodworker and I find myself photographing my furniture a ton for promotional purposes, for YouTube thumbnails and I've been wanting this for a while. If you have a small space like a garage, a basement, unused guest room, or something like that where you can hang stuff from the ceiling, hang stuff from the walls, you can totally install this.
This is not very expensive, it's not very hard to install and I'm going to show you how. All the products mentioned in this video are listed down below with affiliate links, those affiliate links help support my channel. Also, this video is divided into two separate sections, the first is on how to install the Seamless, and the second is on how to use it. I'm going to cover a bunch of lighting tips and tricks and ways to use the Seamless that you may not have thought of before. Stick around till the end of the video and let's get started.
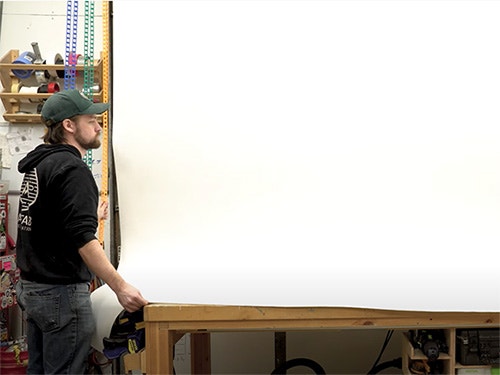
Before I hang the Seamless in the ceiling I wanted to show you how I typically do it with C-stands. I have two C-stands in my shop which are incredibly handy but they are pretty expensive, they come in about $200 a piece. Then I can bring in my Seamless roll, I have to keep it boxed up to keep it clean. This is the Super White by Savage Widetone. It's 107 inches long by 36 feet and that's quite a bit of paper to wrangle. I mean it's not super heavy, but it is pretty awkward.
I do have to find a place to store it every single time I use it. As you can see I tape it up and then I can unfurl it and raise it up. This is a bit of a pain because I do have to run back and forth. Obviously if I had a second set of hands it would be a lot easier but it's still a little bit frustrating, and I've definitely almost dropped these C-stands several times installing it.
The other negative about installing it this way is it can just unfurl completely if you go too quickly, if you don't have enough paper on the roll, so you got to be really careful about that. As you can see that is a totally reasonable option, I've got a great backdrop here but it is a bit of a pain to put together. I also have to figure out where I'm going to store this roll and the C-stands, and every time I set it up I have to think about exactly which color I want.
If I want multiple colors, got to buy multiple rolls. You can see where I'm going with this, it's kind of a pain. What we're going to do is we're going to build a rack for the ceiling.
I bought this kit off of the B&H website. I've looked through loads of different kits for the ones with the best reviews. As far as I can tell a lot of different companies sell this exact same kit under different names, and for different prices. This was the best deal that I could find. Again, this will be listed in the link down below. The kit is designed for three rolls and it has the chain fall mechanism, the chains themselves, mounting brackets, as well as an instruction manual.
The instruction manual leaves a lot to be desired. It's pretty confusing. The diagram doesn't make a ton of sense and it's not written very well. The kit also comes with some mounting hardware. I don't recommend using this. It's designed to mount just into bare drywall, which I don't advise doing, I'll talk about that a little bit more later. I found this mechanism super interesting. It's a way to tighten up inside of the tube and spread the load so that it has a lot of traction.
It worked really well, it takes a little while, there's quite a few threads on there but you want to make sure and get this nice and tight. As I mentioned before, I'm installing three different colors, I've got the bright white, I've got thunder gray as well as ultramarine. All three of these rolls are made by Savage Widetone. I don't have any association with that company, but I do like their product and if you want to check out the links down below you can pick up some rolls. They run about $60 a piece, which I think is really reasonable for what they are.
As you can see, there are two different styles of inserts. This one does the tensioning and the other one organizes the chain and helps you hoist it and lower it. I quickly double-checked the link to make sure it was exactly 107 inches, it was. I should mention that they come in a bunch of different lengths. If you don't have enough room in your garage and your guest bedroom to hang 107 inches that's fine, you can use the same system to hang whatever size you need for your space.
Since I'm hanging it in my garage there's definitely some obstacles, and the main one is the garage door track. Now I've solved this issue before with my light fixtures, you can see I ran a 2x4 across and that way I can raise and lower my garage door and they don't get in the way at all. Now, not everybody is going to need to hang it over a garage door, it's going to be way easier if you need to hang it on a wall or on a ceiling. You can mount it directly to the studs, but for me, I had to find a mounting point, and what I found was this angle iron bracket here.
This is integrated into my garage door and I thought by just putting a scrap piece of plywood in, it would be enough to support this paper roll. A little foreshadowing, this is not a great method, I don't recommend it, but I figured that other people may try this. I also imagine that a lot of people are going to be hanging these in garages. The most convenient spot is in front of the garage door like my situation, because it's so unused that you won't have furniture in the way, but I'll cover this phase of it, just so you can see my mistakes.
Then I'm going to go into how I figured out how to to get it plenty strong enough to support these rolls. Now, some of the steps are going to apply to both the correct way to install this and the incorrect way. One thing is to check to make sure that the garage door does pass behind it. I actually had to shift my brackets a little bit in order to accommodate that, and then of course installing the brackets, which you want to make sure that this is nice and solid.
Obviously, this is the problem. You can see how shaky it's starting to get with just a little bit of cantilever and we'll see when the paper rolls go back on. Another really important thing is to make sure the spacing is correct between the two brackets. Wow, so close. Yes. I added about half an inch between the two rolls extra on top of that 107 inches because one thing that I've found is that if it's too close together, it can actually grind against the paper and cause your edges to get messed up.
Now, it's time to load up the paper rolls. This is pretty easy to do but as you can tell, every time I put a paper roll on this bracket gets more and more bent in towards the center of the garage. As badly as I wanted this to work, it was just not acceptable and I felt like it was going to continue to bend. It was really wobbly and I needed to find a different solution. Honestly, I have no idea why I tried to re-engineer this, the best solution is the solution that I had already come up with for the light fixtures before.
That's what I just went with, I went and cut some 2x4s down and just spanned it just like I did for the light fixtures. Now, I have exposed rafters. I just tied it directly into the rafters. If you don't have exposed rafters you could totally mount a 2x4 to the ceiling along the stud and then drill this stud in. This doesn't take a ton of weight. I am using deck screws for this, not drywall screws.
I don't recommend using drywall screws because they'll shear, they're not made for structural purposes, but deck screws are pretty darn strong. Another little trick that I've learned is just setting up a little support block. This will be removed later, but it's a way that I can take this nearly 12-foot long board and install it without an extra set of hands.
I just went ahead and cut a couple of pieces of plywood that are a little bit wider than those brackets. This just makes things way simpler. These are going to be attached directly to that stud. It's just a way easier solution. One thing that I will say for those of you who are not going to do this method of installation, which I imagine is quite a few of you out there, you can just mount it to the wall or the ceiling.
I do recommend putting a scrap piece of plywood that spans two studs across it, because there's a very little chance that where you want this to be hung is going to be right where your studs are in your wall. It's a really easy way to do it, is to just mount some plywood to your wall or your ceiling and then screw the brackets in there, because that way you can just basically set them anywhere you want.
All right now, I'm ready to reinstall the paper rolls, and this was way better, so much better. They're a lot more stable. They don't shake around at all. Sometimes you just have to build it twice. Here's a quick little closeup of how the tensioners lock into the rail and then you twist this little thumbscrew, that's your tensioner. That's the tension for the whole system. If that's not tight enough, the rolls will just completely unfurl. You want to make sure everything's locked in, that it's registered properly in those brackets and then it's time to install the chain.
I read a lot of reviews of this kit online, and the biggest complaints were about the chain, that the chain wasn't strong enough to support a nine-foot roll, all sorts of things. This is a pretty affordable kit, so it's not surprising that it's made of cheap plastic, but in my experience with these chains, I actually wasn't planning on using them at all because I read the reviews and I'm like, "I could live without it. I could climb up the ladder," but these worked fine.
If I have failures down the road, I'll let people know about it in the notes, but so far this seems to work great. It's got this little weight that just allows it to sort of stay in the right spot, and you can adjust the length of the chain, but I didn't, this was perfectly fine for my space. I was ready to test out the rolls. The main thing is to just release them. The only thing that I did was I made sure and crank down on the tensioner as well as that star knob, because I didn't want it to slide around at all.
Again, they can completely unfurl if you're not careful, the initial tests went great. Really, no issues. One thing is the paper still needs time to relax, like I said. I also had to assist it a little bit just to make sure that it stays on track. I'll probably continue to have to do that just to make sure that it doesn't get off at all. The last little thing to do is to find a home for these chains. I don't want them hanging out in the middle of my space, so I just put a hook into my wall.
All right, there it is. That is the Seamless backdrop and it looks awesome. I am so excited to test this out and that's what I'm going to do next. I'm going to test out some lighting scenarios, some different-sized objects. The first one we're going to go with is the melting table. I still have this sucker. You may have seen the video on it. If not, I'll put a link up on one of the sides and I'm just going to lay this out and we're going to take some beautiful shots of it.
Once again, I am not a professional photographer, but I will share my basic lighting kit. This is not a professional lighting kit by any means, but this is enough to get the job done. I've got a couple of these YN216s, I really like these lights a lot. They are sort of spotlight-y. They have a pretty tight focus on them. They're great for rim lights. They also come with gels so that you can light the background. We're going to try doing both with these.
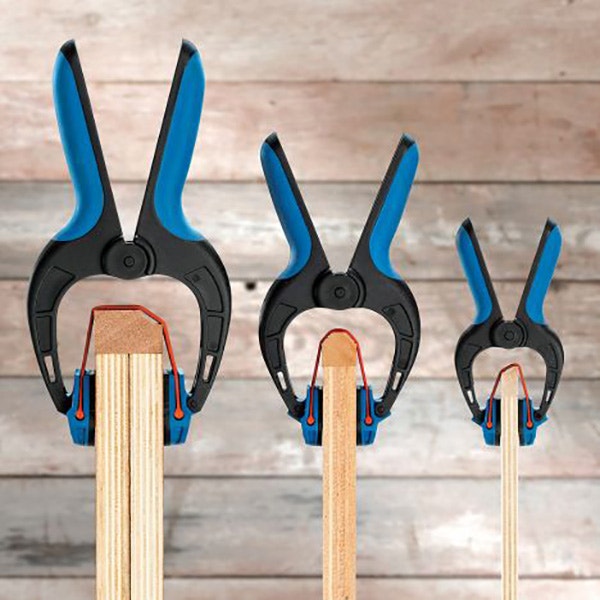
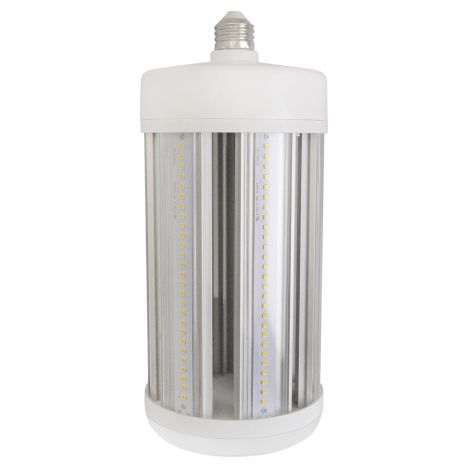
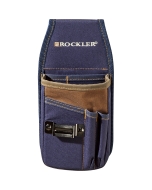
I really like having bandy clamps in my collection. I use these for all sorts of odds and ends. I also have this corncob light, which I just use as a pretty bright key light. To diffuse that key light. I have a softbox. This is a Neewer softbox. Again, I'm going to post all of the details of all these products down below. Nothing's terribly expensive here. It comes with a diffuser as well as a stand to put the key light on top of.
The YN216s take standard Sony F style batteries. You do have to buy those separately. The other cool thing is that they are bi-color, so they can be either warm or cool. You can mix the two and you have a lot of control over the dimmability of them. I popped in the diffuser to just give it a little bit more of a soft look, and attached it to a couple of tripods. The last element I'm going to add to this lighting system is a bounce card, and this is super simple.
I'm just using the Rockler Bandy Clamps attached to the bottom. This is just a piece of foam core, which only cost a couple of bucks. I'm going for a little bit more of a dramatic look with this photoshoot. I'm using the gray background, which is really easy to change. We're going to experiment with changing the background as well. I'm not using it as a Seamless background.
I'm just using it as a clean wall. I like the look of the concrete floor below this industrial table. I'm going to go with that. We're going to do a Seamless photoshoot in a minute though. My goal for this lighting setup is to really accentuate all the edges. I'm using what's called rim lighting. I've got these two lights on either side and they're picking up all the detail on the surface of the carving of the melted section.
They're also hitting the edges of the table legs, and it's making it pop and pull away from the background. You can see what those rim lights are doing. Here's it without the key light on, you can see how much it brings out the texture in the piece. I wanted to play around with the gels that come with these lights. I haven't really used them very much, but it is a way of adding some visual intrigue to your photography. There's a bunch of different ways to use these gels.
You can obviously just use them directly as the rim lights, and you're going to get a two-toned rim light look. The other way that you can use these lights with gels on them is to recolor your background. This is the cool thing about Seamless is that you're not actually limited to the colors that you buy. You can change those colors just by using a different lighting system.
Now let's change it up a bit and set up a whole different look using a different lighting system and a different backdrop. I'm going to be using the white background to do more product photography shots, things that are super clean, great looking for a website. Basically, I'm just going to lay this out in the way that it's intended in a Seamless fashion. On top of my table.
I actually just kept my fluorescent lights on with this and then added in that key light to just really dominate. You want to get that background incredibly white so that you don't see it at all. I think these images speak for themselves. This thing looks awesome. It's so clean. So crisp. You can see all the detail in the piece of furniture and the photograph's great. Another option for this kind of background is to add in a turntable.
I picked up this turntable a few years ago. Again, I'll list it down below. It was a pretty affordable little turntable, and it's got lots of controls. I'm not going to go into all the details of it, but basically, you can lay it out and turn it as quickly, or as slowly as you want, you can incrementally turn it. If you want to take photos in like frame by frame, you can do that as well but I just popped one of my old sculptures on there and took some shots of it.
While I had the turntable out, I figured I would give a couple of other objects a go. This is a pocket knife made by FlorianDIY, out of patterned plywood. It's absolutely stunning as well as this Hillview Wood & Metal bisquare, which I carry with me every single day. If I could spend all day messing with this, there's loads of different ways to play with the Seamless. I'm going to show you one more setup and then we're going to wrap it up
There you go. Just like that, with one light fixture there and the ambient light in the room, I've got my talking head set up. This is so awesome. I'm thrilled to have this in my shop. It cost me about $250 total for all the gear, all the paper rolls, and everything. I'd say that's pretty darn good. There's other things that you can do with Seamless that I haven't mentioned.
Things like green screen, you can buy green screen rolls for these. Also it makes a great projection screen, the white screen especially, I can project movies on. I plan on doing that, treating this space like a movie theater. Hopefully I've helped you out there and if you got any questions, ask them in the comments down below. As always, big thank you to my Patreon supporters and I will catch you on the next one. Bye.


Keep the inspiration coming!
Subscribe to our newsletter for more woodworking tips and tricks