Add Class to your Glass
It's easy to make decorative glass! Making your own decorative art glass might seem like a big challenge, but it's actually an easy project that even novices can tackle."You don't have to be an artist.
All you have to do is have a steady hand. That's what it boils down to, since you're just cutting film and tracing around a pattern with adhesive-backed lead," said Sandy Jendal of Chrysalis Decorative Glass, Inc., in McKinney, Texas. "(The process) is kind of like coloring in a coloring book."New, improved products make the process of creating decorative art glass easier than ever, allowing you to create eye-catching designs in new or existing windows and even non-glass surfaces in just a few hours.
The most popular places to incorporate decorative glass, Jendal said, are doors, sidelight panels, transoms, cabinet doors, ceiling light panels and bathroom windows. It's ideal for applications where privacy is required without sacrificing natural light. Jendal made her first decorative window — an intricate design that incorporated glass bevels, embossed film and self-adhesive lead — in just four hours. "For a novice like me it took four hours, which is pretty good considering what you're saving versus buying custom-order traditional cut stained glass," she said. "The more you do it, the less time it will take.
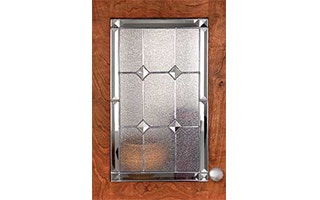
It's low cost, there's only a few standard household tools involved, it's fast, and it can be applied directly to existing windows. "Jendal's design was a 12" x 18" Manchester pattern for a vertical cabinet door. She spent less than $85 on supplies, compared to spending more than $140 to have the piece custom made. It was a fun project to make, she said, and the results are stunning.Best of all, Jendal said, turning a new or existing glass panel into a decorative glass panel is a snap. She outlined the basic steps of creating a decorative glass panel that consists of embossed film for a textured glass look, leading and glass bevels.
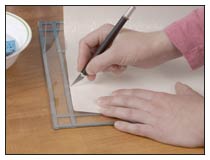
Step 1 - Make a template of the design you'd like on a piece of paper, or use a pattern from a book and enlarge it to the size panel you wish to put it on.
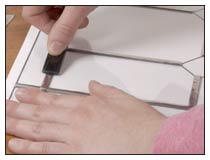
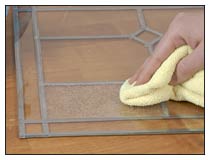
Step 2 - Once you have your pattern, attach it to the front side of the glass. Turn the cleaned glass panel over and apply self-adhesive lead to match the leading lines on the template. Simply connect point A to point B following the lines of the pattern.
Step 3 - Using the plastic burnishing peg that comes with the lead, firmly press down all the lead, making sure there are no gaps when one piece of leading crosses over another piece. The leading is movable before it permanently cures, so you can lift it off and re-apply if you make a mistake.
Step 4 - Apply embossed film and glass bevels to front panel. Once the leading has been applied to the back of the panel, flip the panel over and remove the template. The leading on the back panel will serve as your guide to layout the embossed film, leading and bevels on the front side of the panel.Working on a clean, dust-free surface, cut a piece of the embossed film slightly larger than the area you wish to cover. Remove the paper backing and lightly mist the adhesive with distilled water.
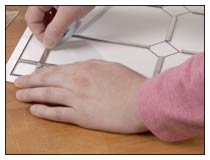
Step 5 - Place the film in the desired location and using a squeegee or soft pad, remove any excess water or air bubbles. Using the lead lines on the opposite side as a guide, cut the film in the middle of the lines using a hobby knife or razor blade. Make sure to leave a 1/16" channel between neighboring pieces of film so that the final leading can be properly applied when the project has cured.
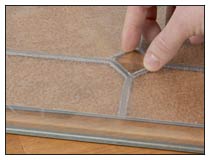
Step 6 - When using bevels on your project, make sure to leave the surface area of the glass where the bevel sits free of film or dust. Apply the adhesive to the back of each bevel and place in the desired locations. Let your project dry for 12 hours, or use a hair dryer to speed the process.
Step 7 - Apply leading to front panel - Simply attach leading to the front panel, using the back panel leading as your guide.

Jendal said she recommends trying these techniques on a piece of scrap glass or non-glass surface first to familiarize yourself with the products."It's a very simple process," said Jim Frey, a Product Development Manager at Rockler Woodworking and Hardware. "The more intricate you get the longer it will take, but the whole process itself is fairly simple. Every item comes with instructions on how to apply, so it's not hard to do."


Keep the inspiration coming!
Subscribe to our newsletter for more woodworking tips and tricks