Avoid Finishing Disasters
Steer clear of finishing frustration on projects with a tight deadline by putting these practices from expert Michael Dresdner into place.
Many of us head into the shop for a frenzy of gift making. So let's review a few tips, tricks and warnings that can make our work easier and help us avoid time-wasting disasters. Here’s a convenient grab bag of things you might have let slip your mind, and maybe even one or two new tidbits.
Shellac
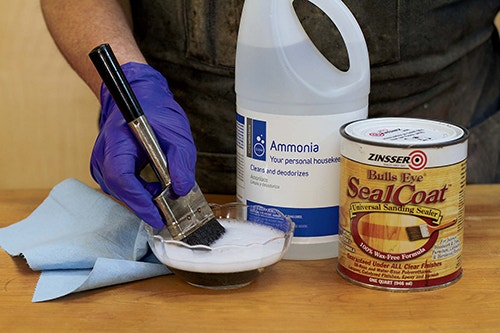
When working with shellac, clean brushes, spray guns, reusable pans and even your hands with sudsy ammonia instead of alcohol. It's cheaper, nonflammable and works even better.
Spraying Hot
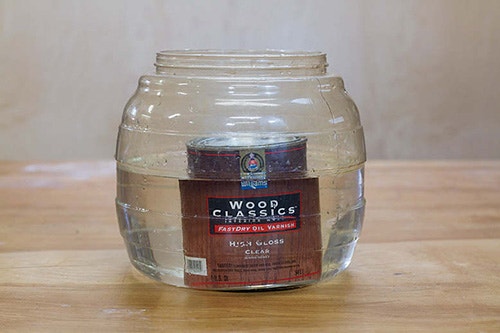
Few guns spray oil-based polyurethane varnish well without thinning, and that makes for runs and drips. Thinning the varnish with acetone instead of mineral spirits helps, since it flashes off faster, but there's another way that involves no solvents at all. Fill a bucket with very hot water and place the unopened container of polyurethane in it for about an hour to warm up the finish. You’ll find that warmer finish sprays (and brushes) more easily and flows out better, even without thinning. You can also heat and apply solvent-based lacquer the same way.
Pouring
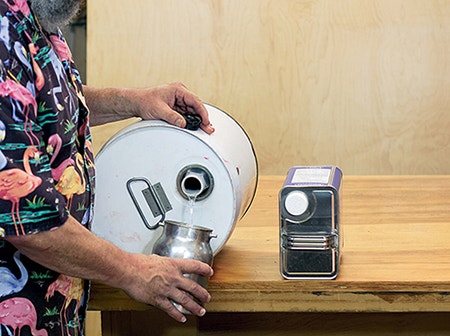
To pour from a large square or round can, lay it on the workbench with the opening at the top, not the bottom. Tip it for "glug-free" controllable pouring. With round cans, simply roll them until a controlled flow starts.
Masking
As you undoubtedly know, there are many types of masking tape. Less commonly known is that, like paint, they all have a shelf life. Because there are so many tapes with such a wide variety of crossed claims, I'll instead talk about my own experiences with them.
First, there's the old standby: traditional, tan-colored masking tape, which has a rubber-based adhesive and a shelf life of about three to four years. It's the cheapest of the lot, doesn't always leave a crisp paint line, and should be removed as soon as possible after painting lest it become hard to remove. When it gets too old, you'll also have trouble peeling it off the roll.
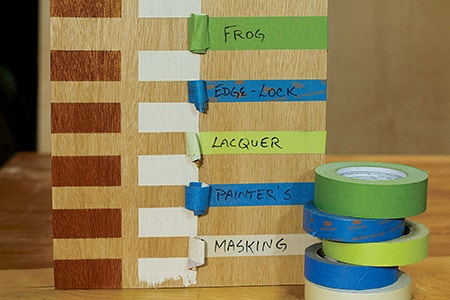
Painter's tape, which is often blue, has an acrylic adhesive and, like all the other tapes in this group, has a practical shelf life of 10 years or longer. It lifts off cleanly, even after being on a surface seven days or longer, and does a tolerably good job of creating a clean masking line with all sorts of coatings. There are versions of blue tape that have an even longer release, up to 60 days, and a weaker adhesive that won’t mar fairly fresh lacquer or paint.
There's good reason to be wary in making that climb cut. The router seemingly will try to run away from you. But the cut is shallow, so the cutter can't get much traction. And, of course, you have a firm grip on the router, too.
What's commonly called lacquer tape (3M’s version is bright green) and 3M™ Scotch® Fine Line tape are usually sold in auto parts stores. Made with an acrylic adhesive, they leave a cleaner line when spraying lacquer and other solvent-based finishes. The thinner Fine Line tape has a flexible polypropylene film backing which stretches and curves for contour masking.
The "new kid on the block" is FrogTape®, whose adhesive edges contain a super absorbent material that gels on contact with water to create very clean mask lines with water-based or latex paint. They are not the only one; at least one other company advertises similar clean edge tapes, and more are sure to follow.
Whichever tape you use, you'll find that mineral spirits will help remove adhesive residue or tenacious tape without pulling up finish or bits of wood. You don't need it when tape comes off as it should, but it's great to know about this trick when it doesn't.
Coloring Tricks
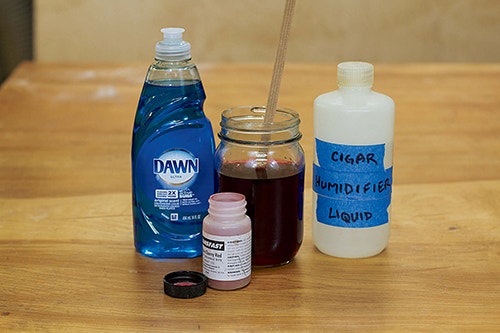
Water-soluble dye is easy to use, but it has its challenges. One drawback is its high surface tension, which makes it pull away and fail to color the grain in large pore woods. Here's a quick fix: Add about 10 drops of Dawn® dish detergent to each pint of mixed water-soluble dye, and it will flow and color pores much better. Cigar smokers can add a hefty dollop of humidifier liquid (propylene glycol solution) instead, which will do the same thing.
By the way, if you completely mess up and want to start over, simply wipe the unsealed, dyed wood surface with fresh, full-strength, household laundry bleach (such as Clorox®). It will denature most dyes, making them just about invisible. Once the bleach dries, wipe the wood surface with a wet cloth to remove any salt residue, and you can dye it again, this time in the correct color. Of course, if you need a cheap, fast-drying, custom color pigment stain, have your store mix the perfect color of wall paint and thin it by half with water.
Upside Down
When finishing something big, like a bookcase or armoire, finish it upside down. Any runs and drips which are easy to see almost disappear when you turn the piece right-side up. Try it; you'll see.
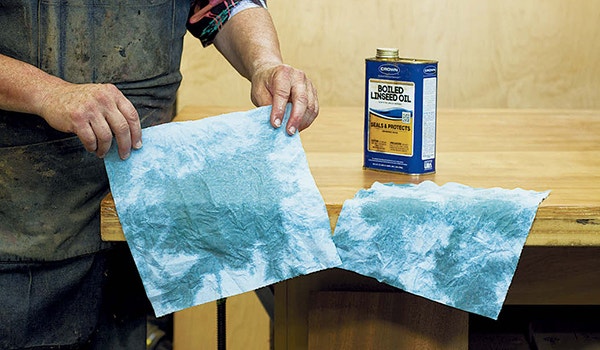
A Final Warning

I've said it before, but if you apply oil or any oil-based finish with rags, lay them out one layer thick to dry. A pile of oily rags can spontaneously combust, creating a fire, but one layer thick, they merely dry hard and crusty overnight, at which point they are landfill-safe.

Keep the inspiration coming!
Subscribe to our newsletter for more woodworking tips and tricks