Video: Building Furniture with Beadlock Floating Tenons
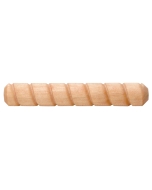
The BeadLock joinery system makes it easy to create rock-solid mortise and tenon joints. All you need to make them is your hand drill and this Beadlock® Kit. Ribbed tenon design prevents racking and increases the amount of precious face-grain glue surface. The result is an extremely strong, totally concealed joint. Included shim set allows you to mortise a variety of stock thicknesses, as well as to offset your mortises.
Skill Builder Video
Building Furniture with Beadlock Floating Tenons - Video Transcript
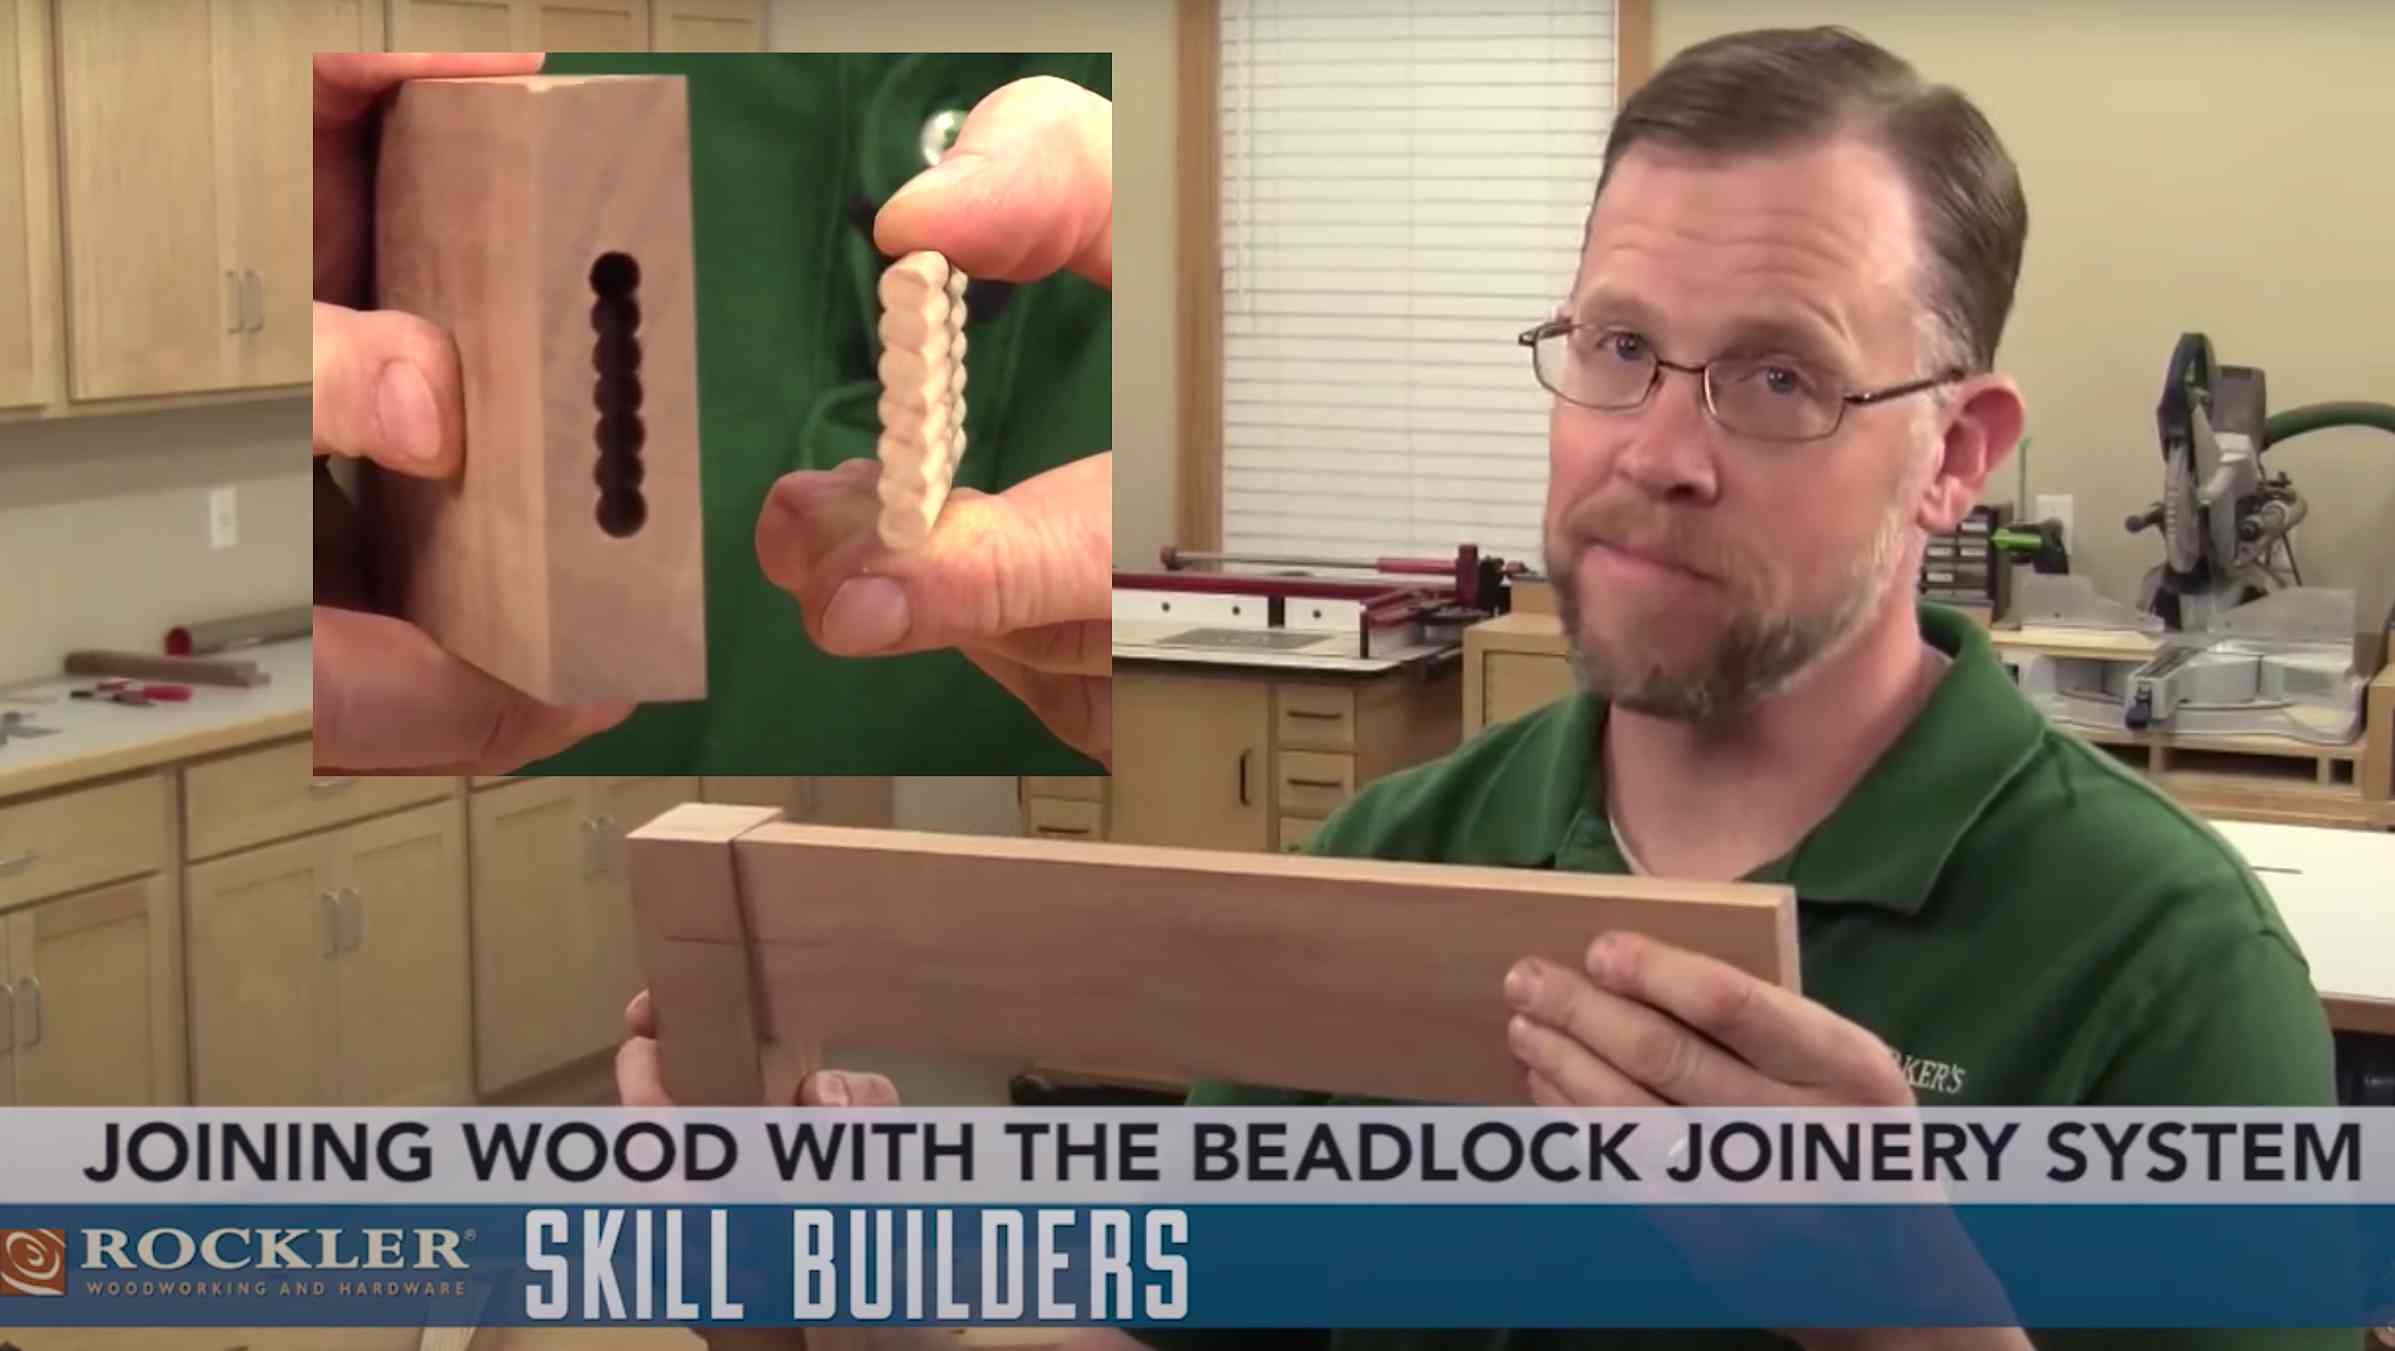
Speaker 1: If you can clamp and drill holes, you can make rock-solid joints like these instead. It's almost too easy. The heart of the system is this two piece aluminum and steel drilling jig. You'll drill a series of overlapping holes to make the mortise and then fill it with these ribbed bead lock tenons that Rockler sells either in strips or individually pre-cut. Their rounded profile matches the hole pattern you drill with the jig.
These three drilling guides which are sold separately bolt on to the base plate of the jig. They enable you to drill quarter inch 3/8ths inch or half inch wide mortises. All the drilling guides will center a mortise on a 3/4 inch thick work piece. You'll notice that the base plate is slotted so that you can move the drilling guide back and forth. One position is marked A and the other position is marked B.
The first step in making a bead lock joint is to set the work pieces together and draw a layout line across them. That marks the middle of the joint. Now for this joint, I'm going to use the quarter inch drilling guide. I've got it attached to the base plate, slid to the A position and locked in place. I also need to mark my drill bit for the correct drilling depth and I've done that here with red tape. Now for this joint, I'm going to use an inch and a half long B block tenon and when the joint is assembled, I want that tenon to be halfway into each joint member. I've marked my drill bit at an inch and 7/8ths, that's 3/4 of an inch for each half of the tenon, an extra an inch to account for the width of the drilling guide and an extra eighth of an inch for clearance at the bottoms of the mortises.
At this point it's time to start drilling holes. Clamps onto the work piece is in a vise and clamp the jig in place on the work piece. Line up the flat edge of the D shaped cut out with your work piece layout line and make sure the drilling guide is pushed down flat against the wood. Now drill these three A position holes and clear the chips by plunging up and down. With that done, loosen just the drilling guide and shift it to the B position. That opens up another hole. Tighten it up again and drill the four B position holes. That's it for one mortise. Now follow the exact same A, B process for cutting the other mortise. If you've done a careful job of drilling your, beadlock tenon should slip down inside and your joint should fit together well. If it hangs up at all, look for loose chips that might still be down inside the mortises.
Well that takes care of centered mortises on 3/4 inch stock but what happens when you need to cut an offset mortise like this table leg and apron for instance? Well, it's actually just as easy. The Beadlock System comes with these plastic shims in 32nd and 16th inch thicknesses. All you have to do is stack up the number of shims you want and install them between the drilling guide on the jig and the base plate. Loose tenon joinery just doesn't get any easier than this.
Keep the inspiration coming!
Subscribe to our newsletter for more woodworking tips and tricks