Video: More Than a Workbench
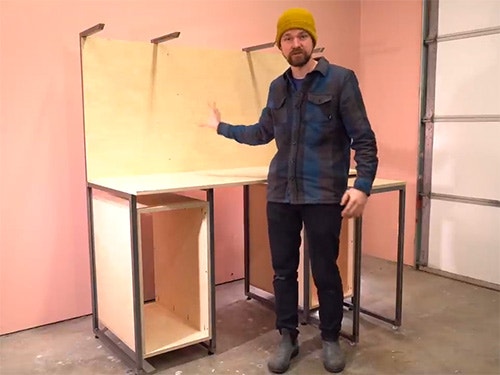
In this video, Michael Alm builds a multi-use workstation and desk for his partner Ashley as part of the Rockler Desk Challenge.
Michael Alm designs and builds a multi-use workspace, perfect for makers of multiple disciplines. This design is modular so if you have a need for a larger or smaller workbench in your shop, it's really easy to make adjustments to the plan.
You can find more great projects and techniques from Michael Alm at his website.
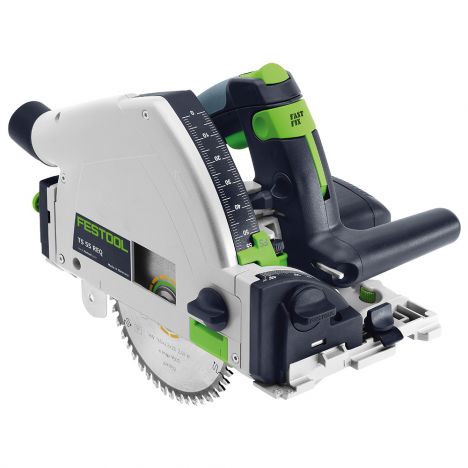
Featured Tools:

Michael Alm: As many of you already know, my partner Ashley is also a maker. She does jewelry making, embroidery work, she does woodworking, and all sorts of other things. The one thing that she doesn't have is her own workspace. She works at a coffee table, she works on the couch, and occasionally she works in the woodshop here but she doesn't have her own workbench. That's what I'm going to do today. I'm going to build Ashley a workbench. This is where I'm thinking, right here. What do you need a store in there?
Ashley: I want to have drawers for all of the tiny bits and bobs like my embroidery floss and my beads. Then, on the opposite side, I want to have space for flat stocks like journals and finished pieces, canvas, and then a couple of cubbies for fabrics. I'd like to have space for sewing this side where I'd be able to have the machine and then have all my scraps and stuff. Just having a little side table that I can pull out and put back as needed.
Michael: All right, so I think I have everything. We need to paint the wall. What color do you want to paint it?
Ashley: Pink
Michael: We can do pink.
Following Ashley's requests, I designed most of the structural elements of this workbench out of steel. I chose this mostly because she wants a side table that pulls out and can support a sewing machine but can be put away. It doesn't take up much space. If I were to build it out of wood, it would probably be pretty bulky, but out of steel, I can make it really nice and thin. I'm using one by one square tubing on this build. I like this stuff, it's a nice size. It's very strong and it's not too expensive. I think I spent about $80 on it.
I set up my metal shop a couple of years ago. If you guys have seen the melting table build, I set it up so I could weld legs for that piece. This has become a very serviceable metal shop. I don't have a whole lot of tools in here but you don't really need a whole lot to set up a metal shop. You really just need some way of making your cuts and some way of joining those cuts together.
For making my cuts, I like to use a Portaband. I have a foot pedal to turn it on and off and I have an aftermarket table for it. I find this setup is really versatile. After a few cuts, you can get really used to cutting nice square lines with it. I like to notch out my joints which the Portaband does super well.
As a very visual person, I like to keep a sketchbook close by whenever I'm working on anything. I also like to write down a full cut list when I'm making a whole bunch of repeated cuts so I don't get anything confused. I don't have to think about it. I can just zone out and make all my cuts all at once.
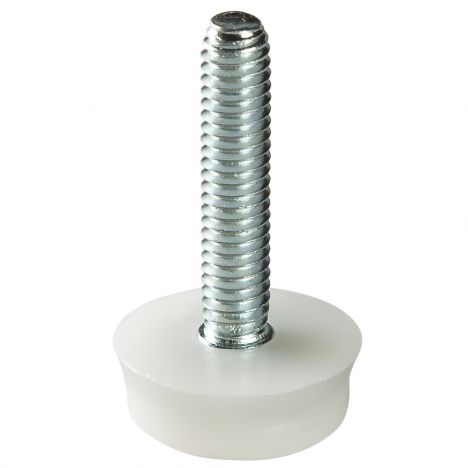
With all my stock cut down to size, I could then start setting up for the details. I'm going to be adding leveling feet to the base of this workbench. In order to do that, I need to drill some holes so the leveling feet have a place to go through the steel. I have a Step Drill Bit installed in my drill press and this is one of the best drill bits to use for drilling metal. Each step is a different diameter and it doesn't pull the metal up the flutes like a normal drill bit, it just sort of scrapes it away. I find that I get really, really clean results with this tool.
This one by one square tubing is pretty thin-walled and so I figured tapping was not an option. What I'm doing is I'm just prepping to weld on some nuts. The nuts already have the threading in them and so I'm just going to use this hold down. A big thank you to Chris Zepp from Make Everything shop. He recommended this hold down. It's not very expensive and it is great at holding these little tiny parts.
Back in the metal shop, I laid out all of the parts that I just caught and I felt like there was something missing. It still needed something on the top to support the light fixture. I quickly puzzled out a design. I wanted the end cap to look really interesting so I cut it on a 45-degree angle and then left a tab down below that I could hammer closed to close off the tube.
On the opposing end, I cut out another notch so that I could attach it to the rear tube and it also closes off the top section and gives it a nice clean look.
With all the steel parts made for the workbench, I was ready to weld. I'm sure I'll get a bunch of questions about the welder I use. I have a very basic welder. It's a MIG welder. Its 120-volt plugs into a regular wall outlet, and it's great for thin-walled things. You're not going to be welding a quarter-inch plate with this, but for this style of welding, for just thin-walled tubing, it's perfect.
After a bit of welding practice with the end caps, I was ready to do a full assembly. To hold that assembly together, I'm going to be using these arrow clamps. These are magnetic clamps that are really affordable. They're like $30 for a four-pack. They just hold everything nice and square so that while you're welding, nothing shifts around. Also, I'm only tack welding at this point. If you're to run a full bead along these joints, there's a good chance that you're adding too much heat to the equation and the whole assembly will start to warp. I'm just tack welding all the corners first and then I'll go back over the top of them and weld them together.
All the parts up until this point just lock into place except for this back corner. I want to make sure that that is the exact same width on the front as the back so that it's nice and level when the assembly goes together at the end. I'm never going to claim to be a professional welder but I'm pretty happy with these beads and honestly, with a little bit of grinding, they look fine.
In order to turn the metal frames into a functioning workbench, you bolt the top and the back. For that, I had a five-foot by five-foot sheet of baltic birch plywood. This stuff is great for this. It's a little [chuckles] awkward to handle because it's just wider than your arm span, but it turned out to be perfect because I was able to get both the top and the back out of this single sheet.
Planning ahead a little bit, I knew that I had the weld bead on the inside of those joints on the steel. I just ran over the backside of the back panel with a chamfer bit in my router. It was at this point that I realized that I didn't have a good way of connecting the two together. What I decided to do was take it back over to the workbench and drill a bunch of holes. I'm using that same tapered bit on the back. I'm going to drill a large hole on the outside, and then on the inside where it connects to the wood panel, I'm going to drill a smaller hole, one that's wider than the threads of my screw but smaller than the head of my screw.
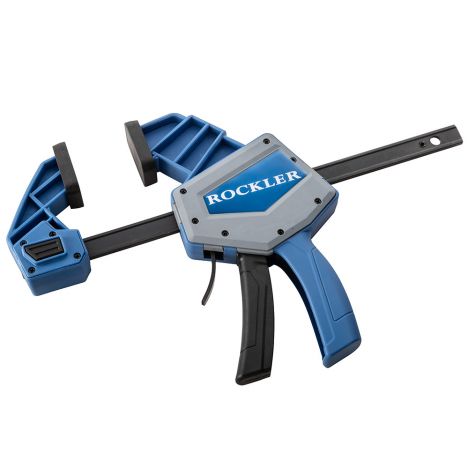
Notice that I'm using these Rockler one-handed bar clamps a lot. They're super handy to have both in the woodworking [chuckles] shop and apparently the metal shop too. I don't have a great way to fix your things to this table so they're a good stopgap for that.
I also figured that before I assemble everything, I might as well put it in the leveling feet. About these leveling feet, I'll post the link down below, but they are a little bit too long. They're taller than an inch and I don't want them to bind up inside of the tube. I made this little shuttle, it's just super-glued together really quickly. I like to have these because otherwise, there's a chance that the bolt will bind in the blade. This just makes cutting them really easy.
Now I'm ready for assembly. I just laid one of the sides on the back. All four of these sides are identical, which is really nice, then I can set the top in. Again, this backboard has the chamfer on the back edge of it so that it can sit between those welds.
With the backboard roughly in position, I could clamp it down, raise up the whole assembly, and then screwed in from the back. Next step is to install the-- Don't do that. The next step is to put on the workbench top. You'll notice I left a good-sized overhang on the front end of this workbench, that's great for clamping things too. I know that Ashley is going to have a bench pin for jewelry making, it'll be a great spot to hang that.
With the back in the benchtop in place, I can now slot in the two other assemblies. These are going to form the sidewalls between different storage cubbies and drawers. It's really important to make sure that they are perpendicular all the way down. I made a couple of blocks that were the right size and I can just clamp those into place and then screw in the assembly.
Each of the sides mounts in with two screws from the back and two screws from underneath. Once I had all the sides secured, I could then remove the blocks that I had for spacing, and then it's time to build some cabinets. I'm very curious if people would be interested in plans for this build. I designed this as a pretty simple build, to be honest. It doesn't require a lot of experience welding and it doesn't require a lot of experience woodworking.
There's lots of different ways to join cabinet sides together, and I'm just going to go with the easiest way I know which is pocket holes. I don't have issues with doing pocket holes on shop furniture. I wouldn't do this if this was a piece of fine furniture for a client, but for this application, it's totally fine. I also like the idea that I can disassemble these as I need. Essentially, I've built the whole thing with screws so I could actually flat pack this workbench without any problem and then reassemble it. If we ever move, if we ever attempt to take this with us, it'd be really easy to pack up and go.
Back at the metal shop, I'm ready to install the cabinets. In order to do that, I made this little jig I guess you'd call it so that I could set the cabinet on top. It's approximately at the right height. I've made it a little bit short so that I could lift up the cabinet to the correct height and then screw it into place. The cabinet was a nice snug fit, and the nice thing about it is that if these legs were out of square at all, this trues everything up. Off-camera, I drilled some holes into the sides of the cabinets just pre-drilled, made sure is wider than the threads of my screw, and then I could screw them into place.
If you're sitting there wondering what the heck kind of screw I'm using to screw into steel, this is what's known as a self-tapping screw and it has like a drill bit on the tip of it, and that allows it to drill into metal and then it creates its own threads inside. The screws that I'm using are intended for cement board. They cut through steel just fine, but the reason I chose this one specifically is because a lot of the sheet metal screws have either a pan head on them or they have a hex drive and this one has a flathead. It worked well for this application. One note about this style screw is that it's very easy to strip out the threads that it creates, so make sure you don't over-torque it.
It's really important that these cabinets be perfectly parallel to the top of the workbench. I wanted a three-inch spacing in between. To do that, I secured the top two screws in the front and then I removed the jig from underneath, and then raised the cabinet to the correct height using a three-inch block. I held the cabinet into place with a one-handed clamp and then secured it with a screw.
I left the backs off of these cabinets for now. Eventually, I'll go in and attach it back. It'll strengthen the whole structure, but for now, while I'm building other parts of the cabinet, it's just easier to leave them off. Now I'm going to start making the pullout table top, and for that, I want really accurate measurements. I want to make sure it fits into this area snugly and it doesn't have too much play in it. I've stacked up the materials that I'm going to use in the build, and then I can measure off of that and get a practical measurement off the actual cabinet.
The techniques that I'm going to be using to make this side table are exactly the same techniques that I used to make the sides of the workbench. This is a really practical way to build. It's super fast to build this way and once you understand these techniques, you can make a lot of stuff with it.
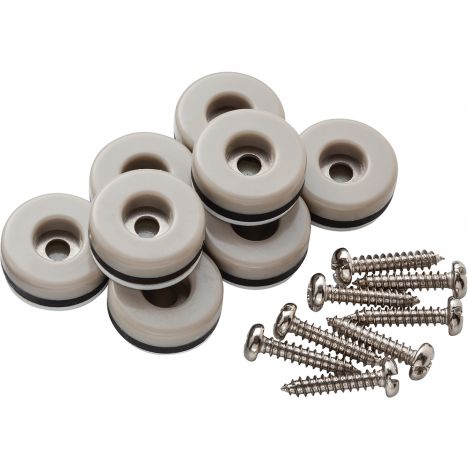
Just like on the base of the workbench, I'm going to be attaching leveling feet to the bottom of the side table. This is pretty critical to the function of the side table because my concrete floor is not very level and so the leveling feet will allow it to work properly. Another element that I'm adding to this tabletop is a pair of furniture glides. These are usually put on the bottom of a chair to make sure that it doesn't scratch up floor. In this case, it's going to be taking the weight of the table top as it slides in and out of its compartment.
The last thing to do on the side table is to secure the top with a couple of screws. Then I can slide it into place. It worked surprisingly well on the first go. I thought I was going to have to do a lot more adjustments but it worked great. I was able to take my full body weight, which I think was pretty impressive. The furniture glides worked surprisingly well.
I also wanted to mention that this was intended as part of the Rockler desk challenge, which was an awesome event put on by Rockler and the guys at the Modern Maker podcast. I, obviously, got this in a little too late. It ended about a month ago but you can go check out all the other desk designs that are on there. There are some really incredible ones.


Keep the inspiration coming!
Subscribe to our newsletter for more woodworking tips and tricks