Video: Remodeling a Bathroom Vanity
In this video, Chris Salomone improves the doors and drawer faces on his bathroom vanity.
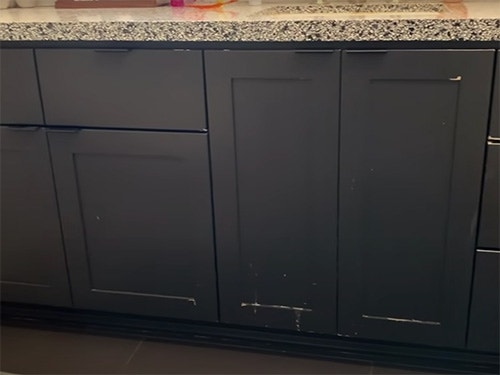
Chris Salomone remodeled our bathroom about seven years ago, and he's still very happy with it. Except that the doors and drawer faces aren't holding up well to time and daily use. So the plan is to rebuild them, using the original pieces as templates to make a higher quality version that will hold up better for years to come!
You can find more great projects and techniques from Chris Salomone at his website.
Featured Tools:


Chris Salomone: All right. Here is the situation. We redid the bathroom about seven years ago, and for the most part, everything is still great except for the vanity drawer fronts and doors. Since everything else with the vanity is still fine, there's no reason to tear it apart. The basic idea was instead of reinventing the wheel, we could use the existing pieces as templates to make new pieces, that'll be a lot nicer.
All right, let's take them out. We're going to go through a harder version first and then a simplified version that uses limited tools and stuff that you could get from your big-box store to achieve the same thing. Did we glue them? Can't work in the dark. Once we had everything at the shop, we started by turning on a few lights and then grabbing the material that we thought we might need to make everything.
Now I have a piece of paper where I wrote down what I needed. All right. We've got our drawing here. These are all the drawer fronts right here. The black pieces are the drawer fronts which are not a panel. I'm going to say @ - How do you do the @? After figuring out the @ symbol, I basically went through my sketch-up drawing and marked up the size of every piece that we're going to need to make, and here's how it breaks down.
We're going to need to make five drawer faces and four doors, which are all frame and panel. For the drawers, it's going to be pretty easy. It's really just a matter of cutting out some rectangles, but for a couple of them, they're a little bit wider, so we're going to need to glue up two pieces. The doors for the "harder version" are going to be frame and panel using tongue and groove. I guess you'd call it joinery, sliding tenons, I don't know, but like this anyway. We'll rip out a bunch of strips, create some panels and then cut in the joinery. All right. Let's get to it. Okay. That's what we need.
Finally, with all of the confusions seemingly out of the way, we could actually get to work. Starting off by cross-cutting our pieces into some chunks that are overly long and then ripping them into some chunks that are overly wide.
Is the in/out method which we've explained several times, and in fact, I made a whole animation of it. Let's roll that. The way that this works is by joining the edge of mating faces where one is always against the fence and the other one is always away from the fence, AKA in and out. That way, if your fence is slightly off of 90, it doesn't matter because the opposing angles are going to offset one another and the face of the two or however many boards you glue together will be coplanar.
Finally, before gluing my panels together, the last thing I did was clean up the outside edges on the table saw. That way, I'd be clamping against a nice square edge. Okay. I always say treat your wood like a hot dog and your glue like a mustard. If you do that, you'll never go wrong.
Feeling good. Now we've got to start cutting out our rails and our stiles, so we need 16 total rails and stiles. We can get two of our 26 and 1/8 inch pieces out of here. Two more out of here, that takes care of those. We get two of our Cs out of here. I'm going to cut those before I start marking everything else out because otherwise I'm going to forget since I have already a lot of marks on this board.
With everything ripped, the next thing we needed to do was mill everything to its final thickness. Now, this is a step that we're going to be able to skip in the simpler version since we can just buy pre-milled lumber, but for these guys, we're going to run each piece across the jointer, just to make sure that it's perfectly flat, and then use the planer to get everything down to 3/4 of an inch thick. Going to mark this puppy up right there at seven and-- All right, let's cut those.
In these next few shots, what I'm doing is marking out and cutting our rails and stiles to their final length. I'm going to use a hypothetical panel with some simpler dimensions to explain what's going on. Let's pretend that we had a door that's 20 inches tall by 10 inches wide. Well, I'm actually going to build the door at this point slightly too big, because I want to cut it down to its final size a little later, so we're going to aim to make the door 20.25 x 10.25.
In other words, a quarter of an inch oversized in each direction. For our stiles, the vertical pieces, we can cut them right to 20 and a quarter inches just like we want. For our rails, we'll need them to be the finished dimension, which was 10.25 inches minus 5.5, that's the width of both stiles which the rail is sandwiched between and then plus the length of the tenons. That comes to a grand total of 6 and 3/4 inches. Now, the math isn't particularly hard, but what's more troublesome is when you get into eighths or sixteenths of an inch and when you have multiple doors that are all slightly different sizes.
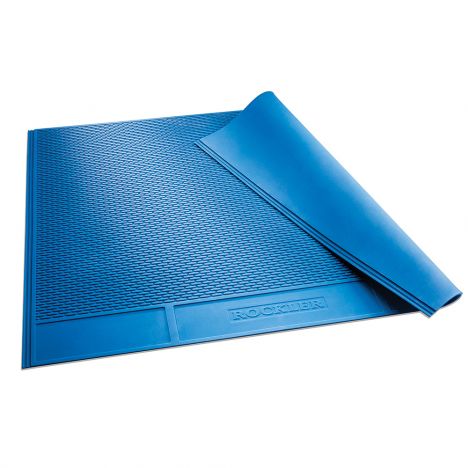
Because we're removing a quarter of an inch and the blade is an eighth of an inch wide - if my math is right. I said, in theory, it should work. That's pretty good, though. Let's just...Actually, let me interrupt for a second to jump back in time to a few days ago when I made the panels that are eventually going to go into the grooves that we're cutting right now. Honestly, this was all pretty straightforward. Really the only unique thing was since the panels are so thin and I wanted to conserve material, I used this FeatherBoard from Rockler to re-saw the pieces into thinner pieces.
Once that was done, I could glue them up and then plane them down to slightly less than a quarter of an inch. The reason that I did this beforehand was because that I knew that it was going to slow us down a lot if we had to do it while we were trying to get the rest of the doors and drawers done. Okay, let's jump back to the present.
After tapping the fence around a few times and making some practice cuts on my scrap piece, I finally had it where I wanted it, so I locked it down and cut the grooves into all 16 pieces. Now I'm going to just mark in a half inch this way. This is going to be for creating our tenon. Basically we just want it the same height. That seems pretty good.
Okay. While we were doing that, we realized we were kind of doing things backwards. We were making the flat cut first and then the vertical cut second. Then, off-camera, we decided that we should probably do it in reverse order so we - With a solid game plan and a little more setup, we were in business, and I went about cutting my 16 tenons on my A rail pieces. I think this one is going to do. I've got a good feeling.
Whoa. Oh, baby. Whoa. We've got all our rails and stiles cut. Here, I've just got them dry fit together. The reason I'm doing that is so that I can figure out how big to make my panels. I know that I've got half-inch deep in each groove. This opening right here is at 6 and 3/4, that means it's 7 and 3/4, that's as big as it can be, so I'm going to back that off by three-eighths of an inch.
What did I say it was? Minus three-eighths of an inch, so write that as 7 and 6/8ths minus three-eighths. All right so 7 and three-eighths. All right. I'm going to calculate the size for the rest of those doing the same thing, just - That doesn't look right. This seems way too short. We figured it out. It's because on that first one, remember, I measured the gap, then I added the inch for the grooves.
Then I subtracted three-eighths and then in my head, I just kept doing that, but I was just measuring the gap and subtracting three-eighths, so I was basically making the panel three-eighths of an inch smaller than whatever the opening is. What I need to do is what I did on the first one, which is add an inch, subtract three-eighths or just add five-eighths. I guess I'll just re-measure them, add three-eighths, cut.
Yes. After double, triple, and quadruple checking everything to make sure that it was right, I went ahead and cut my panels to length and then to width. As you're going to see a little later when I make this simplified version of these doors, they require a lot less math. Oh, get in there. I think we're good. In these shots, I'm using some leather dye to stain my panels black before we glue them up.
This might seem redundant since we're going to ultimately finish them with black polyurethane, but the reason was I was worried the panel might shift over time and end up exposing a part that wasn't finished, so I wanted to have a nice base of black everywhere as a safety net, I guess.
By this point, the leather dye on our panels was dry enough that we could go ahead and assemble and glue all four of those.
These are all sanded on the front side, they're ready to go. Now, we've got to cut them to their final size. What we're actually going to do is use the drawer faces that we pulled off of the cabinet, that way we know we're cutting them exactly the same as what they were. We got them all cut to finished length. Now we cut them to finished width doing the exact same thing. We'll use them to set up the fence.
Now we're going to do literally the exact same thing that we did to the drawer fronts only using our doors. All right. All of our drawer faces and our doors are now cut to size. I'm going to start transferring the hardware from the old doors to the new ones. You can see I've got everything labeled. A W for wide, these are the wider doors, and right top, right bottom, so everything is organized, I can transfer it all
Here, I was looking for an easy way to transfer the hinge location from my old doors to the new ones. The best idea that I had was to clamp them together, align the best that I could, and then drill through the center marks that was left by the Forstner bit to make a pilot hole where the new cups could go. Then to mark my door handles, I'm just going to set it where I want it, hold it there, and use a self-centering bit to drill out some screw holes.
I had noticed that the old doors and drawers had this little chamfer that went all the way around the perimeter, and you could definitely just use some sandpaper to break the corners, but I figured since I'd come so far, I'd go ahead and keep matching the old look. Now we can go ahead and start finishing. After sanding everything up to 220, I'm going to use some black polyurethane, and you could brush this on with a foam roller, which works just fine but is a little bit slower, or spray it on if you've got a sprayer.
We got our poplar that's two inches wide and three-quarters of an inch thick. We got some quarter-inch plywood. For these guys, we don't need to rip or mill or do anything. We basically just need to cut them to length, so let's use maybe a miter saw, heavy. All right. Dead nuts.
What would be the best way to accurately cut something that's too long? I was going to put a stop block. I'm going to assume that people that want to do it this way. Like if you're really trying to do it the cheapest way possible, you probably don't have a whole miter stand setup where you're going to accurately-- Hang on. Hang on. I thought I had an epiphany where I was going to set like a tall stop fence like this that I could just keep hitting, but my pieces aren't that long, and I don't really want to take this apart, this is not my miter saw, so I'm just going to mark them. I'll do my best to be consistent.
I'll cut two of them at 12, and we'll make it where they're 12 tall and we'll say like 8 wide. I'm also going to assume the person probably doesn't have this. Man, that thing kicks on, huh. Okay, we just cut all our pieces to length, that's a lot easier for these ones, basically we just cut this to how big we want our doors to be in the tallness dimension, so 10 inches or 12 inches. We decided we wanted 10 inches this way, so these pieces are just 6 inches, 2 + 6 + 2.
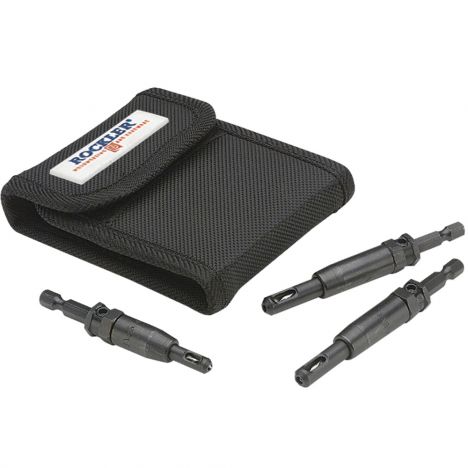
Ten. We're going to join them with dowels. I'm just going to label each one so that-- One, one, two, two, but I'm actually going to clamp them together and mark up where I'm going to put the dowel, so I'm going to go grab some clamps. Then to join them, we'll use our dowels. We got some quarter-inch dowels from the deeps, and I've got this doweling jig which can do a quarter inchers. Just line that up with my mark, can you see that?
See, all right, just got this guy out of clamps, it's all clean, so now we have to cut in a rabbit for the back panel. About 6 and 3/4, 8 and 3/4, because I'm not using a table saw, one of those, I'm going to use a jigsaw to cut this out to show you how unimportant it is to get a clean edge on this panel. I'm going to just butcher this thing probably.
Square peg is not going to fit into a round hole, so we're going to have to do a little Marky Mark and the Funky Bunch, where we're going to round these over. All right, very poorly drawing out some quarter circles, and I will remove most of this material with the jigsaw as well. Let's just go like that, let's do some facets.
All right, we've got our panel to shape, everything is sanded. To put it in, we're just going to use glue, if you have something like brad nails or you could just use regular nails and hammer them in. That might be a little bit extra, but I'm going to just use glue and then we'll let it glue up without even clamping or anything and then we can test it later and see how strong it is. Oh, I did get one, look at that.
Okay, we have our drawer faces and doors all finished. This is where everything could go wrong I think potentially, but the basic idea is, rather than like the traditional way that you would space drawer faces in order to mount them on the boxes, we're just going to try to use the existing holes that the screws made going through the boxes and into the faces, and transfer those onto the new ones.
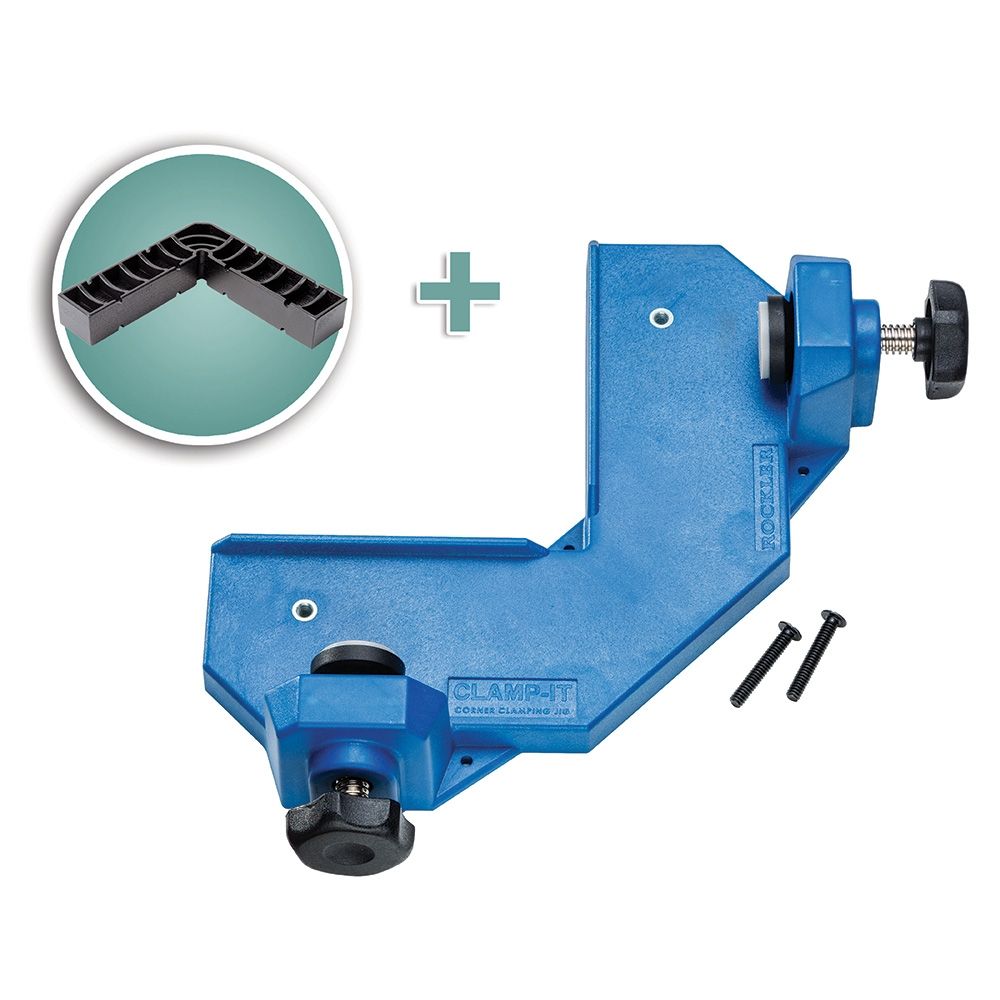
In theory, everything should line up the old way. I had everything labeled before, so this was drawer face B, let's just find our, that's A, here's B, this is right-side up. We're just going to lay it right on it. I'm going to use this clamping square thing, which came in kind of handy for this to just perfectly line them up. All right. That feels good.
All right. We checked the footage, I had done it correctly, so now I can go ahead and transfer those marks. We'll find out if that actually worked in a little bit. Let's get our screws started. All right. Everything looks pretty good. I'm just going to drill in a little bit just to enlarge the hole. Then I'm going to back them out so that the cabinet can sit flush and now start sending them home. That's definitely on there. Whether it's positioned right, we will find out when we get them home.
I think they're going to be pretty close. The tolerances on these seem to be like a little bit looser than the type of drawers that we normally do with your inset, but then there's also like zero adjustability on this hardware, so that makes it kind of one shot. If it doesn't work, we'll just take the drawer faces off and do it the traditional way where we'll have some spacers with us, but hopefully it doesn't come to that, we'll see.
Finally, the last thing that we can do before taking them home to install was reinstall all of the hinge hardware onto the doors. All right, that's the last piece of hardware installed. Let's go install these puppies back in the bathroom. Moment of truth. I can't even see. Yes, there you go.
There's a gap - It's hard to see in here, but I'll show some finished shots after. I'll bring some lights so you don't have to take my word for it. This one definitely needs adjusting.
With a little fine-tuning, everything turned out really well. Now, I know the difference, especially on camera, between the before and after is pretty subtle. Honestly, it's the sort of thing that most people might not even notice, but that's kind of the point. I mean, we really liked the way that the vanity looked, it just wasn't holding up well, and it was apparent that it was only going to get worse. Hopefully, these are going to hold up a lot better for years to come.
Almost forgot, we've got to test this panel if it falls apart. All right, well, it held up to that first one. Let's try another hit. I mean, we're not really testing the strength of this, we know this is obviously going to be pretty strong, so we need to get a direct hit here, maybe we should just like set it up between something and just whack it.
Well, we broke it. The glue doesn't fail. Basically the veneer failed I guess you would say because it delaminated it in order to break, so for normal use, I think you'd be fine. Just don't take a dead blow hammer to your panels and you'd be okay.
Keep the inspiration coming!
Subscribe to our newsletter for more woodworking tips and tricks