Video: Building the Ultimate Workbench
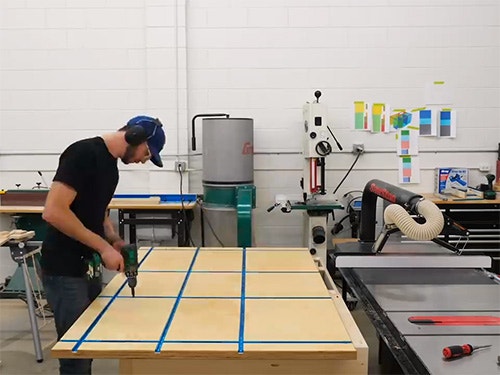
How to build a workbench with assembly and outfeed tables with Chris Salomone.
Chris Salomone finally builds his ultimate workbench including an assembly table and an outfeed table. Lots of function, lots of storage. Nice big surface. Everything that he needs.
You can find more great projects and techniques from Chris Salomone at his website.
Featured Tools:
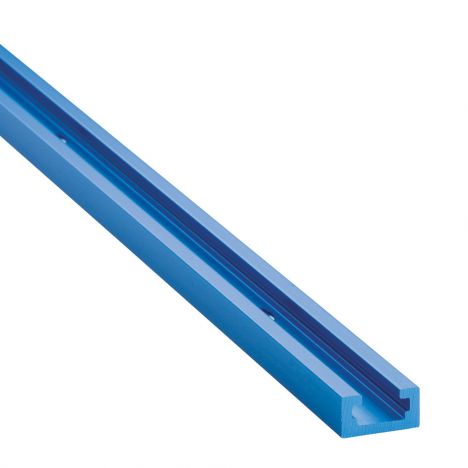
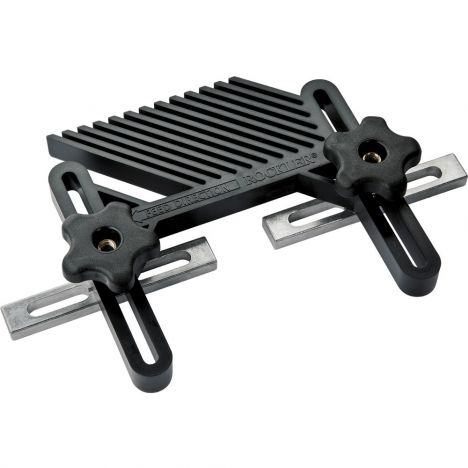
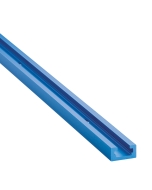
Chris Salomon: Today we're going to build this workbench/outfeed table/assembly table. Before we jump in, I figured I'd show you a couple of features of the workbench that make it most useful for me. First and probably most obvious is the Rockler T-track system. I think this is going to be a huge time saver especially when I'm working on tasks where I need to repeatedly clamp things down or when I need to elevate things. You'll probably see me using it a lot in future videos. Next is just how much extra storage this thing's going to give me. Plus, I really like this push-to-open drawer hardware that eliminates the need for drawer pulls. Last is this flat wall on this side and this cubby on the other side.
Now, technically, I could have used these spots for more drawers, but I have enough already. My plan is to put all of my table sock accessories over here and then make a pull-out cart that can park in this cubby but that'll be a little bit down the line. Anyhow, this is a really big project so let's stop wasting time and start building.
Before adding all of the door trim, I went ahead and paused and sanded all of the drawer fronts as well as that base frame down to 220. Keep in mind, if you're going to be making your own vanity, then of course, you don't have to add trim to the door fronts, you could just leave them as is. However, I really like the look of the added trim. So I put out a profile that I liked and use my router table to cut in the profile on some of these scrap oak pieces.
This project actually started off in my garage where I broke all of my sheets down into smaller pieces. This was mostly so that I'd be able to carry them. In total for this project, I'm going to be using five sheets of 3/4 inches Baltic birch plywood, two sheets of 1/2 inch plywood, and one sheet of a 1/4 inch. There should be enough leftover of the 3/4 inch and 1/2 inch material that I can use them on some other projects. I should also say that this project is pretty much a modified version of what my buddy Johnny Brooke built over on his channel, Crafted Workshop. He actually has plans for this project. I'm going to link those in the description if you want to take a look and I'll throw a link to his video as well.
In the workshop, I could start breaking my pieces down to their actual finished dimensions. In doing this, I realized the sort of irony, and that is, the hardest part about building this workbench is not having a workbench. It just makes for a lot of situations where you have pieces all over the ground. Well, let's just say that not having it while I worked made me more and more excited about eventually getting it done so that I could start using it. It's also hard to explain exactly what I'm doing in these shots. Let's cut to an animation that shows how all the cabinet pieces are going to come together.
The first thing that I'll mention and this is probably the biggest tip for whenever you're cutting out a lot of pieces and you want a clean assembly is this, try to plan it out in a way where you adjust your table saw fence the fewest times possible. For example, see how I have a bunch of pieces that need to be 32 and 1/8 inches wide. Well, if I can plan it out so that when I'm ready to cut dimensions onto these pieces, I don't have to adjust in between for anything else, then I'm going to get perfectly consistent panels. Here I'm going to bring in some color to the drawing and that way you can see which pieces are identical. If they're the same color, then they're the same dimension. The base is going to have a series of these sides and vertical partitions. These are all those 32 and 1/8 inch tall pieces I previously mentioned. These cannot be cut to their finished size prior to the assembly except for these two pieces. My recommendation for those would be to cut their height but weigh on their length until just before you attach them so that you can take a relative measurement. You'll see what I'm talking about in a minute. Anyhow, to that we add these three bottom panels, and then finally a series of 3-inch wide stretcher pieces for the tops.
Now, you may notice that the design is a little bit odd and that's because I wanted to make it where I could easily detach the entire back section. If ever need to move the workbench or anything like that, it'll just make it a lot easier. Anyhow, this is a lot of breaking down material here. I know it's not the most visually compelling thing in the world but this is the last thing that I wanted to show you before we start assembling. That's this little layout that you see me doing in this shot here. This represents what you see in the drawing here. By using that to determine the length of the long panel that runs down the center of my table, I'll get a much more accurate piece than I would by simply going off what the dimensions are supposed to be in theory. To actually cut this piece to length, it was a little bit too long for my table saw so I use my track saw.
Next, I joined a bunch of well, I guess pockets for pocket screws. Here you can see me measuring and marking where I'm going to drill them which is probably overkill. Really the only thing that you want to pay attention to is making sure that the two panels next to each other don't end up with screws in the same locations, they might run into each other. A little pro tip, if you want to make pocket holding more exciting on camera, go with a combination of slow-motion and no dust collection.
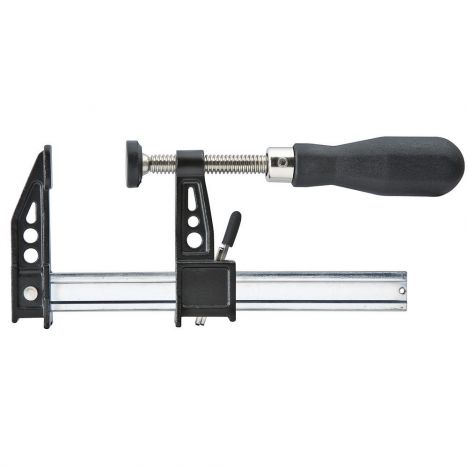
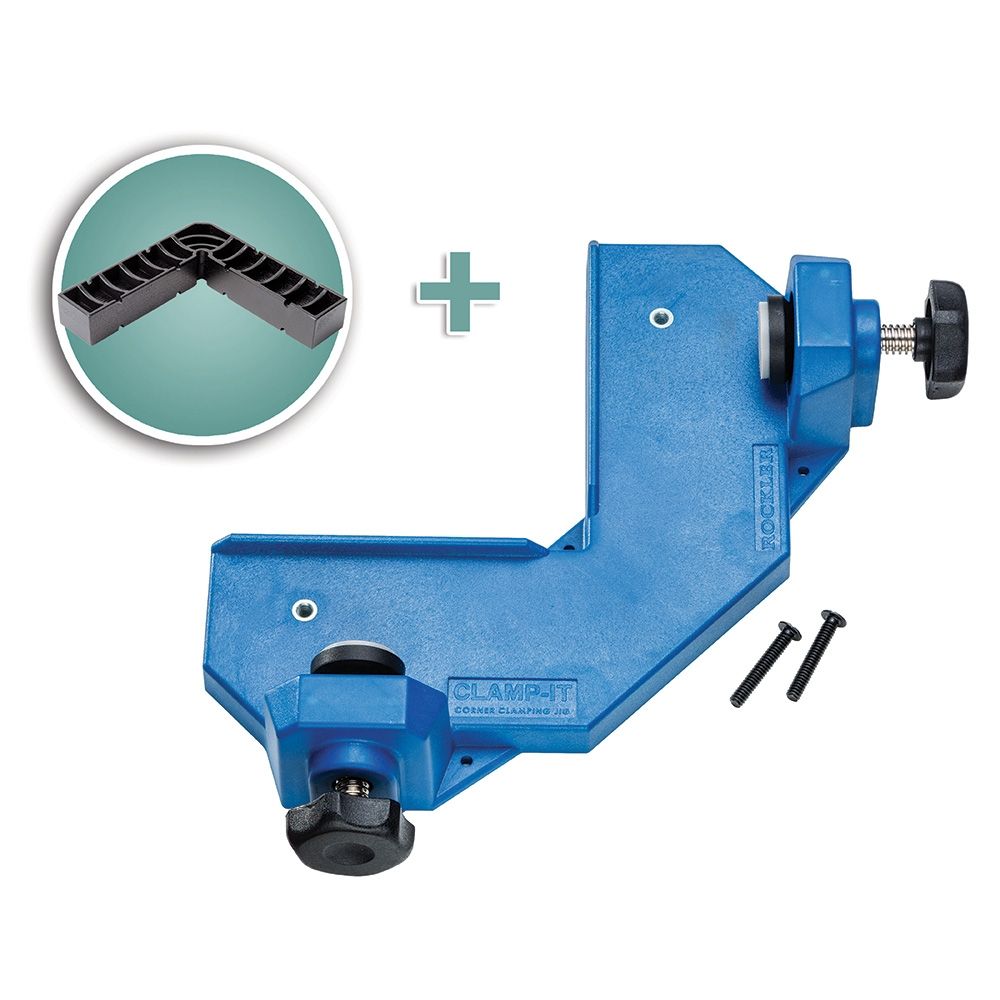
Next, I could start assembling all of my cabinets. If you've done all the prep work right, this part goes really fast. You'll go from what looked like a bunch of pieces to pretty much your finished shape in a matter of minutes. The only real tip here is clamping. Just utilize any clamps that you have in your arsenal to help you keep everything locked down while you screw it together. For me, specialty clamps like these Rockler corner clamp jigs came in super handy. Even though I couldn't use them at every intersection, I think they went a long way in helping me to ensure that all of my boxes came out nice and square. The other thing worth mentioning here is that I didn't use any glue and that's partially because I don't think that it needed it. Again, because if I ever wanted to take it apart, I wanted it to be able to come apart easily.
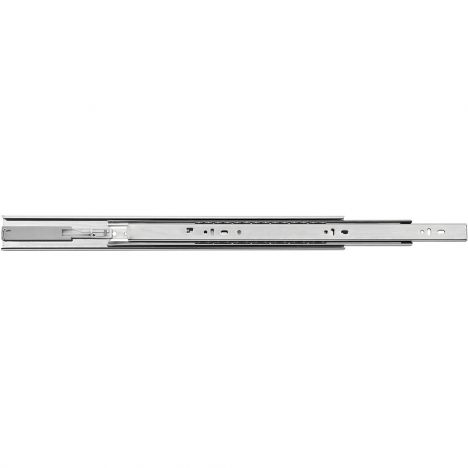
Next, I needed to make a bunch of drawer boxes. Initially, I thought to put five drawers in each cubby for a total of 15 drawers. Between this and the Husky workbench that I have, I just shouldn't really need that much small storage. Instead, I made each of the bottom drawers twice as deep. Hopefully, I'll be able to utilize those for some larger items. I still really liked the aesthetic of the five even-sized drawers. For the bottom one, I'm going to put two small faces on the drawer box to keep the same look. The crucial measurement for these is the width, the part that will go between the hardware sides. Mine called for 1/2 inch clearance on each side, which I tried to nail exactly, and that ended up causing some issues for me, as you'll see in a little bit. Moving forward, I'm going to make my drop boxes about a 1/16 inch narrower than I think that they should be. From my experience, it seems like most hardware is forgiving if you're a little bit too small, but not if you're a little bit too lied.
Next, I could work on installing my boxes. Here I'm using a piece of scrap to mark out where the gaps between my drawer faces will be and where my hardware will go. Honestly, this is probably unnecessary. It's just a moment for me to keep my hands busy while I'm sorting everything out in my head. I don't even know why I filmed it. In any case, I guess it's good because it illustrates how my hardware needs to be offset on the two boxes that are next to one another, that way the screws don't intersect. Here I'm marking out where my hardware is going to go. This is important to mark but only on one box, not on all of them. Once I have it laid out, I centered my hardware on the line and struck another line along the bottom of the hardware. I could use that line to cut a piece of scrap plywood that I'm going to clamp to the inside of the box, and then I'll let the hardware rust on top of while I install it.
Basically, I'm starting with my upper hardware, cutting the piece, moving down, cutting the piece, moving down, and so on until all the hardware is in. Once all the hardware was in, I inserted all of my boxes and everything worked out great on the three upper drawers, but my bottom drawers didn't work on any of the three cabinets. I did a bunch of troubleshooting in real-time on Instagram. If you're following me there, you probably saw it. What ended up working was removing the small bit of material using a router just where the hardware goes and that gave me just enough wiggle room to slide freely. With that done, I could cut out all of my drawer faces and attach those. Since I didn't mention it before, the reason that I went with this hardware is that I wanted a really clean drawer face with no pools. If you want to try these two, the brand is called Centerline, and actually, I'll link them below too.
Now let's turn our attention to the top which I know looks like it's already done according to this shot, but just pretend you didn't see that.
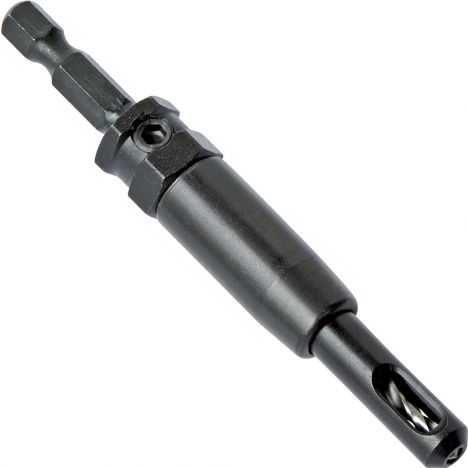
After I got all my pieces in, I cut one to the exact size that it needed to be. This is a tip that I got directly from Johnny Brooke. Then, I cut the other one so that it was about a quarter of an inch bigger in each direction than it needed to be. That way after I glue them together and it's all dried up, I can use a flush-trim bit in my router to make both pieces the exact same size. This was a nice little warm-up to using the router because installing all the T-Track required quite a bit of it. I messed around with my SketchUp file for a bit and ultimately landed on this layout. This mounted up being about 34 linear feet of T-Track. Given that I tended to cut my full depth in about four or five passes, I added it all up, and it turns out I routed the equivalent of three-five kits. I think I'm not going to mess. Thankfully, it was all pretty easy though. I used a three quarter inch bit, which was the perfect size, and set the depth to just a tiny little sliver. We're talking an ant's whisker deeper than what the track is so that the wood top is just slightly proud of the T-Track. I didn't want to try to get it exact, because I figured having it slightly recessed would be fine. If it was slightly proud anywhere that would cause problems. For the actual T-Track, you can buy it in a few different lengths, and you can also buy these intersection kits that you see me installing here. I know you're probably saying right now, “Why don't you just cut the intersections on your own, and you could definitely do that?” In fact, if you really wanted to get involved, you can actually make your own aluminum T-Track. Let's quickly walk through that. First, you're going to want to mine an ore called bauxite, and this can be converted into aluminum using the Bayer process. To do that, the bauxite is blended for uniform composition and then its ground. This resulting slurry is mixed with a hot solution of sodium hydroxide, and then the mixture is-- Just go by. After all the intersections were in place, I started cutting and installing the straight tracks, and you can just use a miter saw for this. The only real tip that I have here is get yourself one of these self-centering bits. They make the install a lot cleaner. Plus, they're good for installing all other hardware, so it's nice to just have one around. All right, we're on the home stretch here.
The next thing to do was plug a few pocket screw holes that were left visible. I got a plug cutter and use it on a piece of maple that had sitting around and in total only had to fill nine pockets which I think's pretty good when you consider I probably cut like 200 for this project. Next, I decided to pay a colorful stripe on each of the front faces on one of the front columns on drawers. I'll admit that most of my reason for doing this was looks, but I think that it could have some function too. First, I think it might make me more quickly remember in which drawer I've put things, and it gives me a good way to explain to somebody elsewhere something is. You're looking for a screwdriver, red drawer, 18-gauge nails, right of yellow, tape measure, around the corner from blue. If you're wondering what the stripes are for, those are to cover-up a mistake where I cut a piece too short. Sometimes it's easier to hide a mistake by drawing attention to it, rather than covering it up. Anyhow, so the last thing to do was slap on a couple coats of simple finish, and that was it.
I'm super happy to have this project finished, partially because it was a lot of repetitive tasks. It took me a lot longer than I thought it was going to take me, but mostly because having this workbench is just going to make the shop a lot more functional. I also want to thank Rockler for partnering with me on this project. I use a lot of their tools on this one.


Keep the inspiration coming!
Subscribe to our newsletter for more woodworking tips and tricks