Making Tight Curve Cuts with Your Band Saw
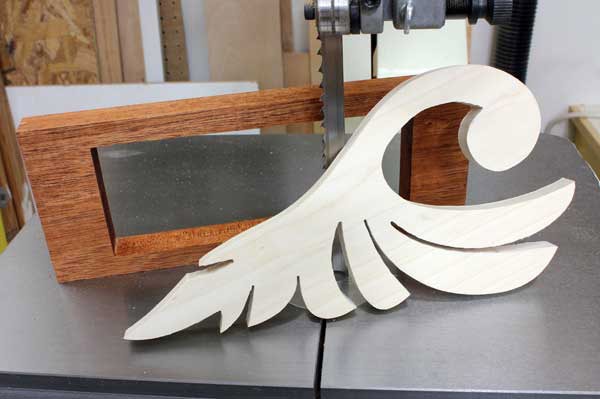
Whether it's a tight curve or a closed opening, you can cut it on your band saw with a couple of easy tricks.
Cutting on the band saw can be the same thing. The narrower the blade, the tighter the spots you can cut; in fact, some band saw blades rival a scroll saw for cutting tight curves. But what happens if you have a workpiece with tighter turns than your blade can handle? You could head to your favorite woodworking supplier for a smaller blade (or even to purchase a scroll saw), but in most cases you can still make the cuts by using the old trick of first making relief cuts that allow your blade to go places you never thought it could.
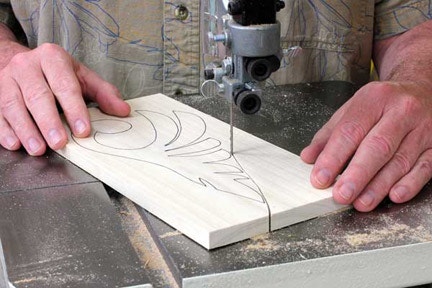
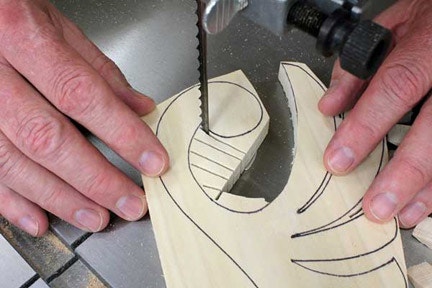
Step 1: Like many woodworkers, I keep a general purpose 1/4" blade on my band saw for everyday use. For the intricate leaf pattern shown here, a smaller fine-cut blade would be better for this task, but let's assume that 1/4" blade is all you have. The key here is to realize that blade can easily bind in tight curves, and backing it out of a curved cut is difficult at best. With that in mind, start by removing waste material outside your curved cuts to shorten the distance your blade has to travel. This is especially important when backing it out of a cut, which we'll do a lot here. I'm only cutting the side of the pattern with the tightly curved cuts — the other side is a gentle curve we can easily cut later, so leave that portion intact for now to facilitate handling. By the way, you'll note in these photos that I've raised the upper blade guide assembly fairly high so you can see everything; when making your cuts, be sure the blade guide is at the correct position just above the workpiece.
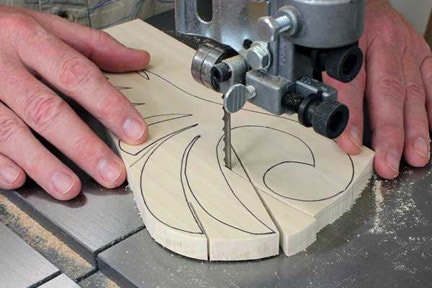
Step 2: Make several relief cuts in each of the curved openings almost up to your pattern lines, keeping your cuts straight. Back the blade out after each cut.
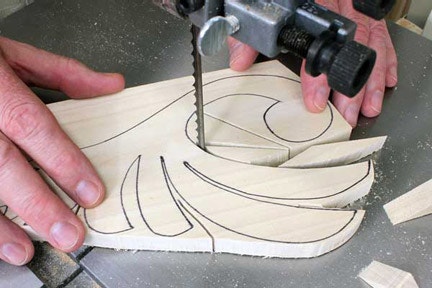
Step 3: Start working the curves, cutting between your relief cuts to remove one piece at a time. Each time a piece comes free, it opens up your pattern a bit more, allowing more room for the blade to maneuver. Your cuts will quickly litter with small pieces. Periodically shut the band saw off and wait for the blade to come to a full stop, then remove these pieces before restarting the machine.
Step 4: I've reached the innermost portion of the first tight curve. With the earlier waste pieces removed, it's easy to cut several relief cuts to allow the blade to finish the curve.
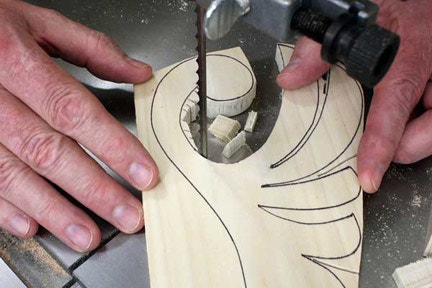
Step 5: Now, work the blade around the cut and just "connect the dots" from one relief cut to the next. Every small chunk that comes free gives the blade more room to turn.

Work slowly till you've removed all the waste down to your cutline. Again, stop the saw and remove loose pieces of cutoff as needed. Repeat the process for each curve down the length of the pattern.

Step 6: Make the last cut on the back in a single pass and then finally the small leaf detail. With the pattern complete, clean up saw marks with a combination of disc sander, spindle sander and hand sanding for a smooth edge all around.

Step 7: By following the above steps you can work your band saw blade through even the tightest openings, but what if there aren't any openings? Let's say you're making the front of a jewelry box and want an opening for a drawer. You need the opening square and smooth, but you want it out of a single piece of wood with continuous grain. Well, you could drill holes in the corners and then use a scroll saw or jigsaw to cut the opening, but that takes a long time and the results aren't always pretty. Instead, simply cut the workpiece in two and rejoin them later. Start by outlining the opening on your workpiece, then slice with the grain right through the center, straight as you can.

Step 8: Now that you have access to the inside of the workpiece, cut out the opening by first angling the blade into the inner line, then straight into the corner. Cut the right angle at the end to remove the first piece of waste, then repeat the process in the other direction. Cut the other half of the workpiece in the same manner.

Step 9: Sand all inner surfaces of the opening, but don't sand the joining surfaces at each end or you may alter how the two halves go back together. The idea here is that you want to remove as little stock as possible to keep those cuts less noticeable. Put a bit of glue on each joining surface, and then clamp up the workpiece.

Step 10: When glue has dried, unclamp the workpiece and give it a good sanding. The nearly invisible joint disappears into the natural grain. No one, except perhaps Houdini, will ever see it.

Keep the inspiration coming!
Subscribe to our newsletter for more woodworking tips and tricks