How to Install and Adjust Euro-Style Cabinet Hinges
Euro-style hinges may seem complicated until you try them for the first time. Then you'll see how easy they are to install… and why so many production shops use them exclusively for hanging cabinet doors. Once in place, Euro-style hinges also allow for some helpful adjustments that other hinge styles don't. Depending on the specific hinge, you can adjust your cabinet doors up and down, side to side and in and out by turning a couple of screws. These versatile hinges are designed to accommodate either face frame or frameless cabinets. For either style of cabinet, you can buy hinges to suit doors that overlay the cabinet opening or set inside it.
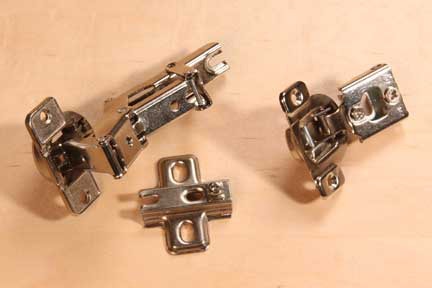
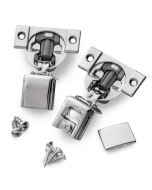
All Euro-style hinges include a round metal cup that mortises into a shallow hole in the back of the cabinet door. A baseplate, which is either an integral part of the cup arm or installed separately, attaches to the cabinet carcass or face frame. Examples of one- and two-piece hinge styles are shown above. For this sequence, we'll install one-piece, partial overlay hinges on a face frame cabinet to hang a flat-panel door.
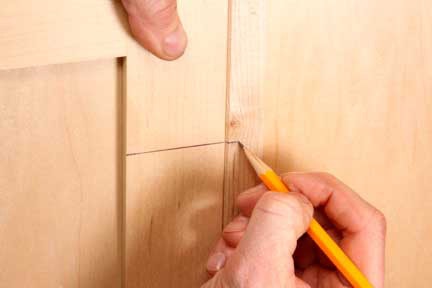
Step 1: Determine where you want to locate the hinges on the door and cabinet. Typically hinges are placed three or four inches in from the top and bottom ends of the doors. Draw a perpendicular line across the door stile to mark the center of each hinge. Now, hold the door in place against the cabinet and transfer these centerlines onto the face frame stile. Draw these reference marks carefully to ensure that the hinges will line up correctly on the cabinet.

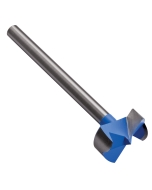
Step 2: Hinge cups recess into 35mm-diameter holes bored into the cabinet door stiles. The instructions that come with your hinges will tell you how deep to make these cup holes and where to locate their center points on the styles. Set up your drill press with a 35mm Forstner bit and a clamped fence to register the edge of the doors when drilling. Bore the cup holes, setting your drilling depth carefully before you begin.

Step 3: Insert the hinge cups into the door mortises and make sure the hardware seats fully in the holes. Adjust the hinges until they are square to the edge of the door, and carefully drill a pair of pilot holes for screws that fasten the hinge cups to the doors. A self-centering drill bit is a good choice for this task. Install the hinge screws in the door.
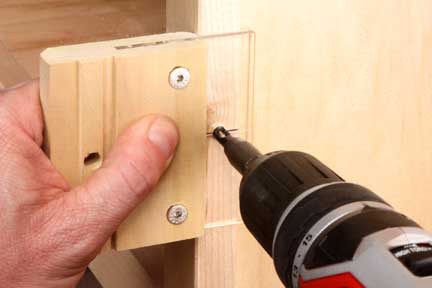
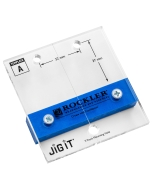
Step 4: Hold the door in place on the cabinet to double-check your reference marks for attaching the hinge baseplates. Now, mark pilot holes for the baseplate screws on the face frame or the side wall of the cabinet. You can determine these center points by measuring, using the dimensions given in the hinge instructions. Or, you may be able to use a ready-made jig, such as Rockler's JIG IT® system, to register these baseplate screw holes without measuring. Drill the pilot holes.

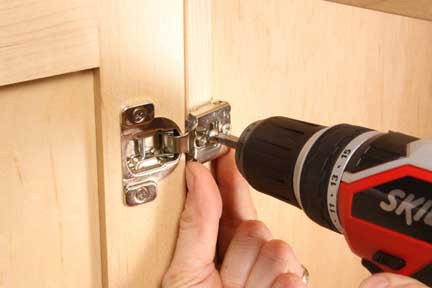
Step 5: Set the door in position and install the baseplate screws to hang the door on the cabinet. On a double-door cabinet, repeat this process to hang the other door. Open and close the doors a few times to check their alignment. Turn the hinge adjustment screws as needed and a little at a time to refine the fit of the door or doors in the opening.
After even one installation, you'll probably agree: cabinet door hinges don't get much easier than this!
-
 35 mm Diameter x 4'' Long Shank Carbon Steel Forstner BitSpecial Price $17.99 Regular Price $36.99 Save 51%
 -

Keep the inspiration coming!
Subscribe to our newsletter for more woodworking tips and tricks