Project: Westport Chair
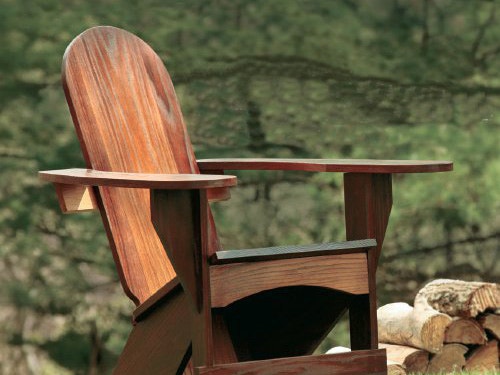
This Westport chair is made from thermal treated red oak, which is attractive and environmentally friendly.
Back in 1902, when Thomas Lee first developed his chair design, it is unlikely that he had any idea his effort would become an uberpopular American classic, but the attractive lines and comfortable and practical features of the chair have sustained it as an outdoor favorite for over 100 years.
Here in the 21st century, I found the "Westy" design impossible to improve upon, with the possible exception of the material from which to build it. Mr. Lee made use of wide white pine boards common in upstate New York in his era. But I was curious about the woodworking properties of thermo-treated lumber — which is purported to be exceptionally rot-resistant. Don’t confuse this lumber with chemically treated stock: it remains natural wood.
Repeatability and Accuracy

Have you noticed how outdoor furniture tends to travel in groups? (Flocks, herds, coveys ... I am unsure what to call the aggregations.) That’s because we like to sit outside communally with family and friends. For that reason, when I decided to build our version of the Westport chair, I chose to make 1/2"-thick MDF templates for all of the shaped parts. Now I can easily build two, three or even an entire flock of chairs. But even if you choose to build a single Westy, I recommend working from templates. They allow you to fair the curves and refine your radii without ruining expensive stock. While I always advise folks to be precise in their woodworking efforts, don’t fret overmuch regarding the shapes of the curved pieces. The most important thing to achieve is a graceful, pleasing shape to the arms and other shaped parts. I laid out the template shapes by using the old trick of a flexed thin strip of wood to define my curves. For other radii, I used a handheld compass.
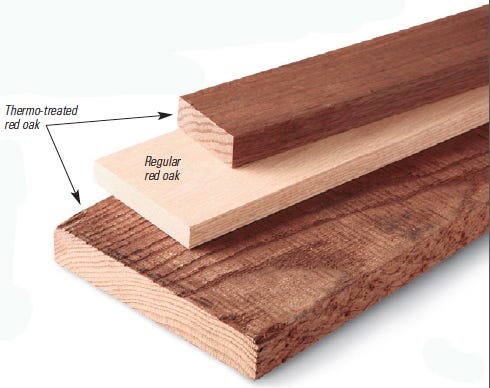
As I noted earlier, I built our chair from thermo-treated red oak, but this time-tested design will work well with cedar, cypress or any other type of wood that holds up well in outdoor use. Similarly, use a good quality waterproof glue — I chose Titebond III — for any butt-joined lamination that you will need, such as for the back and the seat.
Building from the Bottom Up
For the Westport Chair Diagram and Materials List, click here.
Regardless of which material you make the chair from, the legs and arm supports (pieces 1 to 3) have straight lines that are easily made on a table saw. The front legs have a 12° bevel on their forward edges, and notches with the same interior angle. I made each notch by holding the beveled edge of the leg flat on the table saw top and raising the saw blade to 15/16", then nibbling the notch clean. This technique forms the proper angle in each notch. To make the rear legs, I traced their shape onto the stock using a template, and then cut the shape out using a sled on the table saw.
To get the 12° angle on the leg's front ends, I raised the blade on the table saw, held the end square to the blade and slid the saw’s miter gauge up to the leg, adjusting it to the angle of the leg. Then I cranked the saw blade over to 12° and cut the angle onto the rear leg. Repeat the process for the other rear leg.
Now go ahead and cut out the stretchers (pieces 4 and 5). The lower stretcher is simply sticked up; the curved stretcher has a curve cut into its bottom edge. It also has an angled top edge and ends.
Drilling: 1, 2, 3
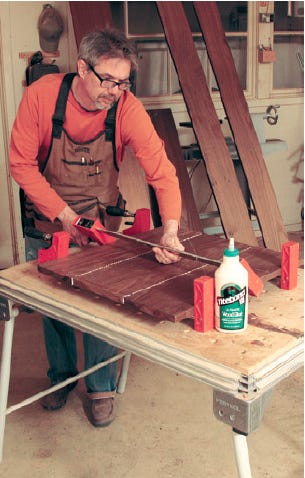
Once you have completed those machining steps, you can start drilling counterbored holes for your first dry assembly. An important note for those who choose to use this treated lumber: I found it more brittle than non-treated wood, so for that reason I procured a really good quality countersink bit set which came with plug cutters. It cost a goodly sum, but it worked so well that, to me, the cost was worth it. Another thing I did was to use three drill/drivers as I worked: one with the countersink bit to make the counterbore and the clearance hole, the next with the properly sized drill bit for the pilot hole and the third with a Robertson (square-drive) bit. I know that having three cordless drill/drivers might seem a bit overboard, but I have to say it was a sweet deal. The screws I used in this project were stainless steel #7, 1-5/8" with square-drive trim heads.
For each front leg assembly, counterbore and drill your pilot holes, then attach the arm support to the front legs using screws alone — no glue just yet. In the same way, secure the lower stretcher to the front legs in the notches that you nibbled earlier (no glue). The distance between the front legs is 20-3/4". With that done, stand up the subassembly on a flat surface like a workbench or table saw table and grab one of the rear legs. Clamp the rear leg in position, holding it back 7/8" from the forward edge of the front leg. Counterbore, drill and secure the rear leg to the front leg, then repeat the process for the other rear leg. Now you can test fit the curved stretcher to see if its angles line up properly. When it fits well, secure it as you have with the other parts . With the leg subassembly done, set it aside and move on to the next set of parts.
Making the Back, Seat and Arms
For the Arm, Seat, Front, Stretcher and Leg Diagrams, click here.
You are on the home stretch now, with just a few remaining parts to make (pieces 6 through 9). Because they are pretty wide, your back and seat will almost certainly need to be glued up. I composed the back panel from a lighter center plank with darker boards on either side. The seat was glued up from boards that were essentially the same color.
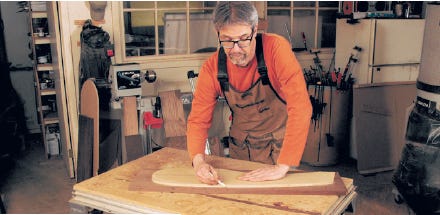
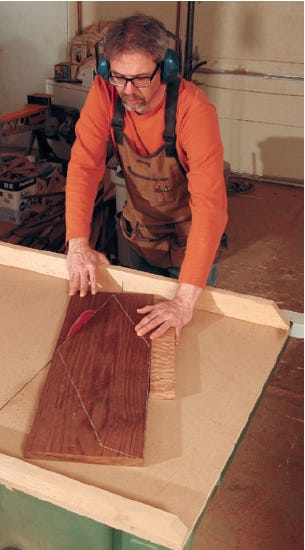
Starting with the back, I traced its shape onto the stock with a white pencil. Stepping to the band saw, I cut out the shape, staying just outside of the line.

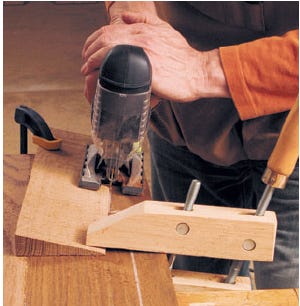
Then, with the help of a 12° ramp and a handheld jigsaw, I cut the compound angle onto the bottom of the blank.
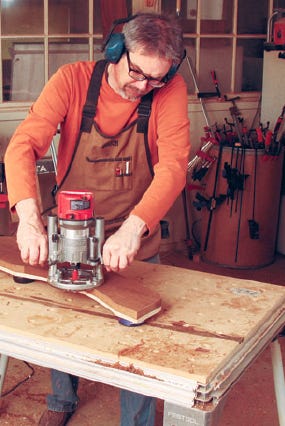
Now I was ready to attach the template to the back blank with double-sided tape, and to use a pattern routing bit and a handheld router to complete the shape of the back. I followed the same steps to make the arms.
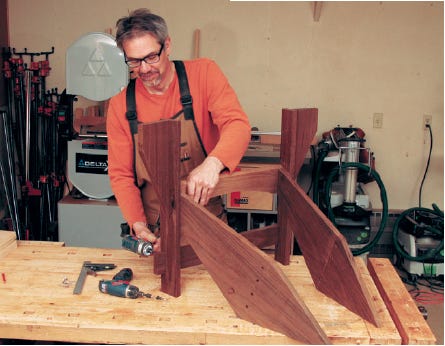
Securing the back to the leg subassembly would be more easily done with a helper to hold it in place — I substituted clamps and muttered threats instead. When you have the back properly positioned, use the three-step drill-and-screw process described earlier to temporarily mount it in place.
There are a whole lot of angles going on in this chair, and I found that despite my best efforts, I was a degree off here and there as I assembled it. For that reason, I located the rear back support by using a level placed on top of the front leg stretching to the back — I marked a line on each edge of the back and mounted the support. Here, I just countersunk the holes for the back support (not covering them with plugs).
The next step was to make and fit the seat. The seat has rounded back corners and notches in the front corners. Those notches have angled rear aspects (across the thickness of the seat) to accept the front legs. I cut those notches with a hand saw. The back edge of the seat is angled to abut cleanly with the back. When you’ve fitted the seat in place nicely, counterbore and secure it with screws.
Completing the Last Details
By now you should be an expert at the bore, drill and screw sequence, so attaching the arms to the chair should go quickly ... again, all of this assembly so far has been without gluing anything in place permanently. The reason is that you are going to take the whole chair apart now and sand it smooth. I also recommend a 1/8" roundover bit on the edges of the arms, seat (except at the notches) and the back (except where it meets the rear legs). On the rest of the chair, I broke the edges with sandpaper, sanding up to 150-grit.
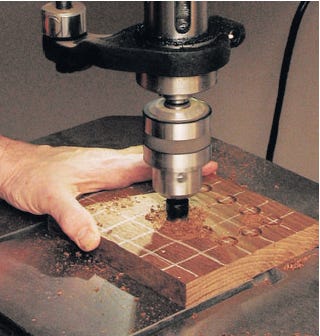
Reassembling the chair went smoothly. I applied glue to the legs subassembly (including where it joins the back), but nowhere else. I took care to drive the screws securely home and then put the chair aside. At the drill press, I made a bunch of plugs and then used the band saw to "resaw" them from the blank.
I glued them in place with Titebond III and let the glue cure. A sharp chisel and disk sander made quick work of flattening the plugs, and the chair was done, except for the applying the finish.
After packing the feet with epoxy, I applied three coats of General Finishes 450 exterior varnish — it has UV protectors that will help keep the color of the wood from shifting in the sunlight.
In the end, I was so pleased with the chair. It is a piece of American history, and it was fun to build and comfortable to sit in. That’s a win, win, win in my book for sure.


Keep the inspiration coming!
Subscribe to our newsletter for more woodworking tips and tricks