Using the Rockler Custom Door and Drawer Front Program
Whether you're building new cabinets or giving your existing kitchen cabinets a new look, having cabinet doors and drawer fronts made for you is an option that's definitely worth considering.
You'll not only side-step one of the most time consuming aspects of cabinetmaking, but you'll also be guaranteed to have beautiful, professionally-made doors and drawer fronts when it's time for installation.
In this article, you'll learn how easy it can be with our Custom Door and Drawer Front Program.
How the Program Works
With the Rockler Custom Door and Drawer Front Program, you can order new, custom made hardwood or RTF (rigid thermo-foil) coated MDF (medium density fiberboard) doors and drawer fronts in the exact dimensions to fit your cabinets.
Your new doors and drawer fronts will be delivered to your door, ready to finish and hang.
Part I - Getting Started
To get started ordering your new doors and drawer fronts, you'll need to gather some information about your kitchen, and make a few decisions about the best way to proceed. This step is very important - omitting it could mean serious difficulties down the line.
How the Program Works
1. The type of door your current cabinets have.
In almost all cases, the cabinet doors in your kitchen will be one of three types:

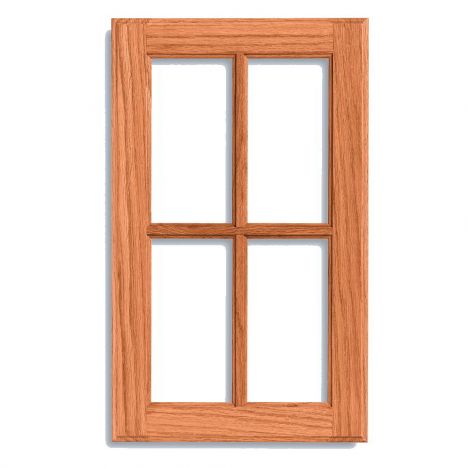
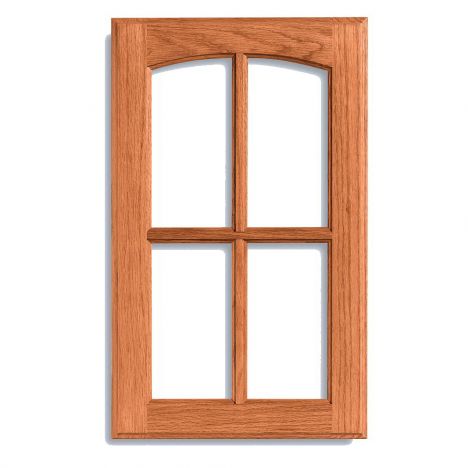
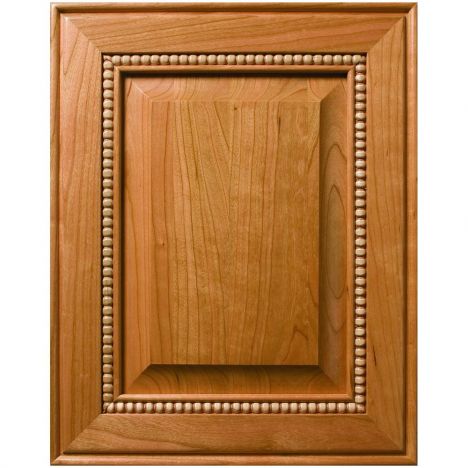
Overlay Doors - The cabinet door is larger than the opening of the cabinet and is mounted over the front of the cabinet opening.

Full Inset Doors - The cabinet door is inset into the cabinet opening, so that the cabinet door and front edge of the cabinet are flush (on the same plane).

Partial Inset Doors - the door has a rabbet, (or notch) cut into the outside edge of the door so that the door is partially inset into the cabinet opening.
2. Decide which type of door You will use for replacement.
Before you can order your new doors, you'll have to decide which type of door and drawer front you'd like to use for replacement. Here you have a couple of options. The most simple - in terms of measuring and ordering the doors you need - is to order the same type of door as you currently have. If your current doors are either overlay or full inset doors, you can simply measure your existing doors and your are ready to order. You do not necessarily have to replace your cabinet doors with the same type of door. You may want to replace full inset doors with overlay doors. There are good reasons for doing so - overlay doors are often easier to install than inset doors. If you choose this option, remember that you will almost certainly need to buy new hinges to go with your new cabinet doors - the hinges used with inset doors are rarely compatible with overlay doors and vice versa. Also, be sure that you will have enough clearance between your cabinet door openings to allow the doors to open and close properly. Check the specifications of the overlay door hinges you select to determine the correct size of door to order. Partial inset doors have become less and less common over that past few decades, and are rarely found on contemporary cabinets. The custom door and drawer program does not offer a partial inset door edge. If your cabinets currently have partial inset doors, you will need to either replace them with another type of door, or be prepared to cut the door lip yourself (a process that we can only recommend for woodworkers of intermediate skill). Fortunately, partial inset doors can usually be easily replaced with overlay doors. As with changing from full inset to overlay doors, we recommend carefully checking the clearance between the cabinet openings and the specifications of the overlay door hinges you choose.
3. Choose new hinges
Unless you are planning to reuse your current cabinet hinges, you'll need to pick out new hinges. You have many options. Take a minute to read through Rockler's article, "Choosing the Right Cabinet Hinge" before you order your doors, where you'll find help in picking out your cabinet hinges. Remember that the hinges you select may influence the size of door you will need to order.
4. Determine the type of your existing drawers
The drawers in your kitchen will be one of two types: they will have a three sided drawer box or a four sided drawer box. Remember that if you change the type of cabinet door - from inset to overlay, for example - you will want to change the type of drawer front to match. Again, be sure that you will have enough clearance around the edges of the drawer front for the drawers to operate properly.

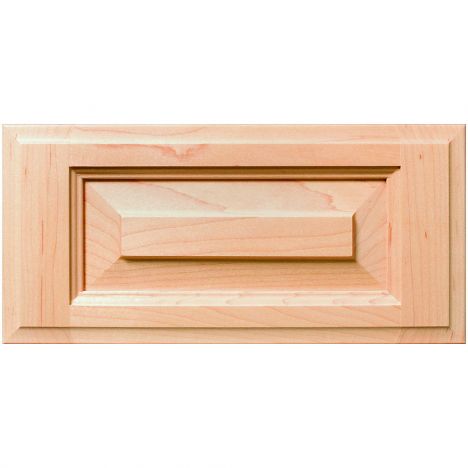
Three sided drawer box - the drawer sides, back and bottom attach directly to the drawer front.

Four sided drawer box - the drawer box has four complete sides. The drawer front attaches to the front side of the drawer box.
Special Instructions for Three Sided Drawer Boxes
Check to make sure that you will have enough drawer clearance inside of your cabinet If your current drawer boxes are three sided, you will be using the current front of the drawer as the back side of the drawer box, and will need to add the current drawer front's thickness to the overall length of the drawer. Measure the entire length of the drawer (including the width of the drawer front) and check to see that you will have enough room inside of the cabinet drawer opening for the length of the new drawer/drawer front.
Ordering Your Doors
If you've determined the type of doors and drawer fronts to order, the dimensions of the doors and drawer fronts, selected new hinges (if necessary) and confirmed that the hinges will work with the door type and dimensions that you have in mind, then you're ready to head to Rockler's Custom Door and Drawer Front page, where you'll be able to specify the style, number and dimensions of the doors in your order.
Part II - Installing Your Doors and Drawer Fronts
If you are replacing your hinges at the same time, be sure to read Understanding Hinges for advice and tips on picking out the right hinges. If you are replacing your hinges with European style hinges, we strongly recommend the JIG IT cup drilling jig. The JIG IT is the preferred tool for boring concealed hinge cup holes among hobbyists and professionals alike.
Step 1 - Install hinges & hang doors.

Place hinges about 2" from top and bottom of doors. Then secure the hinges on door to the frame. If re-using old hinges, remount the hinges so screws make new holes.

When using 35mm cup hinges, screw into face of cabinet frame and center the door over the opening, allowing an equal margin of overlap on all sides. On openings with two doors, leave a gap of about 1/8" between doors.
Step 2 - Installing new drawer fronts.
When replacing the drawer fronts, you must first determine whether your drawer boxes are three-sided or four-sided. If the drawer front is mounted to a separate piece that makes up the forward wall of the drawer box, you have a four-sided drawer box. Remove drawer slides from the old drawer box.
Three-Sided Drawer Box

Using a saw, trim the drawer front so that no edges extend beyond the top, bottom or sides of the drawer box. This allows the old drawer front to fit inside the drawer opening. Hide rough edges by turning the box around. The old drawer front should now be in the back of the drawer box. Replace drawer slides, making sure they are flush with the front edge of the box. Center the new drawer front on the box and temporarily secure with screws. Slide the drawer box
Four-Sided Drawer Box

Remove the old drawer front, being careful not to damage the drawer box. The new drawer front, using the Drawer Front Adjuster. Center the new drawer front on the box and temporarily secure with screws. Slide the drawer box into the opening to check the alignment. Adjust as necessary, then tighten the screws.


Keep the inspiration coming!
Subscribe to our newsletter for more woodworking tips and tricks