Video: Acrylic and Wood Veneer Clock
In this video, David Picciuto creates an acrylic and wood veneer clock.
With the help of a CNC to cut some scrap acrylic and a clock face, David Picciuto creates a classic looking clock with a veneered surface.
You can find more great projects and techniques from David Picciuto at his website.
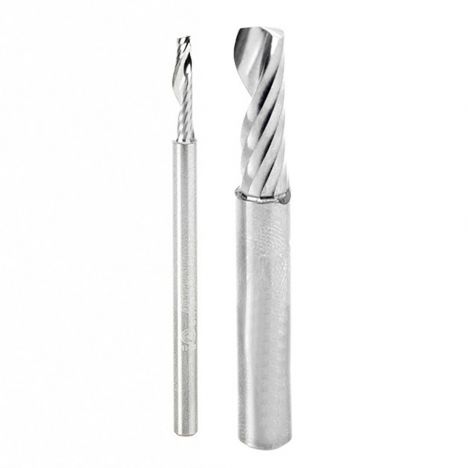
Featured Tools:
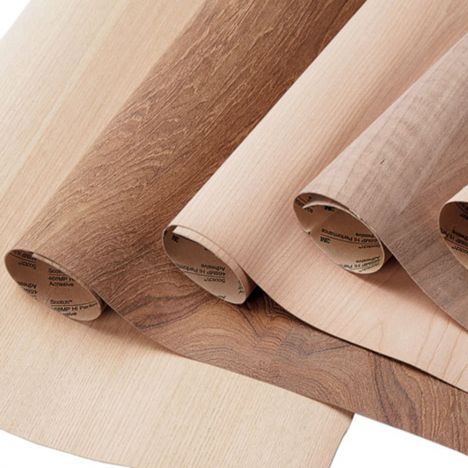

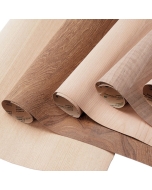
David Picciuto: Today, we're going to make the stylish clock out of acrylic and veneer. Stick around to see how it's done. I have this adhesive birch veneer. It's got a sticky back here, and then I'm going to cut the clock face out over on the laser engraver. First, I'm going to temporarily attach it to a piece of board because it's a little curly and I want it to lay flat as we're cutting it out.
Since that doesn't seem to be working, I'm going to tape it down. I got the files loaded up on my computer. I got the computer hooked up to the laser engraver. Here's the piece that we're going to cut out. I'm going to set this in the laser over here, off-camera. I did a little test to see what the perfect power and speed would be for this particular material. Let's cut this clock out.
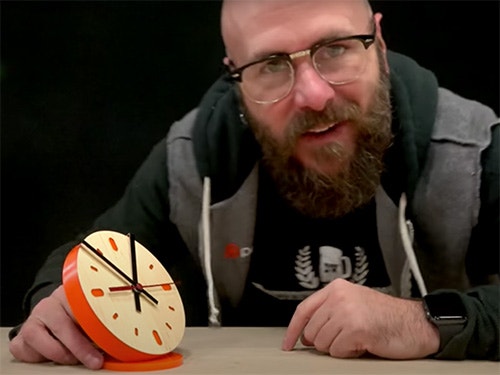
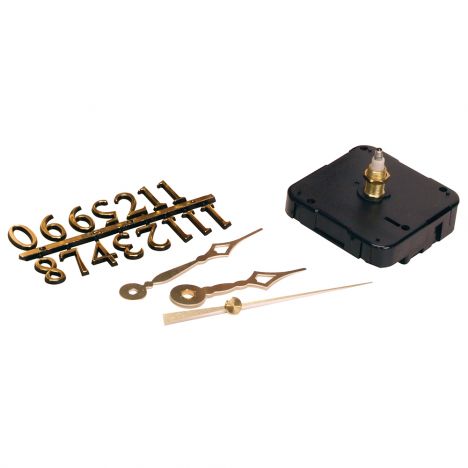
So now that that's cut out. I'm going to put it quick coat of polyurethane on it. I found this awesome piece of orange acrylic at a thrift store recently, and going to use this as the back of the clock. I'm using double-sided tape to hold it down to the waist board. I'm just going to cut a whole five-inch circle out of here. I got these really cheap clocks off of Amazon that I'm going to gut and use the parts for. The reason I bought the full clock instead of just the mechanism is because I also want the glass that's in there, for some future projects, secret future projects.
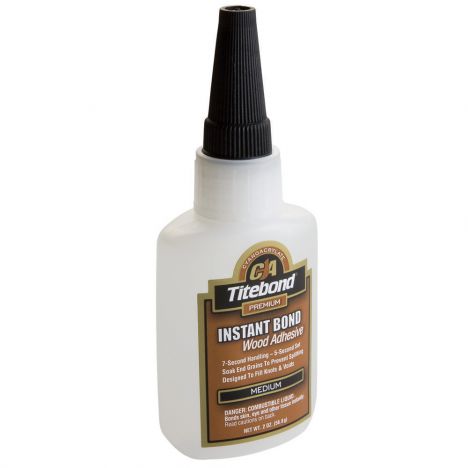
Look at the front piece of acrylic and then the two back pieces. This will allow room for the mechanism to go here. Now I'm just going to stack them up and glue them together, using some CA glue. Then for this wood veneer that we cut earlier, it's going to peel back the adhesive. Now I'm going to take this over to desander and sand down the edges so it's nice and smooth along here.
Now I'm going to drill a hole in the center here for the clock mechanism. I think what I want to do is take the hands and wrap them around the edges for an added design effect. I'm just going to take it and then bend it right over. Then we'll snip that extra off right there. The trick is to bend it so they don't touch, so they don't interfere with each other. We've got some good clearance there. For the second hand, I'm not going to bend it over. I'm just going to snip it off.
Next, I went through and started adding the edge banding, first ironing it on, then coming back and trimming it up. This time I used a viewers tip and used a chisel, and it really made quick work of the step. All right. Next, was to make the molding. I didn't like any of the molding right off the shelf, so I decided to order a few bits and make my own.
Here's what I have so far. I'm going to take the waste piece from the back here and make that the base. I think what I want to do is, I want to have this sit on the base, like that. I'm going to grind this part flat and then-- Almost dropped it. Almost dropped it, but I did not. Then we'll glue it right on there like that. I'm just going to set a piece of wood in here and use it as my fulcrum. Is that the right word? Just rest it on there and use that to get my flat bottom.
Mixing up some five-minutes of epoxy here. That was the last thing I wanted to happen. I'll hold that down with a holdfast. Maybe we can lean it up against there. Oh, yes. That'll do. That'll work just fine. I'm just going to let that sit and dry for a little bit. Hopefully, that holds. I think it should be fun. Change of plans. I didn't think this through, I did not think this through. I should think things through a little bit more. As the hour hand would come down, it would interfere with the base. I need to trim the hour hand down a little bit until I get enough clearance. Probably got to trim it down to about right there.
It's not clear. Let's try this again. That's going to do it. It's sitting flat now. The minute hand is going to clear everything. We're looking good. We're looking real good. I really love the way this came out. I love how the hands wrap around the sides. It's just really cool, stylish, kind of mid-century modern to it. Love it, love it, love it. Yes, I did make this with a CNC and a laser cutter. You don't have to have those tools to make this. You could easily make this with a scroll saw. I don't have a scroll saw. You have to use what you got.
There's an old auto racing phrase that goes, "Run what you brung," which means use what you have, so use the tools that you have to have fun and experiment. I love making clocks because there's so much you can do with them. You can get really creative. You can get totally wacky. You can make useless clocks. You can make beautiful clocks, elegant clocks. You can totally art out on making clocks.
I had a lot of fun making this-- Just really like the way it came out. The reason I made this is because I needed to make a prototype. I want to make a bunch of clocks for an upcoming craft show. I thought I would experiment with this. Now that I know that it works, now that I know what obstacles I'm going to run into, I can bash out a whole bunch of it at one time. What I might do for the clocks for the craft show is, I might localize them a little bit.
I might put the names of local cities in the middle here, or maybe the Toledo skyline. I'm going to try to make them very unique to this area. I can do that with my laser cutter. You could take this and easily make it your own, get all wacky and crazy with it. Look up clocks on Pinterest. You're going to come up with all kinds of wacky ideas.


Keep the inspiration coming!
Subscribe to our newsletter for more woodworking tips and tricks