Video: Building a DIY Dining Table
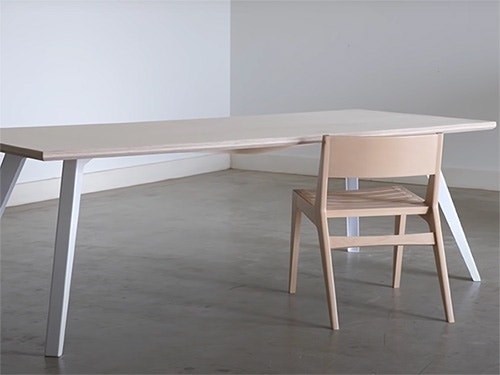
In this video, Chris Salomone takes a deep dive into building a DIY dining table. All you'll need is a sheet of plywood, some table legs, a circular saw, drill, and sander.
This is a fairly simple DIY woodworking project, but Chris Salomone covers it thoroughly so that you have the best chance at a good result. He'll also cover a few options such as edge details, overall size and more. He has also provided a free version of this plan that you can download here.
You can find more great projects and techniques from Chris Salomone at his website.
Dining Table Build Video Transcript
Chris Salomone: Hello and welcome to the video build series for this table that you see upside-down behind me. Now, this video is going to be a little bit different than normal because it's going to be structured more like our plans only albeit for a piece that's a little more simple or I guess more DIY than our normal plans are. Without getting too much into that, let's talk about this piece. This one's going to be called the general specific dining table and the reason that I called that is because it's based off of these legs.
Well actually not these legs, these are just prototypes, but anyway it's based off of these legs that I worked with a company called Semi Exact to create. Semi Exact general specific both oxymorons and that's the name. At the end of the video, I'm going to talk more about that but I don't want to get bogged down just yet. All right, before we get into it just a few things that I want to mention. Mainly in addition to this video, we've got a downloadable PDF on our website that you can get that has some written instructions and more dimensional drawings that'll help you through the build.
In those drawings, you may notice at times that dimensions that we talk about in the video might not reflect what's in the drawing. Beyond that, there's probably going to be times that your dimensions are going to differ from both the video and the drawing. That's fine, that's honestly the reality of building things, there's variations. That said, the main takeaway there is don't just blindly go off of numbers that we give and instead reference your own project to make sure that you get the best result possible. We'll try to point out those times as we go along.
Also as we work our way through the build, I'm generally going to do things the most simplistic way that I can, and then I'll present options or alternatives. Regardless of what you choose to do, make sure that you're comfortable around your tools and that you understand how they work. If you ever feel uncomfortable with a particular cut don't do it, find an alternative. Now, normally I would have said if you're uncomfortable contact me but those are for our plans that we sell tens of and this is for a YouTube video that hopefully will get viewed thousands of times, tens of thousands even.
I guess don't contact me, I can't keep up with that, and instead, I'll say Google it. All right, let's get into the build. For the version of the table that I'm going to be building in this video in terms of wood, all you'll need is one sheet of 4 by 8 by 3/4-inch thick plywood. Any species would do but I'm going to be using baltic birch. That's going to give us a finished table that's about 90 inches long, 38-1/2 inches wide, and about 29-1/2 inches tall. By the way, in our real plans, we give dimensions in both imperial and metric, but for the purposes of this video, I'm just going to stick with strictly imperial.
What You'll Need
Sorry, I guess rest of the world. Anyway, then in addition to that obviously you would need something for legs and we're using the legs that I worked with Semi Exact to design, but you could certainly make your own or use hairpin legs. Just know that the dimensions might vary. Then in terms of tools, the absolute minimum that you would need would be the following:
In the video, I'm also going to use some other specific tools just to demonstrate some faster ways, but all that stuff is optional.
All right, I guess go grab your materials and then I'll meet you in the next chapter.
Next Steps: Breaking The Plywood Down
In this chapter, we're going to start breaking our plywood down into what's going to become the finished top. Let's start by talking about how the top is going to come together and then we'll talk about the best way to do this order of operations to get the best results. I suppose if you wanted to build this table the easiest way possible, you could just get two pieces of plywood, glue and or screw them together, attach the legs and then call it a day.We want to do it using only one sheet of plywood. If we look at the top from the underside, you can see that we're going to start with one large top piece. Then we're going to have four perimeter pieces that'll give the top a thicker look. Then we'll have these two support pieces, I call them belly pieces later in the plan that are going to be there to help prevent the table from sagging. Then finally each leg is going to get a little support block that'll make the table the right finish tight.
Now because we're all probably using different plywood and we're all going to end up building this a little bit different, note that your piece might sag a little bit in the center. Mine does ever so slightly but honestly, it's pretty sturdy. Honestly, I guess that's just one of the downsides to trying to stretch one piece of plywood as far as you can take it. If you are concerned about that at all, I would say either use more wood to help reinforce things or just make the table a little bit smaller. Either one of those or a combination of the two is going to help to get you there.
That said again, I made my table as big as I could possibly make it and it's pretty sturdy. Anyway in this drawing here you can see our pieces of plywood with the pieces nested in it as well as an underside view of the assembled tabletop. I'm going to quickly color code everything so that you can get a rough idea of where each piece is going to come from. In terms of the order of operations, what you should do is start by cross-cutting this section so that we're left with a 90 by 48-inch chunk.
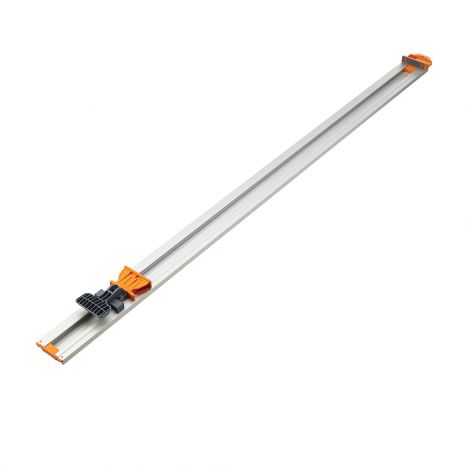
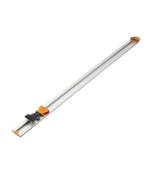
Then from that, we're going to rip three strips at 2 inches wide then one strip at 3 inches wide and whatever we're left with is going to be our top. Now let's get ourselves set up throw a piece of plywood on the table and start cutting things. The first cut that you want to make is removing the factory edge from one end of your panel and to do this you're going to want to use something with a straight edge. Now I'm using one of these straight edge guides that said a piece of plywood with a couple of clamps would work just as well.
Anyway, I'm going to set it up so that I know it's perpendicular with the long edge of my plywood and remove my factory edge or as much as I need to so that my piece looks clean at the perimeter. Where you place your straight edge guide is going to have to do with your circular saw. For me, the blade about 3-1/2 inches from the edge of the base plate. After making that first cut, what I'm going to do is measure from my edge guide that I had set up to where the actual cut happened.
Then moving forward, I'm going to use that distance for any calculations and it's going to be more accurate than trying to measure the distance from your blade to your base plate. That said, they should be pretty close so the difference would be marginal and I'm going to use 3-1/2 going forward. Next, I'm going to measure and mark 90 inches from the edge that we just cut and make a mark on each edge of my plywood. This is where I want to start the second cut. This is going to determine the finished length of the tabletop. If you want something different, adjust accordingly.
Regardless, remember that we need to place our guide 3-1/2 inches over from that. I'm going to mark on each side and then clamp my straight edge guide to my workpiece and if you want to verify that you have it right, you can measure it where your clamp is. Which for me would be 90 minus 3-1/2 or 86-1/2 inches. Once you're feeling confident, make that cut. All right, we can set the off-cut aside for now and we're going to come back to this later to attach it to our legs. Next with our big chunk of remaining plywood, we're going to have to remove the factory edges on the long ends.
Here I'm measuring and marking at just slightly over 3-1/2 inches on each end then clamping a long straight edge to those marks and making the cut. By the way, I recommend not being like me in these shorts and using some breathing protection. All right, the next thing we want to do is rip three long strips at 2 inches wide and one long strip at 3 inches wide. We're going to start with the 2 inchers. To do that, I'm going to need to set up my edge guide at 5-1/2 inches because 2 + 3-1/2 = 5-1/2.
A faster way to do this rather than measuring it out each time is to set a combination square to 5-1/2 inches and use that to mark things up. Here I'm marking that out and then making the cut and then I'm going to repeat this process two more times to make two more 90-inch by 2-inch wide strips. Then I'll do this once more to make a strip that's 90 inches by 3 inches instead [silence]. Once you've finished doing that you should have your tabletop three 2-inch strips, one 3-inch strip, and this chunk that's about 48 by 5-1/2 inches big.
Here I'm just measuring what I have leftover for my top and it looks like it's going to be 90 inches long and about 38-1/2 inches wide. In this section, we're going to cut and attach our four perimeter pieces to give the table the illusion of being an inch and half thick rather than three-quarters of an inch. Picking up where we left off, the first step is going to be choosing which face of the top you want to be the top. then flipping the whole thing upside down. Next, I'm going to use glue and clamps to attach our two long pieces to the underside.
These are already the exact perfect length because of the order of operations that we used to get to this point. If you don't have a ton of clamps, you could also use glue and a nail gun or screws. The only thing I'll warn you of is don't put them too close to the edge for now as you might accidentally expose them when we go to cut in our bevel in a few minutes. With our two long pieces attached, I'm going to take our third and final two-inch wide strip and crosscut it roughly in half. At this point, they'd be about 45 inches long.
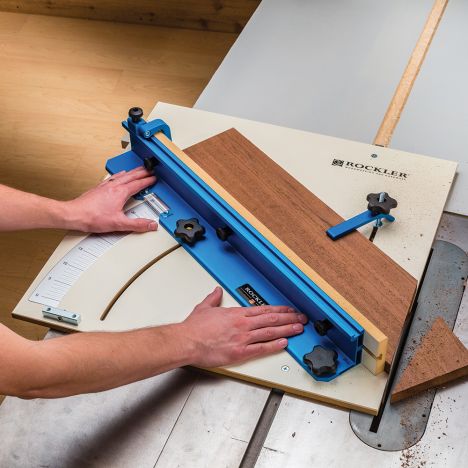
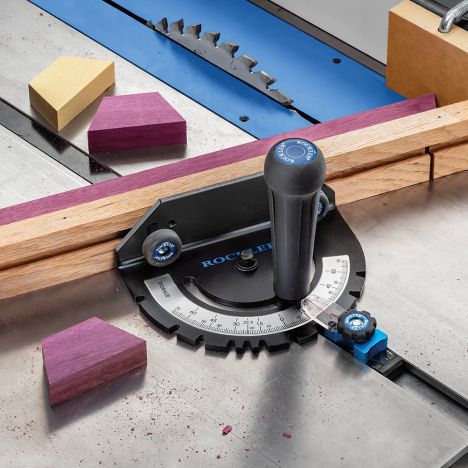
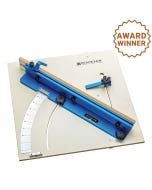
Then I'm going to hold them between the long pieces and mark exactly where we need to cut to get to the right length. For this cut, you can make it any number of ways. You could use a circular saw with a speed square like we did for the initial cut. You could use a miter saw if you have one. If you have a table saw, you could use a crosscut sled that you've made or something like this Rockler crosscut sled. You could also use a miter gauge on a table saw or you could use something like this Kreg crosscut station.
The point is you could use any number of tools to get the job done. I'll throw links to the tools that I showed here. Regardless of how you get there, after you do, go ahead and glue those on to each end and let's let them dry.
I'm sure there's a better name than belly support stretchers for these pieces but that's what I'm calling them so whatever. I guess the reason that I call them that is because they're like a little pot belly on the underside of the table or maybe a wing support stretcher. I don't know. Anyway, at this point, the only pieces we have left are these two chunks. In this chapter, we're going to turn these chunks into our belly supports. Now, this is probably the most complex shape that this table contains other than I guess the legs, but you're not making those.
If you prefer to keep it simple, you could just leave them as rectangles. I don't personally think that looks as nice but it's honestly not a huge difference-maker since you can't really see these things from a standing height and/or when the table's surrounded by chairs. It doesn't matter that much. In any case, the first thing that we're going to do is cut this piece in half and then measure out 42 inches and cut each piece to that finished length. Now, if you do want to make this belly wing shape, what you'll do is mark a line at the center and then mark a line an inch and a half down from the top on both ends and then connect the dots.
Then, I also marked a 45-degree angle on each end. Again, you can make any shape that you like because these angles are really just for looks. [silence] Whatever you do, once you have your shape marked out, probably the easiest or most approachable approach, I guess, would be a jigsaw. You'll just cut to the line and then sand it to clean things up. If you happen to have a track saw though, that's a much faster and more accurate way to make these kinds of cuts. I'm gonna use my ACS to quickly make these shapes.
Let's set these aside and we'll come back to them in a bit. I started off by splitting this chunk into four pieces. To start, my pieces were about 5 inches wide and 11.5 inches long. That said, I ended up wanting thinner pieces. After the fact, I ripped them to four inches wide. Whatever size they are with those pieces in hand, start by making a mark down the center of the piece lengthwise then transfer that line across the ends of the pieces on both the front and the back of each piece. Then I'm going to line the front edge of my leg up to the end of the plywood so that the centerline is running down the center of the leg.
Then, I'm going to attach these with two half-inch screws for now. These are just temporary and are going to get replaced later. As you can see by the door opening and my different shoes and my different clothes, it's the next day now. I'm going to start the day by getting a speed square and marking a 45-degree angle from the corner going towards the center and we're going to do this on each corner of the table. Then I'm going to elongate that line by just using anything with a straight edge.
Next, I'm going to take one of my legs and just mess around with the placement to figure out exactly where I want this thing to live ultimately. For me, this ended up being right at about 20 inches along each of my 45-degree marks that I made. Next, to figure out where to place our belly pieces, we're going to start by marking a centerline on the underside of each of the long pieces. Then I'm going to mark a center line on each of my belly pieces. Then if I hold these marks up to one another, I can mark out the total span of the belly pieces on the underside of the table.
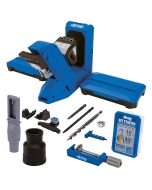
Next, I'm going to get a combination square and set it so that I'm making a mark about 10 inches in from the inside edge of the perimeter piece and then mark a line exactly where I want my belly to be placed. I'll also transfer that center line towards the center of my tabletop so that I can line that up with my belly piece's centerline to make sure that they're placed right in the center of the table. Not that it really would matter that much but I like things centered. Anyway, with everything marked out, next, I'm going to grab my pocket hole jig and drill out spots for five screws along the length of each piece.
If you don't have a pocket hole jig, you could use regular screws that are countersunk or just glue, or honestly, you could get one. They're not that expensive and they're pretty handy. I'm sure you'll use it for something else later. Now let's set the legs and belly pieces aside, do some detail work, and then we'll get these again when it's time to attach everything. Most of what we do in this chapter is optional. Again, there are a couple of ways you can do it. I'm going to start by breaking any of the sharp edges that I'm not going to route.
That would be the inside lip of the underside for me. Then I'm going to sand the outside edges and I'm going to go up to 180 grit for this. I'm also going to make sure that I slightly round over all four corners. If you wanted to stop here and then just break the top and bottom edges just like we did on the inside lip, you could do that. I wanted to put a 45-degree champer on the bottom edge and a quarter-inch round over on the top edge. We're going to start with the champer bit working our way around the table, taking several passes to get to our desired depth.
Which for me was about five-eighth of an inch. Now, if you don't have a router and/or you feel confident doing it, you could tilt the blade on your circular saw and use a straight edge to cut the bevel that way. Either way, again here, it's the next morning. I sanded my chamfer again just removing any little burn marks and making sure that it felt nice to the touch. Then I could flip the whole table over so that it's right side up and then use my round-over bit along the top edges.
Finally, regardless of what you do on the edges, we're going to sand the entire top with 180 grit and then 220 grit sandpaper. After doing that, we're going to need to flip this thing back over to attach the legs. I'm going to use a moving blanket and just be extra careful. If you don't have one you could just wait until the very end to sand the top. We've already done most of the work when it comes to attaching the belly pieces. Really at this point, we just need to position them to our marks and then attach each with five screws.
The legs are similar. The only trick here is that we're going to line up the marks that we had made on the center of the ends of our plywood spaces with the 45-degree marks that we made from our corners to ensure that the legs are at the proper angle. To attach them we're going to use one and a quarter-inch long screws through the slots, through the spaces, and into the underside of the plywood. In this video, I'm only putting two screws into each leg. That's because these are the prototype legs and I know I'm going to swap them out with the real thing as soon as I get them.
Here in this drawing, it shows how I might actually attach these. From here you can just use whatever finish you like using the best and then you're done. Well, let me be the first to congratulate you on a job well done. You've got a finished dining table. I don't have a finished dining table yet and that's because as I said earlier, I'm still waiting to get my hands on the non-prototype version of the legs. I'm hoping that here I'm able to add in some pictures of the real thing, but whether or not that happens, you should be able to see them and get more info directly from Semi Exact.
I'll have the links in the description. A few last things. At the top of the video, I mentioned that we have a PDF that you can download which will have more information and dimensional drawings and guides. There's a link for that in the description. Also, if you like this kind of content and want plans for some considerably longer and more complex build, check those out on the site as well. I also mentioned at the top of the video, that I worked with Semi Exact to develop these legs.
In full disclosure, I'm not selling these legs or getting money directly from any sales of these legs. Semi Exact is selling them. That said, I did invest money in the company a few months back because I really like their philosophy and the direction that they're headed and I wanted to be a part of it. I was also excited about the idea of getting to develop things that I just couldn't really ever do on my own like metal legs. I guess the long story short there is that I don't want people to buy these legs because they want to support me.
Featured Tools:


Chris Salomone: Hello and welcome to the video build series for this table that you see upside-down behind me. Now, this video is going to be a little bit different than normal because it's going to be structured more like our plans only albeit for a piece that's a little more simple or I guess more DIY than our normal plans are. Without getting too much into that, let's talk about this piece. This one's going to be called the general specific dining table and the reason that I called that is because it's based off of these legs.
Well actually not these legs, these are just prototypes, but anyway it's based off of these legs that I worked with a company called Semi Exact to create. Semi Exact general specific both oxymorons and that's the name. At the end of the video, I'm going to talk more about that but I don't want to get bogged down just yet. All right, before we get into it just a few things that I want to mention. Mainly in addition to this video, we've got a downloadable PDF on our website that you can get that has some written instructions and more dimensional drawings that'll help you through the build.
In those drawings, you may notice at times that dimensions that we talk about in the video might not reflect what's in the drawing. Beyond that, there's probably going to be times that your dimensions are going to differ from both the video and the drawing. That's fine, that's honestly the reality of building things, there's variations. That said, the main takeaway there is don't just blindly go off of numbers that we give and instead reference your own project to make sure that you get the best result possible. We'll try to point out those times as we go along.
Also as we work our way through the build, I'm generally going to do things the most simplistic way that I can, and then I'll present options or alternatives. Regardless of what you choose to do, make sure that you're comfortable around your tools and that you understand how they work. If you ever feel uncomfortable with a particular cut don't do it, find an alternative. Now, normally I would have said if you're uncomfortable contact me but those are for our plans that we sell tens of and this is for a YouTube video that hopefully will get viewed thousands of times, tens of thousands even.
I guess don't contact me, I can't keep up with that, and instead, I'll say Google it. All right, let's get into the build. For the version of the table that I'm going to be building in this video in terms of wood, all you'll need is one sheet of 4 by 8 by 3/4-inch thick plywood. Any species would do but I'm going to be using baltic birch. That's going to give us a finished table that's about 90 inches long, 38-1/2 inches wide, and about 29-1/2 inches tall. By the way, in our real plans, we give dimensions in both imperial and metric, but for the purposes of this video, I'm just going to stick with strictly imperial.
Sorry, I guess rest of the world. Anyway, then in addition to that obviously you would need something for legs and we're using the legs that I worked with Semi Exact to design, but you could certainly make your own or use hairpin legs. Just know that the dimensions might vary. Then in terms of tools, the absolute minimum that you would need would a circular saw, a drill, and a sander. In the video, I'm also going to use a router, some clamps and some other specific tools just to demonstrate some faster ways, but all that stuff is optional.
All right, I guess go grab your materials and then I'll meet you in the next chapter. In this chapter, we're going to start breaking our plywood down into what's going to become the finished top. Let's start by talking about how the top is going to come together and then we'll talk about the best way to do this order of operations to get the best results. I suppose if you wanted to build this table the easiest way possible, you could just get two pieces of plywood, glue and or screw them together, attach the legs and then call it a day.
We want to do it using only one sheet of plywood. If we look at the top from the underside, you can see that we're going to start with one large top piece. Then we're going to have four perimeter pieces that'll give the top a thicker look. Then we'll have these two support pieces, I call them belly pieces later in the plan that are going to be there to help prevent the table from sagging. Then finally each leg is going to get a little support block that'll make the table the right finish tight.
Now because we're all probably using different plywood and we're all going to end up building this a little bit different, note that your piece might sag a little bit in the center. Mine does ever so slightly but honestly, it's pretty sturdy. Honestly, I guess that's just one of the downsides to trying to stretch one piece of plywood as far as you can take it. If you are concerned about that at all, I would say either use more wood to help reinforce things or just make the table a little bit smaller. Either one of those or a combination of the two is going to help to get you there.
That said again, I made my table as big as I could possibly make it and it's pretty sturdy. Anyway in this drawing here you can see our pieces of plywood with the pieces nested in it as well as an underside view of the assembled tabletop. I'm going to quickly color code everything so that you can get a rough idea of where each piece is going to come from. In terms of the order of operations, what you should do is start by cross-cutting this section so that we're left with a 90 by 48-inch chunk.
Then from that, we're going to rip three strips at 2 inches wide then one strip at 3 inches wide and whatever we're left with is going to be our top. Now let's get ourselves set up throw a piece of plywood on the table and start cutting things. The first cut that you want to make is removing the factory edge from one end of your panel and to do this you're going to want to use something with a straight edge. Now I'm using one of these straight edge guides that said a piece of plywood with a couple of clamps would work just as well.
Anyway, I'm going to set it up so that I know it's perpendicular with the long edge of my plywood and remove my factory edge or as much as I need to so that my piece looks clean at the perimeter. Where you place your straight edge guide is going to have to do with your circular saw. For me, the blade about 3-1/2 inches from the edge of the base plate. After making that first cut, what I'm going to do is measure from my edge guide that I had set up to where the actual cut happened.
Then moving forward, I'm going to use that distance for any calculations and it's going to be more accurate than trying to measure the distance from your blade to your base plate. That said, they should be pretty close so the difference would be marginal and I'm going to use 3-1/2 going forward. Next, I'm going to measure and mark 90 inches from the edge that we just cut and make a mark on each edge of my plywood. This is where I want to start the second cut. This is going to determine the finished length of the tabletop. If you want something different, adjust accordingly.
Regardless, remember that we need to place our guide 3-1/2 inches over from that. I'm going to mark on each side and then clamp my straight edge guide to my workpiece and if you want to verify that you have it right, you can measure it where your clamp is. Which for me would be 90 minus 3-1/2 or 86-1/2 inches. Once you're feeling confident, make that cut. All right, we can set the off-cut aside for now and we're going to come back to this later to attach it to our legs. Next with our big chunk of remaining plywood, we're going to have to remove the factory edges on the long ends.
Here I'm measuring and marking at just slightly over 3-1/2 inches on each end then clamping a long straight edge to those marks and making the cut. By the way, I recommend not being like me in these shorts and using some breathing protection. All right, the next thing we want to do is rip three long strips at 2 inches wide and one long strip at 3 inches wide. We're going to start with the 2 inchers. To do that, I'm going to need to set up my edge guide at 5-1/2 inches because 2 + 3-1/2 = 5-1/2.
A faster way to do this rather than measuring it out each time is to set a combination square to 5-1/2 inches and use that to mark things up. Here I'm marking that out and then making the cut and then I'm going to repeat this process two more times to make two more 90-inch by 2-inch wide strips. Then I'll do this once more to make a strip that's 90 inches by 3 inches instead [silence]. Once you've finished doing that you should have your tabletop three 2-inch strips, one 3-inch strip, and this chunk that's about 48 by 5-1/2 inches big.
Here I'm just measuring what I have leftover for my top and it looks like it's going to be 90 inches long and about 38-1/2 inches wide. In this section, we're going to cut and attach our four perimeter pieces to give the table the illusion of being an inch and half thick rather than three-quarters of an inch. Picking up where we left off, the first step is going to be choosing which face of the top you want to be the top. then flipping the whole thing upside down. Next, I'm going to use glue and clamps to attach our two long pieces to the underside.
These are already the exact perfect length because of the order of operations that we used to get to this point. If you don't have a ton of clamps, you could also use glue and a nail gun or screws. The only thing I'll warn you of is don't put them too close to the edge for now as you might accidentally expose them when we go to cut in our bevel in a few minutes. With our two long pieces attached, I'm going to take our third and final two-inch wide strip and crosscut it roughly in half. At this point, they'd be about 45 inches long.
Then I'm going to hold them between the long pieces and mark exactly where we need to cut to get to the right length. For this cut, you can make it any number of ways. You could use a circular saw with a speed square like we did for the initial cut. You could use a miter saw if you have one. If you have a table saw, you could use a crosscut sled that you've made or something like this Rockler crosscut sled. You could also use a miter gauge on a table saw or you could use something like this Kreg crosscut station.
The point is you could use any number of tools to get the job done. I'll throw links to the tools that I showed here. Regardless of how you get there, after you do, go ahead and glue those on to each end and let's let them dry.
I'm sure there's a better name than belly support stretchers for these pieces but that's what I'm calling them so whatever. I guess the reason that I call them that is because they're like a little pot belly on the underside of the table or maybe a wing support stretcher. I don't know. Anyway, at this point, the only pieces we have left are these two chunks. In this chapter, we're going to turn these chunks into our belly supports. Now, this is probably the most complex shape that this table contains other than I guess the legs, but you're not making those.
If you prefer to keep it simple, you could just leave them as rectangles. I don't personally think that looks as nice but it's honestly not a huge difference-maker since you can't really see these things from a standing height and/or when the table's surrounded by chairs. It doesn't matter that much. In any case, the first thing that we're going to do is cut this piece in half and then measure out 42 inches and cut each piece to that finished length. Now, if you do want to make this belly wing shape, what you'll do is mark a line at the center and then mark a line an inch and a half down from the top on both ends and then connect the dots.
Then, I also marked a 45-degree angle on each end. Again, you can make any shape that you like because these angles are really just for looks. [silence] Whatever you do, once you have your shape marked out, probably the easiest or most approachable approach, I guess, would be a jigsaw. You'll just cut to the line and then sand it to clean things up. If you happen to have a track saw though, that's a much faster and more accurate way to make these kinds of cuts. I'm gonna use my ACS to quickly make these shapes.
Let's set these aside and we'll come back to them in a bit. I started off by splitting this chunk into four pieces. To start, my pieces were about 5 inches wide and 11.5 inches long. That said, I ended up wanting thinner pieces. After the fact, I ripped them to four inches wide. Whatever size they are with those pieces in hand, start by making a mark down the center of the piece lengthwise then transfer that line across the ends of the pieces on both the front and the back of each piece. Then I'm going to line the front edge of my leg up to the end of the plywood so that the centerline is running down the center of the leg.
Then, I'm going to attach these with two half-inch screws for now. These are just temporary and are going to get replaced later. As you can see by the door opening and my different shoes and my different clothes, it's the next day now. I'm going to start the day by getting a speed square and marking a 45-degree angle from the corner going towards the center and we're going to do this on each corner of the table. Then I'm going to elongate that line by just using anything with a straight edge.
Next, I'm going to take one of my legs and just mess around with the placement to figure out exactly where I want this thing to live ultimately. For me, this ended up being right at about 20 inches along each of my 45-degree marks that I made. Next, to figure out where to place our belly pieces, we're going to start by marking a centerline on the underside of each of the long pieces. Then I'm going to mark a center line on each of my belly pieces. Then if I hold these marks up to one another, I can mark out the total span of the belly pieces on the underside of the table.
Next, I'm going to get a combination square and set it so that I'm making a mark about 10 inches in from the inside edge of the perimeter piece and then mark a line exactly where I want my belly to be placed. I'll also transfer that center line towards the center of my tabletop so that I can line that up with my belly piece's centerline to make sure that they're placed right in the center of the table. Not that it really would matter that much but I like things centered. Anyway, with everything marked out, next, I'm going to grab my pocket hole jig and drill out spots for five screws along the length of each piece.
If you don't have a pocket hole jig, you could use regular screws that are countersunk or just glue, or honestly, you could get one. They're not that expensive and they're pretty handy. I'm sure you'll use it for something else later. Now let's set the legs and belly pieces aside, do some detail work, and then we'll get these again when it's time to attach everything. Most of what we do in this chapter is optional. Again, there are a couple of ways you can do it. I'm going to start by breaking any of the sharp edges that I'm not going to route.
That would be the inside lip of the underside for me. Then I'm going to sand the outside edges and I'm going to go up to 180 grit for this. I'm also going to make sure that I slightly round over all four corners. If you wanted to stop here and then just break the top and bottom edges just like we did on the inside lip, you could do that. I wanted to put a 45-degree champer on the bottom edge and a quarter-inch round over on the top edge. We're going to start with the champer bit working our way around the table, taking several passes to get to our desired depth.
Which for me was about five-eighth of an inch. Now, if you don't have a router and/or you feel confident doing it, you could tilt the blade on your circular saw and use a straight edge to cut the bevel that way. Either way, again here, it's the next morning. I sanded my chamfer again just removing any little burn marks and making sure that it felt nice to the touch. Then I could flip the whole table over so that it's right side up and then use my round-over bit along the top edges.
Finally, regardless of what you do on the edges, we're going to sand the entire top with 180 grit and then 220 grit sandpaper. After doing that, we're going to need to flip this thing back over to attach the legs. I'm going to use a moving blanket and just be extra careful. If you don't have one you could just wait until the very end to sand the top. We've already done most of the work when it comes to attaching the belly pieces. Really at this point, we just need to position them to our marks and then attach each with five screws.
The legs are similar. The only trick here is that we're going to line up the marks that we had made on the center of the ends of our plywood spaces with the 45-degree marks that we made from our corners to ensure that the legs are at the proper angle. To attach them we're going to use one and a quarter-inch long screws through the slots, through the spaces, and into the underside of the plywood. In this video, I'm only putting two screws into each leg. That's because these are the prototype legs and I know I'm going to swap them out with the real thing as soon as I get them.
Here in this drawing, it shows how I might actually attach these. From here you can just use whatever finish you like using the best and then you're done. Well, let me be the first to congratulate you on a job well done. You've got a finished dining table. I don't have a finished dining table yet and that's because as I said earlier, I'm still waiting to get my hands on the non-prototype version of the legs. I'm hoping that here I'm able to add in some pictures of the real thing, but whether or not that happens, you should be able to see them and get more info directly from Semi Exact.
I'll have the links in the description. A few last things. At the top of the video, I mentioned that we have a PDF that you can download which will have more information and dimensional drawings and guides. There's a link for that in the description. Also, if you like this kind of content and want plans for some considerably longer and more complex build, check those out on the site as well. I also mentioned at the top of the video, that I worked with Semi Exact to develop these legs.
In full disclosure, I'm not selling these legs or getting money directly from any sales of these legs. Semi Exact is selling them. That said, I did invest money in the company a few months back because I really like their philosophy and the direction that they're headed and I wanted to be a part of it. I was also excited about the idea of getting to develop things that I just couldn't really ever do on my own like metal legs. I guess the long story short there is that I don't want people to buy these legs because they want to support me.

Keep the inspiration coming!
Subscribe to our newsletter for more woodworking tips and tricks