Video: Building a Bathroom Vanity With Drawers - Part One
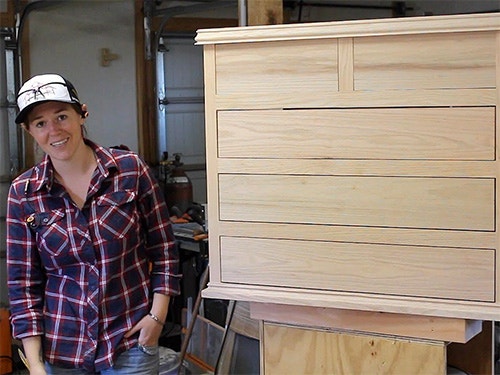
April Wilkerson designs and builds a bathroom vanity in this first of a two-part series.
April Wilkerson has been wanting to build a new bathroom vanity since she moved into her house. So, she took the time to model one on the computer and start making it happen. The build was moving along perfectly until it came time for the moulding on the drawer fronts.
You can find more great projects and techniques from April Wilkerson at her website.
Featured Tools:


April Wilkerson This week, I'm going to be building a new vanity for the guest bathroom, something that is a little bit bigger and that has more storage. To start the project off, I started with a full sheet of plywood that has an oak veneer on it. I used my track saw to break it down into smaller manageable sized pieces, cutting out the largest pieces first and also the first pieces that I'm going to need to assemble, which are the two sides and the back.
If you're interested in a full cut list and material list for this project and I will have a set of plans on my website, I'll leave a link in the description down below. I plan to stain my vanity. Therefore, I'm not going to be using any screws or nails. With that, I'm going to be making the box or the carcass of the vanity using rabbet joints. I switched out my regular saw blade for a dado stack in my table saw and cut a rabbet along the bottom as well as the two sides of both side pieces.
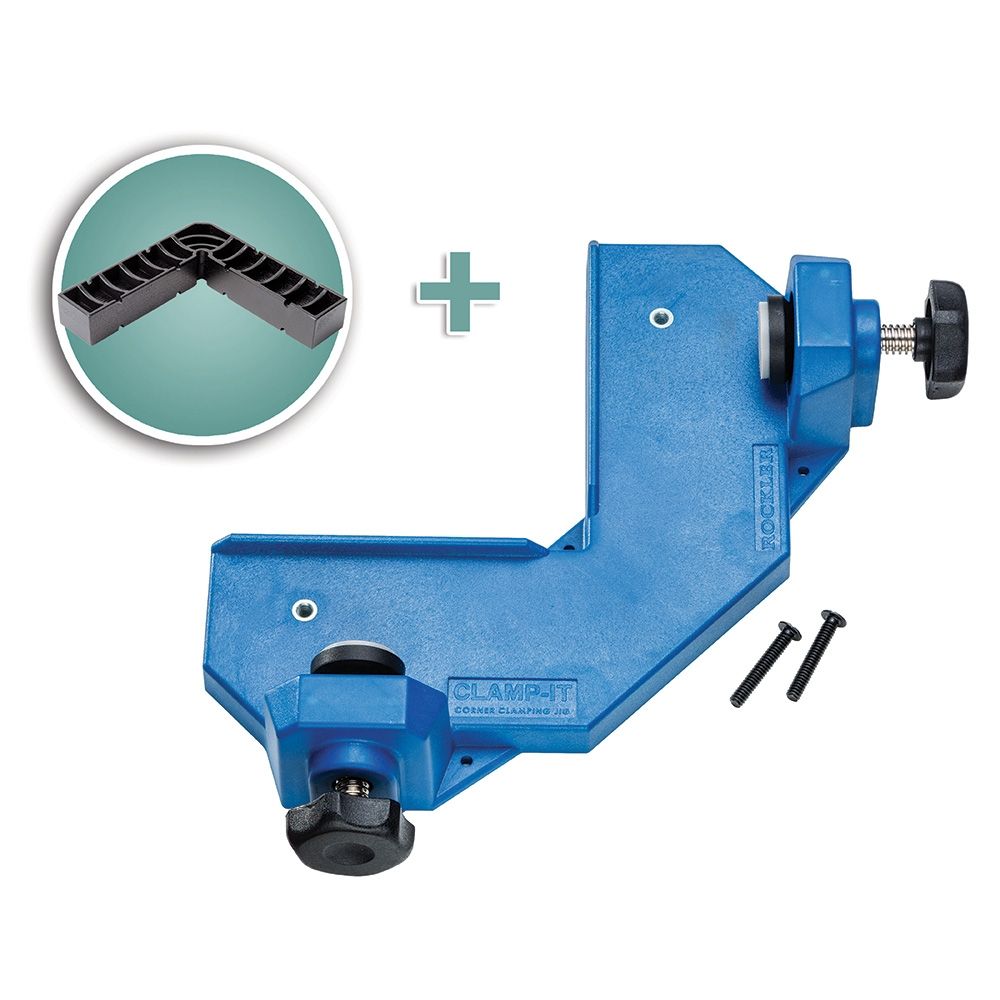
To start assembly, I first laid down some glue in the rabbet joints and then joined one of the sides to the bottom, utilizing these very useful writing or clamping jigs that Rockler produces. As you can see, I can simply slip it on to the corner and I will make sure that those sides are being glued exactly at a 90 to the bottom. Even though they hold them at a 90, it doesn't necessarily clamp it. After getting the jigs in place, I turned it on its side and then used some clamps to secure the bottom in place.
I then moved around to what will become the top of the vanity and attach two boards that will give me gluing surface for my sink and countertop to be attached to later on. I don't know if you can make it out in the footage or not, but this is why I made a rabbet the entire link, so that these two boards are actually recessed and setting inside of those rabbet, where the entire top is one flat, smooth surface. With both of those clamped and drying, I then flipped the vanity up on its, I guess, head then attached two more boards on the back that I believe they're called screw plates.
What these two boards do is give me plenty of area to screw into to attach the vanity to the wall whenever I'm installing it. That's pretty much it for the carcass. Then I moved on to making up a face frame. Since I went with oak veneer plywood for the carcass, I went with solid oak boards for the face frame. This step goes very quick if you put yourself a spacer to make sure that you're spacing all of those reels equally. I use glue and pocket holes to attach the entire face frame together.
At this point, the carcass is completely done drawing. I moved it back to my outfeed table to use as an assembly table and started attaching the face frame to the carcass. I lay down some glue and then put the face frame into place. Now, the top of the face frame is going to be flush with the top of the cabinet. However, in my bathroom, the right side is butted up against the wall. Therefore, I left a quarter-inch overhang. This overhang will really come in handy whenever I go to install it if my walls are not perfectly square.
Again, I'm not using brad nails since I'm staining it. I just pulled out every clamp I own and let it dry overnight. The next day, I pulled out my palm belt sander and did a little cleanup work on that face cream before moving forward. I not only cleared away all the glue squeeze-out, but also made sure that those joints were nice and flush. I set the body aside and started making the drawers. I already had some half-inch plywood strips cut. That's what I decided to go with for my drawers.
I first cut all of my pieces to link, then cut a dado along the bottom of every single piece. This will be used later on to receive the bottom of the drawer. Next, I started working on the joints for the drawers themselves, which this time I decided to go with a joint called the lock rabbet drawer joint. That's a little difficult to say. I use the dado stack in my table saw to cut in a rabbet on all of the front and back pieces of the drawers which, of course, creates this tongue that you see so that you could then take the side pieces of the drawers and cut a receiving dado.
It's a very simple joint for drawers, but it's very strong. Since I'm going with plywood for my entire door assembly, I not only glued in the entire bottom, but also all of the sides to each other. As you can see, the pieces go together like a nice simple puzzle. After getting all of the pieces in their place, I came back with my brad nailer and threw in a few brad just to hold everything in place while that glue set up. Next, I moved on to making my own trim.
To make my own trim, I threw the router bit that I liked in my router and then clamped some oak boards into my super jaw. With this being a very big bid, I not only turn the speed of my router down, but I also made about three or four passes to make the complete profile of this fit. Now, the consistency of the molding is dependent on keeping my router flat. To give the base a little bit more stability, I clamped two more boards behind the one board that I was actually carving into. I not only did this for the custom trim that I wanted for the bottom of the vanity, but also the profile that I wanted for the top.
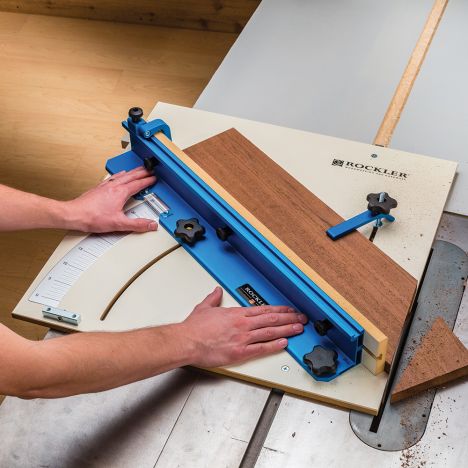
I personally think the process is so satisfying. After getting both of the profiles carved in, I made myself comfortable and gave both a good sanding using these very handy Contour sandy pads. They not only give you a round surface to attach sandpaper to, but also a concave surface which is great since I have both. Once the trim was all cleaned up, I used my table saw to cut it to the exact height that I needed it then used an auxiliary fence at the miter saw to cut into miter on the pieces.
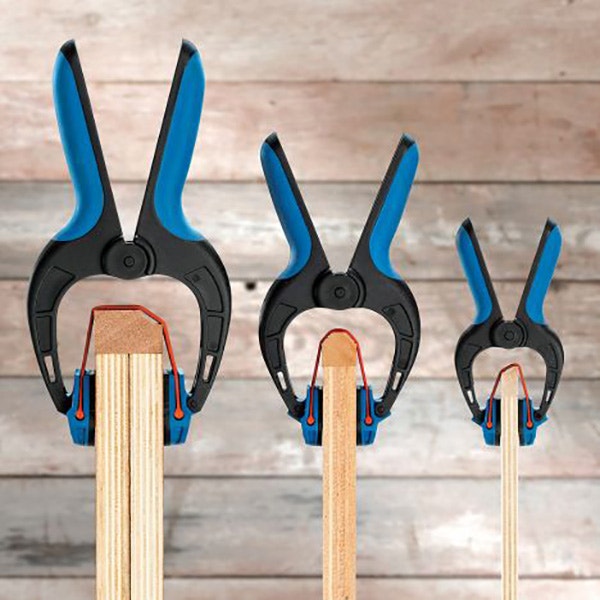
In my bathroom, the right of the vanity will be up against the wall. I'm only attaching trim to the very front as well as that left side. Since I don't want to use nails to attach anything, I went with Bandy Clamps to secure this trim to the carcass while it was drying up. These clamps are actually really cool. They have that stretchy metal portion so that you can apply a lot of pressure as you're grabbing on to something. After getting the top trim attached, I moved to the bottom of the carcass and repeated the process with the bottom trim.
Whew, it is starting to look like something. When I was making the face frame, I actually meant to attach a small vertical piece in that top drawer just to break up the consistency of the look. Of course, I did not. At this point, I added it in real quick. Now, this very top space is actually going to be for drawers because the sink will be in the way. I measured the opening then cut the drawer opening to its exact height and width. Later, I'll come back and attach these from the inside.
Note that another option is to install some hardware to make them flip outdoors, but I personally didn't want to go with that option. After cutting the three real drawer faces, I then moved on to installing the doors themselves. Whenever I personally install sliders, what I do is I leave the sliding components, A and B, together on the carcass. I lay down some spacers and then insert the drawer body. Pull out the drawer slider, then attach the very front of it to the drawer. Then measure from the top of the drawer down to the slider before attaching the second screw.
This will make sure that the slide is being put on level to the drawer, but it'll also make lining up part A and B of the drawer slides very easy. After repeating the process for the other two drawers, I then moved on to installing the drawer faces. First, laying down some spacers on the bottom as well as one of the sides so that I could just bump the drawer face up to these spacers, I use clamps to attach it to the carcass so that I could move to the back of the cabinet and attach the drawer front from the inside of the drawer.
It was at this point I realized I forgot to modify the two top drawers to go around the plumbing of the sink, but no big deal. I very quickly took them out and used my circular saw to cut out a notch along the back and used a jigsaw to complete the cut into the bottom. Essentially what I'm going for is instead of a solid drawer, I'm going for a U-shaped drawer. Something that will still allow me storage and use of the space but, of course, also something that's not going to be knocking into the pipes underneath the vanity.
I used glue to attach all of these dividers then came back with a brad nailer to hold them in place while that glue set up. There we have it. I ran into a roadblock. The router that I really want to make the trim for these door faces, I won't be able to get for a few more days. With that, I'm going to go ahead and split this project into two videos. If you're interested in seeing this vanity complete and installed, then stay tuned for Part 2. I will see you then.


Keep the inspiration coming!
Subscribe to our newsletter for more woodworking tips and tricks