Video: DIY Retro Stereo Speakers
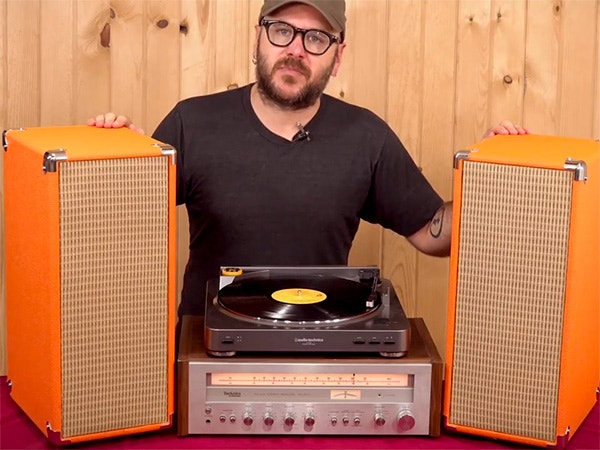
In this video, David Picciuto builds a unique set of vintage stereo speakers.
In this DIY speaker build, David Picciuto uses using 1/2” baltic birch plywood to make a pair of stereo speakers that look like vintage guitar amps.
You can find more great projects and techniques from David Picciuto at his website.
Featured Tools:
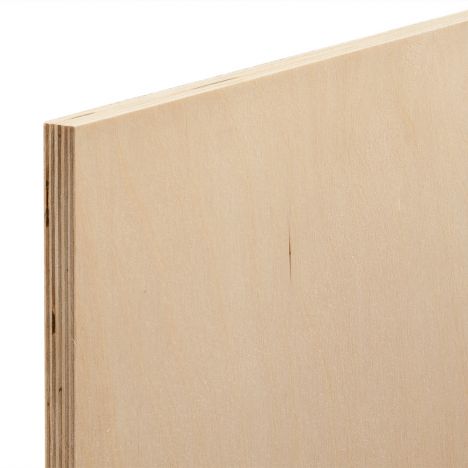


David Picciuto: Hi, I'm David Picciuto and today we're going to make a set of stereo speakers to look like vintage guitar amps. We're going to use half-inch Baltic birch plywood that would be covered in orange Tolex. We'll then add some corner protectors and stretch some grill cloth over the front to give them a classic guitar amp vibe. The speakers and wiring come as a kit from Rockler, which they also provide the wiring instructions and interior dimensions. I'll start by cutting up all the backs, fronts, tops, bottoms, and sides to the proper dimensions. Here I'm cutting up thin strips that will be used for the corner reinforcements and grill cover. Finally, cut some corners for the grill. For the back pieces, I'll mark where to cut the holes for the terminal cup, and for the front, I'll mark the placement of the woofers, tweeters, and air tube you ensure to stick with the exact placements as in the instructions.
I'll draw out what I can over on the drill press. For the whooper opening, I'll only use my jigsaw. Now it's time to glue up the cabinet. I'm just going to use some simple butt joints.
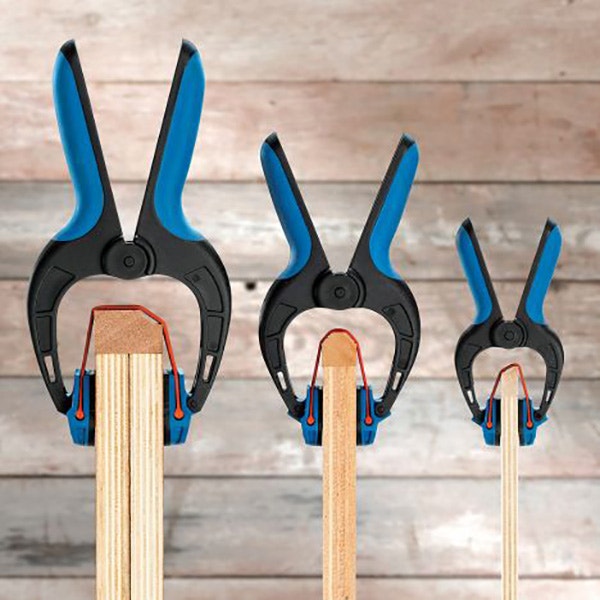
The Rockler assembly squares clamp to the corners makes the process much easier. I'll add glue to all the joints and a pin nailer to secure it in place. In a corner, I'm going to add some thin strips of plywood. This will add some reinforcement but more importantly, it'll help align the back panel so it sits flush and the front so it's inset to allow our removable grill cover. Here, you can see me using a piece of scrap for proper placement.
The front panel just slides right in and rests on the thin strips of plywood. I'll then secure it in place with some pins. For the grill covers, I'm going to assemble everything with glue and clamp the pieces in place with tape. In a later step, I'll stretch a grill cloth over the top. The corners of the cabinet all need to be rounded over so the corner protectors will sit flush.
I didn't take into account that I'd be rounding over the edges when pin nailing so I did run over a couple of pins here. The pins are so small that I didn't even notice until later. Now it's time to cut the Tolex to width. Because the Tolex I ordered was just a tad too short, I had to add a thin strip on the bottom of my speaker cabinets. I'm going to cover that strip with masking tape to avoid getting glue on it. To attach the Tolex to the cabinet, I'll just brush some contact cement right on the plywood. You can let it dry for 10 minutes or you can use a heat gun to speed it up. Once it gets tacky, I'll add a second coat and once again, use a heat gun to speed up the drying process. I'll then use some spray adhesive on the back of the Tolex. This creates an almost instant bond when attaching to the cabinet.
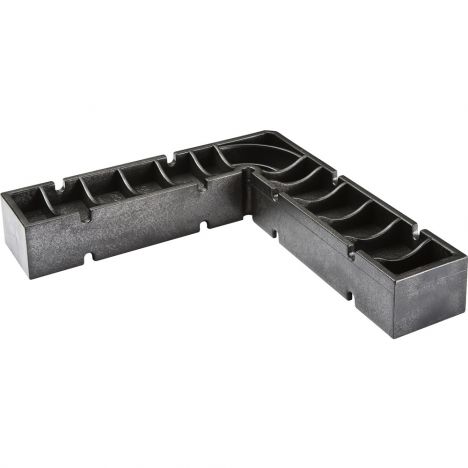
Don't worry though as the bond isn't too strong and allows you to pull it off and reposition if necessary. Using a roller, I'll squeeze out any air ensuring a nice solid bond. Then it's just a matter of repeating the process one side at a time. A quick note, the contact cement has a very strong odor and I ended up covering the second speaker cabinet outside. Be sure your area is well-ventilated and take the proper safety precautions. For the seam, I'll overlap a Tolex and use a straightedge to cut through both layers. Then remove each waist piece and that should form a perfect seam. The corner may seem a bit tricky, but just cover everything with some contact cement and cut 45-degree miters. I was a little sloppy with mine, but the corner protectors we're going to add will cover that right up.
Then add some staples if necessary. I wasn't planning on painting my grill and the face of the speaker, but I found the grill cloth to be slightly see-through so I thought I'd darken up the inside. For the grill cloth, I'll use some guerrilla duct tape and stretch it out as much as possible on my bench. Ensure to not distort the line pattern. I'll then add some spray adhesive to the grill and just a touch to the cloth. Press the grill down on the cloth. I'll then run a clamping call down the middle to be sure the cloth doesn't move on me. I'll then run some staples down the side in the back.
I'm using an eighth-inch piece of plywood to raise the stapler for better staple placement. Now next is to screw the speakers down, hot glue the air tube, and velcro the grill in place. Follow the wiring diagram that came with the speakers and crimp everything in place. It's a pretty simple process and doesn't require any soldering. On the back panel, all hot glue some polyfill that came with the kit. The subject of polyfill can be complex, just know that it helps to fuse the waveforms inside the box for a better and bigger sound, and for the cherry on top, our corner protectors, and some rubber feet.
I really couldn't be happier with the way these came out. Overall, a real simple build, and with all the Tolex and grill cover colors, your options are endless. This is my first time using Tolex and I'm lucky my sloppy corners were hidden with the corner protectors. If you have any questions, please ask them in the comments below. I'd also love to hear how you would cover your speakers. Visit my website for the companion article that goes along with this video. You'll find more detailed instructions, links to all the supplies as well as plans for this project. I'd like to thank Rockler for supplying some of the materials used in this video.


Keep the inspiration coming!
Subscribe to our newsletter for more woodworking tips and tricks