Video: Modernize Your Workbench
Modernize your workbench and make it more functional with these add-ons and accessories.
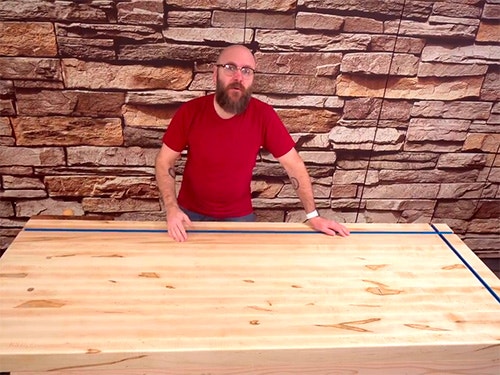
David Picciuto shows you the additions he's made to his ultimate workbench to bring his workshop into the 21st century.
You can find more great projects and techniques from David Picciuto at his website.
Featured Tools:


David Picciuto: Welcome to Make Something with me David Picciuto, and this is part two of my workbench video. Where we left off last time was we still needed to clean up the ends of the workbench. We needed to add all the accessories that make this a modern workbench, put some finish on there and attach the top, so let's get started. Today's video is sponsored by Rockler Woodworking and Hardware. Create with confidence.
It is time to clean up the ends of my workbench here. My circular saw will not go all the way through in one pass, so what I'm going to have to do is cut one time, flip it over, cut it another time and then take our belt sander and sand them smooth. I have a straight edge clamped to my bench here and I'm just going to follow that straight edge. There's no dust collection for this saw so it might be a little messy. Watch your fingers. I'm just going to take a belt sander and sand that flush.
Now, it's time to attach the top of the bench to the base. When I made the base I added this little piece of wood along the front and back, and that gives me a place to put in screws. The placement of the top is pretty critical to my needs. I want the front face flush. That way, if I have a longboard and I need to clamp it to the front here I can have it sit on the floor and everything is flush.
I want a little lip over here on this side in case I need to get a clamp on here. Then over here on this side, it needs to hang out so much because I have a vise that I'm going to install. Then it hangs out this way so I can sit here and use this as a desk if I need to.
When I made the workbench top, I made it in three sections. Each of the three sections was perfectly flat as I ran it through the planer, but when I glued those three sections up there was a little dip in the middle section. I took my hand plane, it's the largest one I have a number 6 and I planed it down. Technically you should probably be using a larger plane like a number 7 because the longer the bed the flatter it is you're going to get. A lot of woodworkers want a perfectly flat workbench and that's great. I find if there's a 32nd of an inch dip in there, it's not going to ruin any of my assemblies.
You could do the the router trick where you build two slides along the edge then you take your router all the way through. That sounds like way too much work for me, and I don't want to spend that time doing it. It looks messy Jimmy Diresta came up with an amazing idea. Take a piece of plywood, glue sandpaper on the bottom of it then take two people and run that piece of plywood over the bench, which I thought was pretty darn brilliant.
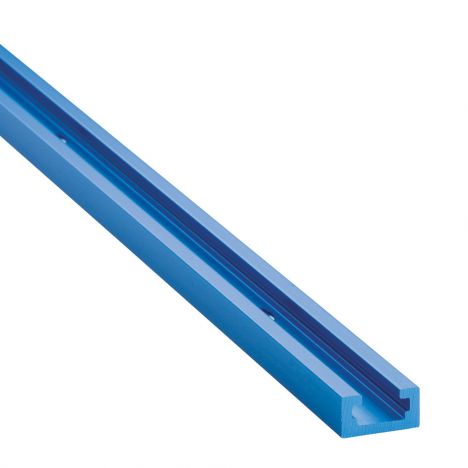
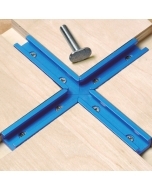
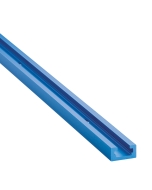
We were actually going to do that, but it's flat enough. It's good enough for me. Next thing we're going to do is we're going to round over all the edges because if I don't eventually that will chip out. Next thing we need to do is, we're going to install the t-track into the bench. I'm going to run t-track this way, and run t-track this way. If I have to install more in the future I will but for now, I'm going to install this t-track so I can use different accessories on the workbench top. We'll talk about that a little bit later.
To do so, I need to write a groove into the bench where this sits flush with the top. This is three-quarters of an inch thick. I have a half-inch bit in my router, so we're going to do it in two passes. I'm going to go three inches from the bottom. There's a little intersection here that you can get from Rockler, all this comes from Rockler. Three inches from the bottom allows it so this doesn't overhang, it's in set just a little bit. This is the part that I am most nervous about, I got this beautiful maple top and I'm just gonna take a router and run it right down in the middle of it. Not too thrilled about this part, so here we go.
I moved my plywood fence over just a little bit, and we're going to do the second pass now. Oh, perfect. Cool. Now we'll do the other side. We're going to start with our little intersection right here, just going to pre-drill and screw it in. Check this out. This is also from Rockler. How cool is that? We're gonna stick this piece in there, butt it up against there. I know I want to come out, right there we're going cut that off. This is aluminum so this will cut with a woodworking blade in the miter saw.
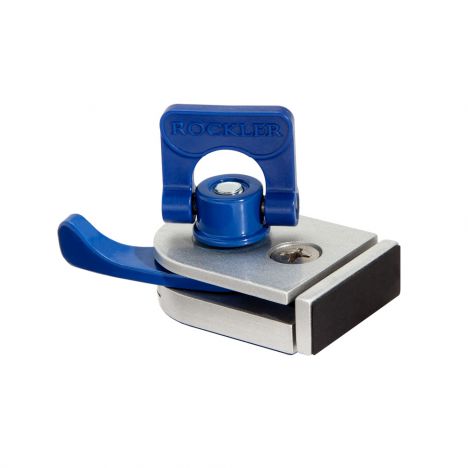
Let's talk about a couple different ways on how to use this t-track in your workbench. I had these deluxe hold-down clamps from Rockler here, and it slides right into the t-track check that out. I'm going to put another one in over here. Boom, now my board is locked into place. That is one way to hold down a workpiece, let me show you another way. Rockler t-track auto lockdown clamp and again, it fits right into the t-track. It auto-adjust to the height of your board to lock it down. That's pretty cool.
You've seen me use bench cookies quite a bit in my videos, I use them to hold my pieces up and now I can use the t-track with them as well. I can lock them in, and then I got a nice way to get my piece up off the bench. I could finish it, do whatever I want. Finish all the sides at once, flip it over, boom. If you have t-track running down the middle of your bench that might even be easier for you, but I use these cookies all the time. They got a nice grippy surface. Love the bench cookies from Rockler.
This is a Rockler vacuum pump kit and check this out, these things slide into the t-track and I can lock them down. This is so cool. I flip on the switch, and this creates a vacuum on here.
I can set my board on here, I'll press it down for a few seconds, and it's locked down. No clamps, nothing in the way. I could easily route all the way around this without any clamps getting in the way. That is super cool. Ah, I'm so excited. I can also use this over the drill press and the CNC and any of the other tools that have a t-track installed. The walnut plywood held on there just fine.
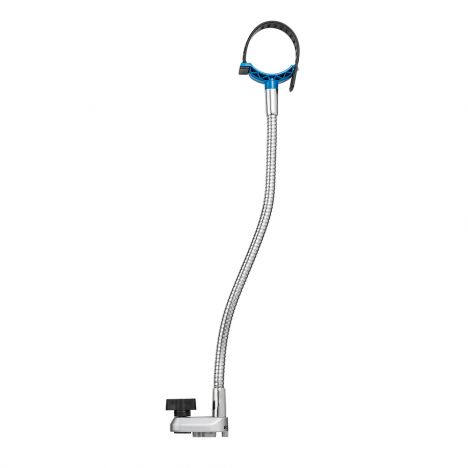
I wanted to use a piece of red oak and the only piece that I have here is my Shellac example that I made a while ago. The red oak is a little bit more porous, and so I do want to see if that suction is on there as well. There it goes. Yes, that's pretty cool. Another thing from Rockler is this t-track flex hold arm. This fits in the t-track. Of course, I can bring my dust collection hose on here, clamp it on there. Now I can have that right at the source if I'm drilling or routing or carving or whatever. Boom, that's pretty cool.
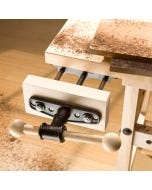
Every bench needs a good bench vise and I am using the heavy-duty quick-release from Rockler. I've already milled up a piece of walnut that I want to use, drilled some holes, used my vacuum clamp to sand it and round over the edges. How cool is that? I'm just going to stick this in here and screw it in place. All right. It's looking good. Love the quick release.
I like to use dog holes to hold down the material at times, so I'm going to put one in the vise and then maybe one or two in the bench and I can always drill more as needed. I got a big little spade bit in here. Three-quarter inch. I like to get them started with the spade bit, and then I'm going to switch over to this guy. The spade bit has a nice tip on there that'll keep it from slipping around.
Dog holes in my bench allows me to use items like this. Dog holes are a little tight yet. Put this bench dog and the vise here, now I can clamp my material this way. Having the dog holes also allows me to use a holdfast. This is a custom-made one made by a local artist but you can buy them at rockler.com and so you just stick it in the hole there, whack it down and your piece is secured to the bench. Very old way of holding things down to the bench. It works great. I use this all the time. That isn't going anywhere.
Another thing that Rockler sells for the T-track is this little inline cam clamp. Again, fits in the T-track, and you can wedge your piece in there. You tighten that down and then uses cam action to clamp your work, so if you don't have dog holes you could use that. We got some electrical installed underneath the bench. Drilled a hole in here and then we're snaking it through here behind where the drawers are going to go, and then we have it plugged into the floor. We have an outlet over here.
Then down underneath, we have our outlet on the floor. I can plug that in there. This outlet strip has one, two, three, four, five, six, seven outlets. That's probably six more than I'll ever need but it's there in case I need it. Up top. In the past, I have not put any finishes on my bench just to keep it nice and rough so pieces wouldn't slip and move on there. This time I'm going to change it up. I'm going to use some clear Shellac just to give it a little bit of protection and maybe keep the nice color of the maple over time, and protect it from some finishes, and waxes, and whatever else might get on there.
You might have seen that bench wobble a couple times in the video. That's because my floors are crazy uneven. It's like a pitcher's mound in the middle. This is a garage floor and so on the feet here I have these wedges that I have to put in and I'm going to chop them off and I got them all the way around back. Even got some over here to level it out and take out the wobble.
You might remember from part one, I only had two drawers over here and I turned that into four. I didn't want really deep drawers. I also put a chariot veneer on all of the drawers and added handles. It's just to make it look pretty but check this out so all the drawers, not all of them. A few of them have this foam in here to keep things organized. I have not cut out the foam yet but I will once I figure out the perfect placement.
I have a drawer that's just screwdrivers and squares. I have a drawer that's only drill bits. I have a screw drawer which I want to make into little compartments to keep all my screws separate. What else do I have down here? Oh, I have the hammer drawer. On the hammer drawer, I do have the foam cutout on there. It's hammers and cutting tools here. The big drawers I have them organized.
These are just for clamps. This top one has all my F-style clamps and then the screw clamps and the drawers open from both sides so I could actually open it from the other side. It goes all the way in or this way. The clamps are organized by these Rockler F-style wall clamp holders but it also works great in a drawer here. That's what we got going on there and then we got the Rockler wood screw clamps. This drawer is going to be my aluminum bar clamp. These are the Rockler aluminum clamps. These are the ones that I go to first for all my projects. I love the way they work.
Then down here we have all these guys. A bunch of the Rockler bandy clamps. Love these guys. Then the Bessey clamps. My Bessey clamps are a little messy, they got glue all along them and they don't work as well which is why I go for the aluminum bar clamps. Eventually, I want to make a little bin in this drawer to keep these guys all separate because organization is the key to having a clean shop.
I made this side of the bench flush in case I need to clamp boards to the face of it. I can push the drawers in out of the way if I need to and then clamp my boards right to the bench. It's very unusual that you need to do this but when you do this comes in handy. That's why the ends hang over on all the other sides except the front. All right so we talked about the benchtop and the T-tracks that you can get in there and all the wonderful accessories. By far, my favorite is the vacuum pump. That thing is so cool. That is going to come in so handy.
I've been using this workbench for about three weeks now with the track in here and I have decided that I do want to put in another track over here, and another track all over here, all along the edge so I need three more intersections. I think it'll just come in handy. With the T-track installed, I can add these bench cookies in there and I can raise pieces up off the bench and that would allow me to run a jigsaw up above the bench without the blade hitting the bench. I think just having more T-track in here is going to come in useful for me.
Over here on this side, I installed the Rockler T-track accessory storage rack where all these guys are actually ready right there. This is my Festool dust extractor that I use for my sander and my router. It's the smallest one available and it hangs right there on the bench. I also keep my air compressor and pin nailer right here. I still need to do a little bit more organization probably somewhere that I could hang this up and I can keep the hose right there.
There is an outlet underneath the bench that allows me to power everything so this is kind of the area that's not seen on camera and this where I can store a lot of this stuff. Over here on this other side, I have, you might recall this video for this little storage caddy. I have all my sandpapers and my craft paper over here and then more drawers with all my tools and stuff. Everything is always at the ready when I'm at the workbench.
Of course, we got the quick release bench vise. It's great. A little one turn loosens it and then boom tightens. I got a little fancy and here's some figured walnut on there but hey, it's my bench, I can do what I want but that'll come in real handy. Got the dog holes on there for more accessories. There is a coat of Shellac on the top here but I'm not real concerned about the bench getting dented up and there's already scratches. I've got drill marks in here. Oops already. Dents for me throwing the clamps on there. This bench is going to take abuse. That's what it's there for. It's not there to look pretty. Although I like that it looks pretty but it's made to take a beating.
I would like to thank Rockler Woodworking and Hardware for sponsoring today's video. Almost all the accessories that you see here come from Rockler. Like the T-track, the bench vise, all the accessories that go into the T-track, the clamp storage. What else have we got? Oh, the vacuum pump, that thing is super cool. I'd like to thank Rockler. I have links to all the stuff that I used down below in the description.


Keep the inspiration coming!
Subscribe to our newsletter for more woodworking tips and tricks