Video: Power Carved Pendant Light
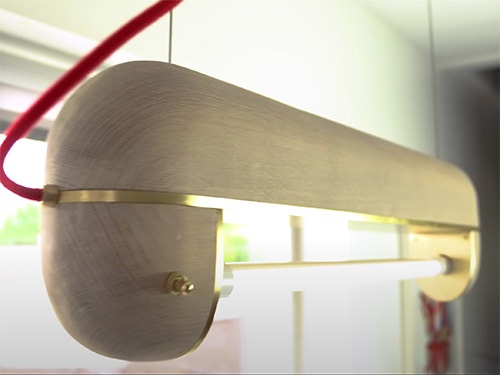
In this video, Michael Alm builds a Pendant-style light fixture, which pushes his skills to the edge.
Michael Alm's hanging carved light includes power carving, brass working, sheet metal bending, electrical wiring, and more all packed into this one build.
You can find more great projects and techniques from Michael Alm at his website.
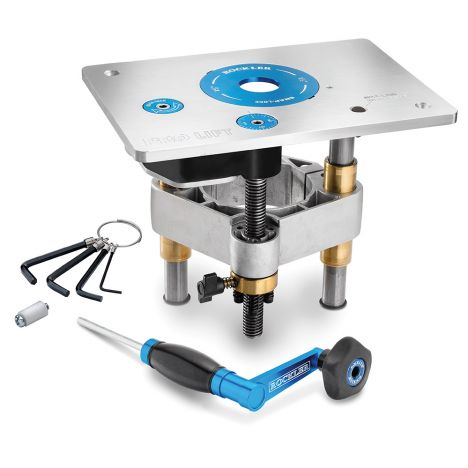
Featured Tools:


Michael Alm: I've had this one design idea in my head for years but I haven't taken the plunge to make it yet because I felt like it was out of my comfort zone. I've taken a few steps just to get up to this level, done a lot more power carving, done a lot more of brass work, and I built a couple light fixtures. I think I'm ready to take the plunge and that's what I'm going to do this week. I'm going to give it a shot, I'm going to see how it goes. This is hugely experimental but I'm really excited about it.
Up to this point, I've made a lot of drawings of this light fixture, but I've never actually seen it in space. I like to make a template so that I can get a feel for the proportions of it. I make a lot of templates in my shop and they have lots of different functions. You're going to see how I use this throughout this entire build, and it comes in a lot of handy. I find that inspiration comes from the strangest places sometimes, and this project is inspired by a 24 inch LED replacement bulb. I replaced all the shop lights in my shop from fluorescent tubes to LEDs, and I found these really cool bulbs. They're super lightweight, they're easy to use, they're direct wired, but that form factor for some reason I found really inspiring.
I was really happy with the proportions of this, I figured out where the light fixture needed to be. I was ready to start cutting into some more expensive materials. I picked up this beautiful piece of quarter-sawn white oak from my local Rockler store. I chose the Corson wood because it has those beautiful rays in it. I knew that power carving into it would reveal those rays, and it's just going to have a really cool effect. It's also going to help me book match the ends because the grain is so straight throughout the board that it's going to match up really well as I glue the multiple parts together.
I cut down the oak to the correct size for my templates but then really quickly realized that I needed another template. This one is going to be the vertical profile of the piece. I'm going to use this for both the top and the bottom, and this just makes sure that everything stays symmetrical. These oak blocks are extremely heavy and since this is going to hang over my head at my desk I want to make sure that I lighten it as much as possible. I can use that template that I just made to trace out the interior lines and that's going to help me when I power carve to know where to carve away, and also to make sure that the weight is evenly distributed throughout the light fixture.
Now, it's ready to carve and for that, I'm using the power carving unit from Arbortech with their turbo-plane attachment installed. This is my go-to for roughing passes, it's great for hollowing out materials and it just makes short work. Even this really dense oak, it chews right through it. I spent about between 5 and 15 minutes per section of these just hollowing them out. I don't need them to be super precise but just nice enough saw cut, plenty of glue surface later, but it's also pretty hollow to eliminate that weight.
I find using this tool is pretty intuitive and with just a little bit of practice, you get a feel for what grabs and what doesn't. It never really jumps out of your hand, it might just grab a bit of grain and tear it out if you're not going in the right direction. I've also found that if I tuck my elbows and move from my legs rather than my wrists, I get a more consistent cut. Also, I'm sure a lot of you are looking at the table and being like, "What this is hooked up to dust collection, it doesn't look like it." That's because my dust collector was full when I was doing this. I don't know why I didn't think to empty it out but I did later. You'll actually see the dust collection later in this build but for now, it's basically, not working at all.
When I stand and carve I can't really see those lower lines or the high spots, so I go over the top of those high spots with a sharp bit, and then I can knock those down really easily. I'll go back and do that several times throughout the process just to get an even carve throughout. After test fitting the two panels together, I noticed that they had a bit of a warp in them, there was a gap in the center, and so I decided to run them through my drum sander just one light pass. I didn't have a lot of material to spare, so this was enough to just get them flat enough and get them ready for the glue-up.
One of my favorite tricks for gluing up things that need to align perfectly is to add just a little bit of table salt into the glue. The crystalline structure of the salt embeds into the wood when you put pressure from the clamps and doesn't slide around like it would with just regular wood glue. One thing that I like about working with Arbortech is they're always coming out with new designs and new styles of carvers. They just came out with the precision carving system, and this comes with three different carving heads that go onto the power carving unit. This is the mini ball gouge, it's literally my first time testing it out, and it works super well.
I love how much reach you can get in, the fact that I can clean up the inside of this is pretty amazing but I really liked this barrel carver. The ball couch worked well right on the seams or rounded edges, but the barrel carver was great at flattening seams. You can see I was able to run it along this whole section and flatten it out really really well. I'm constantly impressed with Arbortech stuff.
Again, I'm going to reference that template, the template tells me where that inner carved section is so I don't accidentally cut through it and ruin the piece. [music] With it roughed out on the band-saw I can go back to the turbo-plane and refine the shape. Once I had it roughed out, I could switch over to the sanding disc. This is a flexible sanding pad and I just have 120 grit sandpaper on it. This is a good way to refine it before going to the final hand sand. [music] Now, we're into the brass-making portion of the build, I'm so excited about this. I'm having a blast working with brass, and I will say that I was super nervous at this stage.
If you follow me on Instagram, you would have followed a lot of the drama. I'm just really excited about brass, I can't wait to use it in more builds and this chunk of four-inch by quarter-inch brass is just amazing to work with. I'm not really set up to work with brass, I'm slowly figuring out how to work with it, but it seems like the porter band was a great way to go. I just cut a little bit away from my line, and it did a pretty good job. All right, okay I can fix this.
I spent a lot of time thinking about how this light fixture is going to get assembled and disassembled so that it can be repaired if need be but I ended up coming up with just really pretty brass screws. I don't mind exposed screws on things. I get a lot of flak sometimes for using exposed screws, but I like the industrial look of it and that's kind of the goal with these light fixtures to keep it looking somewhat industrial. I just made sure to drill out wider than the actual threat of the screw, and then I countersank with this counterbore bit. These are great for metalwork, they're so clean and consistent.
I drilled them out, I had my depth stuff set so that they were all set at exactly the same level, and that way the screw head would sit perfectly flush on the surface. Again, I've just rough cut this piece of grass, and I'm going to attach it directly to the oak. This was all theoretical, I didn't know whether it was going to work or not. I talked about it a lot on Instagram, whether I could do this or not. Some people said, "No," some people said, "Yes, it will work fine." I'm going to try template routing brass, I'm going to use a router bit on this brass, we'll see if it works.
I was shocked with the results of this, I did not expect it to go anywhere near this smoothly, it looks awesome, and look at these crazy shavings that came off of it. I removed the blue tape just to check to see how everything looked, and it seemed to be just fine. I was super impressed. Like I said, one thing is that I was going very slowly, my feet speed was very slow. I don't have a variable speed router but if he did, maybe turning the speed down a little bit lower would be a good idea too.
I'm building this light fixture from the top down. I've made the top cover and then the middle brass reflector plate. Now I'm making the bottom side wings that are going to hold the actual light fixture itself. It made it a lot easier to carve out the center first and then cut them in half and sandwich them together. This helps book match the grain which is really nice for the carving. You won't really notice the seam as much, and also makes sure that they're exactly the same size. At this point, I returned to the template that I made at the very beginning.
This is going to be the side reflector that is going to support the light bulb. One note about this brass is that it has not been polished yet, and it's going to be really shiny in the end but right now it kind of looks like junk. This is just kind of how you get raw brass. I learned from earlier projects where you just don't want to polish the brass too soon because it'll end up getting scratched up, so you guys have to stick around to the end to see it all nice and shiny. [music] I needed to make a hole in the center for the light bulb and for that I decided to screw down these plates because I was going to use a pretty aggressive hole saw to make that hole.
I made two errors there one of them was pre-drilling. I found that the pre-drilling actually kind of dragged the plate upward and so I should have just started with the hole saw. The other mistake that I made was that I didn't have deep enough screws, I was using a half-inch sheet of plywood which is really dumb. Instead, I grabbed a one-inch board, got into the quarter screws, and then it worked just fine. Brass screws are kind of the worst, they want to snap on you, they are incredibly fragile, and you have to be really, really careful with them. By really careful I mean don't use a power drill, Michael.
With a brass plate removed, I can drill out holes for the side wings. For these, I'm not going to be using brass screws, I'm just going to use steel ones because you're not going to see them. Now that the reflector is positioned on the side wings, I can trace out the brass plates so that I have reference, take it over to a bandsaw and rough cut.
Since I have to cut both the upright face as well as the underside of this, I'm going to save the blocks that are offcut from the upright face. Then, I can use that square sides to cut the opposing face, and it just makes it a lot more stable to go through the saw.
Parts are pretty small, I just glued them down to a block of wood. This allows me some clamping surface, I also put them right up against each other so that I can get the same curve on both cases. I also put the top piece in front of me so I've got a nice reference to make sure that all the curves are matching up and they look right. The first time around I used the wood to template route the brass, now I'm using the brass to template route the wood. This was a super-easy way to do this, and it made it a way easier to carve because I had a good reference surface. All I had to do is basically get the rough outdone.
One thing that I would have done is I probably would have carved this a little bit more when the router bit was going over the back edge and wanted to dig into the fibers of the woods so I had to do a climb cut which isn't fast. I was able to get a fairly smooth finish in the end. The router bit wasn't tall enough to get all the surfaces, but it was enough for me to establish where I needed to go and carve to that line. Once I got it rough carved, I can switch over to the flexible sanding disc and refine the shape.
Brass plate needs a hole in either end. One for the cords and another just to keep the weight nice and even on both sides, it's also going to eliminate quite a bit of weight because the brass plate is super heavy.
We need a place for the cord to go through into this side wing area, and I really want it to go clean through the brass plate. Super nervous about drilling this out. I didn't know if it was going to work. I was anticipating ruining the light fixture right here, but the only way to do it is to just go for it.
It's angry, but it's working. Woo, did it. Wow, that was scary. After taking a little bit of a breather, I was ready to tap the hole. I tapped the hole. I didn't add any tapping fluid to this because I was worried it would run into the wood, and I was just very careful, very cautious with tapping it. I could then insert the brass tube fitting that I got from Color Cord, and prep to drill out the hole for the light switch. I only have about a quarter-inch of threads on the light switch. The side of the oak is pretty thick, so I had to thin it out with the barrel carver, sneak up on it until I got a nice fit.
As I mentioned before, this is essentially a fluorescent light fixture. I grabbed an old fluorescent fixture and stole the tombstones off of it. These tombstones lock into place with spring tension. I think the best way to replicate that is just to steal one and alter it. I need to alter it because the wires come out the front of it, and I need them to come out the back. I removed the little brass pins that were inside of there, pulled out the wires, and then I could take it over to my bandsaw and trim off that front face.
After trimming it, I realized that the brass pins were going to stick out the front, so I trimmed off a little bit of those. Then, I soldered wires to the backside of them. They actually already had a hole in them, so it's super easy to solder them. Just to make sure that things were safe, I shrink-tubed any exposed sections of copper. After that, I just reassembled the tombstone, and basically, works like normal, it just has wires that come out the back. Next step was to figure out how to mount it to the brass. To do this, I just made a cardboard template and I tested some stuff out. What ended up being the simplest solution was just this cross pattern.
I made sure that it fit all the way around that I had enough slack and then I cut it out of sheet metal. [music] I have to stress that this entire build is improvising. I didn't really have a full plan going into it, but I'm really happy with how this ended up coming together. I didn't have a flat tap the correct size to do this with, so I just drilled it out and then took some screws with some oil and then tried to use the screw to cut the threads. Which worked just fine, but then the screw is a little bit too long, so I sanded down the tip of it. Once that was done, I was able to get it in with a couple of washers to space it out with.
Now, full disclaimer, I'm not an electrician. I think this is okay, but I'm sure if it's not, people will tell me in the comments. This is for me, and I'm not going to sell it to a client, so I'm really happy with it. I wanted to do one more assembly before doing the final polish and finish work, just to make sure that everything was working. Make sure that the switch works, make sure that the wiring was correct and just make sure that everything fits properly.
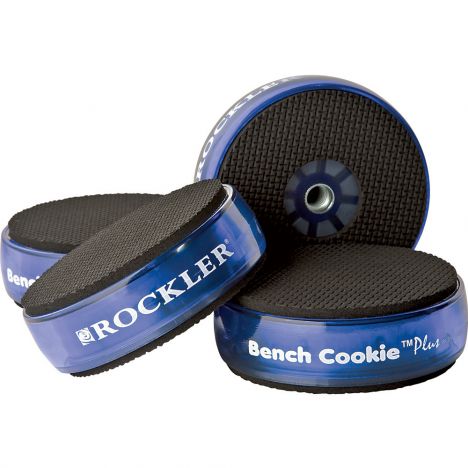
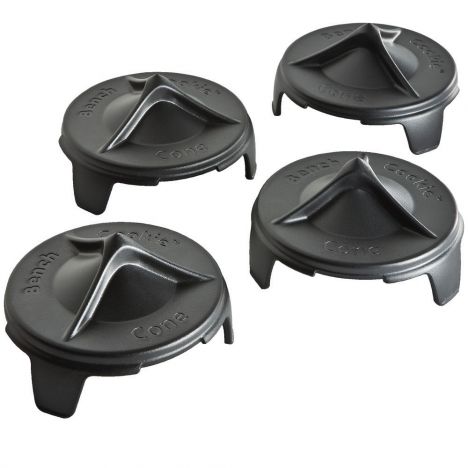
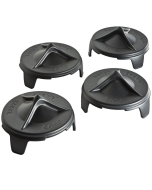
It works. All right. After that, I was ready to do the final polishing and sanding on all the parts. With the brass, you want to wear gloves, and I like using this brown Scotch-Brite. You also want to Scotch-brite the brass parts that come from Color Cord. These come in raw brass, which is great because you can apply all sorts of different patinas and finishes to it, but you've got to make sure and clear coat the surface of it. In this case, I'm using a specially formulated lacquer that's designed for brass. I also really like using the bench cookies to support these while I'm spraying them. It keeps them up off the table, allows me to spray those edges, and makes sure I don't touch them at all during the process.
For the oak, I'm going to be applying a coat of Rubio Monocoat cotton white. I've been using this fairly often now in the shop. I really like the look of it, especially on oak. It fills in the pores of the grain and makes them pop. When you spend this much time carving a piece, you really want to see the grain, and even though this functions like a stain, it's more like a filler. It fills in those grain sections, and it actually brings out more of the grain than you would see if you just put on a natural finish.
At this point, it felt like I had assembled and disassembled this light fixture like 20 times. I was really efficient at it. I put on my gloves and made sure not to mess up any of the finishes, and honestly, it was really satisfying to put this together for one last time.


Keep the inspiration coming!
Subscribe to our newsletter for more woodworking tips and tricks