Video: Two Car Garage Workshop

In this video, Michael Alm gives a tour of the workshop he's built out in his two car garage.
Michael Alm spent around five years converting his two car garage into an efficient woodworking shop. The garage measures 415 square feet with 12 foot ceilings.
You can find more great projects and techniques from Michael Alm at his website.
Featured Tools:


Michael Alm: Hey everyone. I'm Michael Alm, and this is my shop. I've been in this space for five years now. It's taken about that long to feel comfortable in here, make sure that the workflow works, but at this point, I'm super happy and there's not a whole lot that I want to change.
Cool thing about this space is it's a two car garage, it's about 415 square feet, but it also has 12 foot high ceilings. I've got loads of room to build up. When I built my dust collection system, I was able to build that really high up on the wall and same thing with my lumber storage. I was able to put that super high up so that I can store a lot of things, a lot of materials that I don't have to use on a regular basis. I figure a good place to start is with my oldest tools in the shop. I know looking at this shop, it looks like it's complete.
It's a huge collection of tools, but really this started about 15 years ago when I bought tools off of Craigslist. This is a used shop saw that I've had for forever and it's great. It's super functional. There's still a couple of these old tools around that still work really well in the shop. I also have my old original cabinets from my old shop. I never found a reason to change them. It's funny you can see them now they're pretty janky. They're not well built at all. They're made basically out of stuff that I found in the garbage. It's like one by twos and one by fours.
I hinged them with basic hinges you get at the hardware store and it works. I'm not going to spend a lot of time building shop furniture if I already have something that works. The way that these function I've got both of them lined up together. A lot of wood workers will do this in their chop saw stations. They'll align the tool level. This is level to this surface and it actually is-- I think I can get a full eight foot run that way and about, I don't know, six feet this way.
The board can actually overhang pretty well and so this is a workstation that I use for quick work. I don't use it for a lot of precision stuff for that. I use the table saw. When I first saw this shop, I noticed the giant garage door, and this is awesome. It's an easy way for me to move material off of my car directly into the racks that I've built right here. These are as close as I can get to my work bench as well. I've got my foam cutting board here that I lay out. Then I can lay a sheet of plywood on top of this and immediately start breaking it down before it goes over to the table saw.
This first table in my shop is mostly used for breaking down materials and I have it set up so that I can do it pretty. I've got my track right here and my track saw right here ready to go. This hose is universal and the plug kind of comes out. I've got a bunch of other things like the domino, and I have my sander in here and so that I can hook those up super quick.
The other thing is I don't have much stored underneath the table so I can pass the track saw back and forth underneath. I've got my sandpaper here along with my sanding rolls.
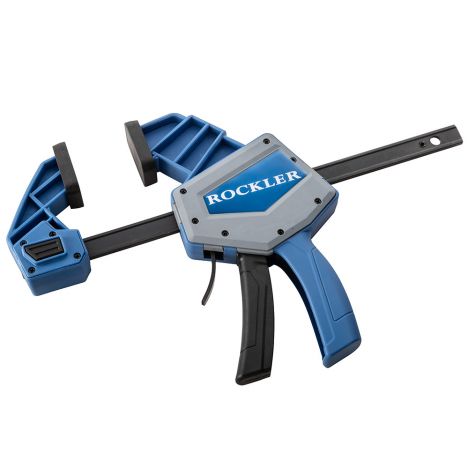
These are basically drawer liners that stop the vibration of the wood when you're sanding it. Other quick access stuff is I've got all of my quick grip clamps. These are super handy to have easy access to basically whenever you're doing a glue up and you're just like covered in glue and you need to find one more clamp. This is really, really nice. To remove this and it's in the way, which happens every once in a while, it's just on a cleat. It lifts up pretty easily and I can set it aside.
The other thing is I've also labeled each one of my clamps with the length of them so that if I need to know which ones they are find that when I'm looking from the top down, I can't really tell. Real quick, I wanted to talk about the track saw itself. This is probably one of the most valuable tools in my shop. I was able to stave off buying a big table saw for a long time because I had a track saw. If you're looking into like starting a shop, especially if you're running a shop for profit, this is a really essential tool.
It was expensive at the time, but it's super precise. I'm able to do a lot of cuts that I wouldn't have been able to do otherwise, like you can make cuts inside of panels because it plunges, you can make cuts at at different angles. I know this is an expensive tool. There are other brands out there that are a little bit cheaper, but I have really appreciated the investment in this. I use my track saw on just about every project. From this table, it is a very short walk over to the table saw, where I do a lot. I do all the refinement. That's the rough cutting, this is the more precise cutting.
This table saw is a saw stop table saw. It is a 36 inch 3 horsepower. I've built a custom additions to it, including my outfeed table, which I have plans for as well as my storage cabinet under here, which I also have plans for. This is on the mobile base. It's on the industrial mobile base, I think they call it. The whole thing rolls and all of it rolls with it, including the cabinet that's under here. I made this cabinet a couple years back, right when I bought the saw, and it's been super handy. Basically, I have all access to all of my push sticks, my accessories for the saw stop.
Like extra breaks, all the wrenches and everything, and that's really close at hand. The next drawer down is a little bit more because I'm a filmmaker. I've got a whole bunch of camera equipment in here and a little bit of spill over from the upper cabinet. Then the lower one, I mostly just use for saw blades. I've got my dado stack here and then all the different saw blades that I use, including the saw blades for the band saw, which will talk about in a minute. I also have quick access to my crosscut sled, which I use a ton.
It's a really simple crosscut sled. The main thing that I like about it is it's depth. It is 22 and a half inches deep, which is plenty to cut most cabinet parts, nice and square. I've doubled up the front and the back because I've found them weak over the years and I think about three inches in the hand. Then I've got an upper section here. I'll probably rebuild this at some point, although I really like this sled because it's super accurate. I'll probably rebuild it and do plans at some point. The other thing is the handle on this is been great because it's so heavy. I'm able to pick it up.
When I didn't, before I put the handle in, this was a huge pain to use, but I find that I use it even more just because of this robust handle right here. I keep my hearing protection. These are ISOtunes. I keep my hearing protection up here. This is my dust mask, which I wear all the time, the Jimmy Diresta ice pick. I've got the Wixey digital angle finder.
I've got a couple other angle finders and squares here. Another square there. A couple of pencils in case I lose them in the shop.
I've got five here, my safety glasses, and then of course my marking and measuring tool pouch, which usually lives on my hip. Also, on this thing is my dust collection button right here. When it's on my hip, I can pretty quickly just reach down, hit that button, got a tape measure right here. This is one of the items in the giveaway and this one of my favorite things in the shop is just having quick access to everything. This is the painting finishes and just washing up area. I've got a whole collection of spray paint and whole bunch of these.
These are like latex paint pots. If I need to paint anything pretty much any color, I like having access to it right here. I've got some rarely used items up top. I keep my wood glue here. If you guys watch my pattern plywood videos, I go through quite a bit of wood glue. Most commonly I use Titebond I. That's my main go to. There's Titebond II up there if I need something a little bit more waterproof, and then I'll just buy a small thing of Titebond III if it's going outside. I've got this file cabinet which I keep everything in.
I just found this on the street, I think, and then spray painted it red. It's full of-- This one's my thinners and finishes. I've got tung oil, teak oil. I've actually got a whole video on finishes. If you want to know about all that stuff, go watch that video. There's all my stains and waxes and oils. I don't use stains very often, but for some reason, they just tend to collect. I have a lot of them in here. Probably should get rid of a few of them. Then down here, kind of odds and ends, some white glues, some sprays, things like Super 77, WD-40, all that odds and ends. Then at the very bottom, I've got all my painting rolls and paint supplies. I really like these foam rollers. I go through these more often than most and then if I got to paint a wall or something like that. Then I store all of my paint roll tools over here. Here, I've got access to first aid here, as well as a washing station for all sorts of stuff. I've got brush cleaners and some more wood glue here, just odds and edds. There's lots of different stuff that goes along with painting and clean up, so it all just lives here.
This is just the messy corner and I let it just be messy and stay messy. Also got a whole bunch of the stickers. I need more surface area for putting stickers on at some point but I do like trading stickers. If you want to do a sticker swap, let me know on Instagram or in the comments or something. Let's see. Oh, tape. This is where I keep my tape. Pretty simple. It's just like small, medium, and large, and once they get too small, they drop to the next shelf pretty much on their own. This whole thing, this is all dry erase.
This is all dry erase. You may have seen me working on this in some videos. I get questions about this a lot. I didn't shoot a video on putting the dry erase into the garage door. I don't necessarily recommend it bebecause it added a lot of weight to my garage door. I had to retention it, buying new springs. It ended up actually costing quite a bit. This stuff is just-- I think, it's really cheap shower material that they sell at at big-box stores. There's styrofoam behind it, solid foam insulation, and then they're just slipped into place, which it's all right.
They're easily replaceable. It doesn't erase super well. You need to use Windex to erase it, but it works pretty good. Around this corner you can see I just keep levels and straight edges. Again, these are just quick to grab if I'm headed out the door. I use straight edges and squares quite a bit, and this was just an easy place to put them where they don't get damaged or dinged up at all. I've also got a framing square here, which this is just a drywall framing square. I'll use this when I break down sheets of plywood to draw that out.
A couple art pieces. This is from my good buddy, Sean McElroy. He gave this to me from one of his art shows just to let me know that I'm great. Up there is from a carnival game that a drawing group that I participate in called The Drunk, they made that for a carnival game that they were doing and I ended up taking it because I'm the only one who had enough space to tag it up afterwards. Let's see what else. We've got the seamless right here, which is something that I did a couple months back. This has been super handy for photography when I photograph pieces of furniture.
We also use it as projection screen every once in a while. I've got three colors on here. I would love to have some bright colors too, so I may double this up. It took me a little bit to get this honed in. I will say that when I did that video, I was not an expert on the subject and I wish I knew a little bit more. I've changed the roles. I've reversed them so that they go the opposite direction and done a few odds and ends. I think I had the weights on upside down in the video, but it works. Hopefully, people got the point across.
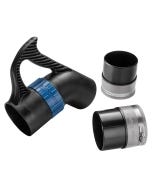
I use this for thumbnail images quite a bit. If I have to speak in front of something, it's nice to have just a clean background because there really isn't another clean background in the shop. We should talk about the giveaway. I reached out to a bunch of the brands that I work with and asked them if they'd want to participate in the giveaway, and they responded so well that I actually have three prize packs to giveaway. The first one is the Arbotech prize pack which includes a power carving unit.
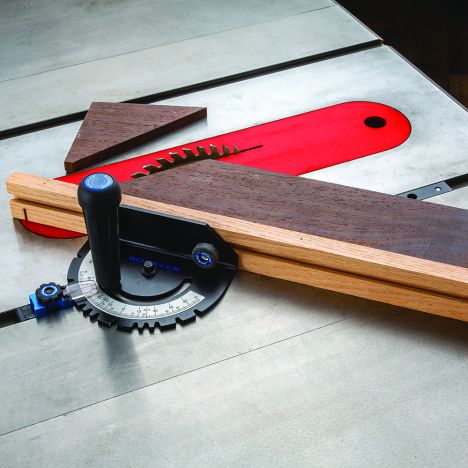
There's also the Shaper prize pack, which has two sustainers in it, and the Rockler prize pack, which includes their precision miter gauge. I also ask ISOtunes to help out and they're giving a pair of ISOtunes to all three packs and I'm going to be giving away some swag as well. Make sure you check out the links down below all the rules and everything are down there. Big thank you to all 300,000 of you. That's insane. I can believe it. Really appreciate it. Check out the links down below, you'll find all the giveaway details and all the rules and stuff there.
Let's carry on with the tour. This table saw is awesome. I've had it for a couple years now and I really don't have any complaints. It is the saw stop table saw that has the break cartridge in it. I don't have to worry nearly as much about getting my fingers in the blade. I still treat it like a normal table saw, but that assurance has been awesome. I keep a couple things on the top of the table saw. I've got a Shinwa ruler right here and it always lives here. This is a really accurate ruler that I've found. It's only about 20 bucks.
All the stuff that I'll mentioned is listed down below. I also have the Jimmy Diresta pencil, which I use all the time mostly with the crosscut sled to hold smaller pieces down. It works like a small push stick. In general, I really like this table saw. I don't really have any complaints about it. I do think that it needs some outfeed support. I've been very happy with this, which was an improvised design and this just worked out great. This is 18 inches off of the back of the saw which some people have asked me why I like it to be that short.
The reason for that is bebecause when I'm pushing and I imagine I have a push stick in my hand, when I push through the saw, it hits its center of gravity and it tips up and then I can it and pull the board away. If it was longer, I'd have to reach further out over the saw. If you're ripping a whole bunch of materials, this is a really efficient way to do it. You just push it through and it lifts up, set it aside, cut another one. On the other side of the table saw, I have more storage. I have this restored cabinet.
I put out a video on this a while back. It's just a cheap cabinet that I got, but it's got lots of hardware that I don't use that frequently, but when I need it, I definitely need it. I also have my miter gauge here, which I use all the time. This is the rock precision miter gauge with the miter gauge fence and it's really handy. I've got my trash can over here, which is part of the reason that I didn't extend the outfeed table all the way to the end is bebecause I like to be able to chuck things over there along with the scrap bucket, which is pretty essential as you cut thin scraps you got to have a place to put it. Those live right here.
This is my additional outfeed support if I need it. I don't really use it that often, but it does work. You can see it's set at the same height. It's actually a little bit lower, which is intentional because I don't want it to hit, and so across all of here-- If I'm ripping a big four by eight sheet of plywood, that's pretty much the only time that I'm can be using it. Most of the times, I break it down over there, but it's nice to have just in case. Off the work tables, this is probably the one that I'm at the most. This is my favorite space to work just bebecause I feel like I have access to everything super quickly.
If I need to fire in some nails, I've got nail guns right here. If I need to chop something down, I've got my chops saw behind me. I've got loads of different tools and equipments in all these drawers. I also have access to my glue super quickly and this is really-- it's an assembly table as mostly what it's turned into. Really happy with the build of this. I made it before I was shooting YouTube videos, but it's been such a handy sturdy work bench. Eventually, I think I'll probably put out plans on it. Also, it's the same size as the white table.
It's three feet by six feet and it's built with two by four construction that are half flapped over each other like a torsion box which keeps it nice and flat. I've got multiple two by fours that are glued together and then they have bridal joints in here that just makes this thing so sturdy and strong. The top is made of black melamine. This one's also melamine. It's white Melanine. I, in hindsight, would've just put black on all the surfaces. I like it because it's just not quite as reflective. I find the white is a little harsh, especially shooting video.
This is this just been a beast. I've been using it forever. It's taken a lot of abuse. I thought I would have to replace the top of it by now and I haven't. All you have to do is scrape it down to clean it off and you can get any glue off of this if you want. You can even wax the surface, I do that every once in a while, but really all finishes a'll paint it just scrapes right off and keeps on kicking. I love this work bench. All right. This is my hand tools area. This is the far right side. We're going to go along this whole bank and just talk about all the different things that go on in here.
I like the Adam Savage first order retrievability idea where everything is accessible quickly. You can see it and this is actually based on his design that he put out tested. I'll post a link to the video. I can grab whatever I need super quick. I've got drills. I've got all my screwdrivers, my hammers, my sharps, all the different razor blades that I use and stuff. I've got drill bits and hand tools down here, knives, vice grips hanging out behind here. I've got my, the palm router, all of my screws. Pretty much just everything that I grab on a regular basis that you want to be able to grab quick and put away quickly. Everything needs to have a home. This has been great. I had it on wheels with the idea that I would roll it over to my workspace as I was working on it, but it just eventually found home. That's the way that this shop has worked; that I built something and then I moved around the shop. Then eventually, this was like, "Oh, this is the most convenient spot for it." It just for a number of years at this point and I really like it a lot. It's also sloped back so that I showed you before with the chop saw, I can get aboard past here and it doesn't get in the way.
Moving over, I've got my charging station. I use mostly Milwaukee tools in here. I have a couple of Ryobi as well and so there's the dedicated charging station here. Then there's another Ryobi charger that doesn't quite have a home yet that's over on this side. Moving down, I've got my pattern plywood toolbox, which it's just full of patterned plywood scraps. At this point, I think this is going to go away eventually. I really want a home for a lathe and that's probably what's going to go here, just a small lathe, but I just haven't had time to rearrange and plan that out.
These are my glue-up squares. I built them myself. I've talked about them before and I really want to do a video on this. It's just made of scrap plywood. These are super handy. I've got them wrapped in plastic tape so they don't get glued to the surface of stuff. You'll see this in a lot of my videos and they just live here because they're easy to access when I go over to the table. If I'm doing a glue-up, I don't want to have to walk very far. Those live right here right next to my chop saw. The chop saw is one of the only tools that isn't hooked up to dust collection.
I hope to change that at some point, but for right now, it has a hood which keeps the dust down. Eventually, I'd love to put a vacuum system in here or run my dust collection system up to it, but for right now, it doesn't have it. I also have electrical over here. I really like this. This is a 50-foot long electrical line and I can just pull it over the table as I need it. Few of my tools these days actually use power that I don't use it that often but there's occasionally a hot glue gun or something like that and I need to pull it out.
I also have a little hook here because I found that as I was pulling across the room, it was getting in the way, so I can hook it down below here. There's a lot of little improvised things in my shop where I just quickly needed a place for stuff to live. That's just where they've ended up living. I've got Jimmy Diresta's blade over here which just lives there. I used it for scrape and glue at one point and I thought it might be good for that, but yes, every once in a while I find a use for that. This is the air filter system right here.
I've just got the remote. You can turn it on and off from here. It doesn't get lost because it has a home. Then as I'm moving over, we're starting to get into the hardware section.
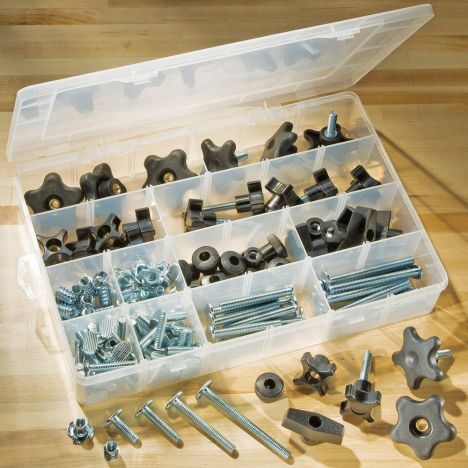
A lot of that's hand tools. This is where I keep all of my odds and end screws, all the brass stuff, just random things that I need. I find myself reaching for the small screws bin a lot because I've got that big bin of deck screws, but often times when assembling furniture, you need something a little bit smaller. These bins are a collection of-- I think these are home depot bins, the HDX ones up here.
These are Harbor Freight bins which I know other people have had problems with. I haven't had any issues with and then the lower ones are the Stanley ones, which are more expensive, definitely better built. I only have two of those and the bottom one, I just keep empty if I'm ever working on a job site so I can fill it up. A lot of times I've built a number of IKEA kitchens over the years and they come with all this hardware. It's good to get them organized so I use one of these bends for that.
The labeling system is just something that works for me. It's color-coded. It's not really coded as anything, it's just that I recognize the color now so I know that my wafer nuts and bolts are in this container and I just recognize it as blue. I almost don't even read the labels anymore. Sockets, my socket sets live here mostly because they're this same bin. It's not that I really use sockets all that often but I had this little tiny gap here and it fit in perfectly right there. Then this I do use all the time is my 50-foot air hose.
This can stretch all the way outside. I can do construction projects outside because it's so long and it really quickly rolls up so I'm not tripping on it. Moving further down, I've got scraping tools, all sorts of random hand tools that just don't fit in there. I've got my sandpaper here, and underneath, I've got all of my air equipment. What hooks up to this air hose is the California air tools 10-gallon compressor. I covered this in my tooltips video. If you haven't seen that, you can go check that out. It's a great system.
It's super quiet. I had the little pancake for a long time and it's the loudest thing ever scared the crap out of me every time it turned on. This is so much better. I've got a 23-grit gauge nailer. I've got a 16-gauge nailer. Those are the main two that I use. I don't remember the last time I used this 18-gauge nailer. It came with that pancake compressor. Then I have a stapler which I use mostly on outdoor projects or backs of cabinets. This works well on the back of cabinets as well. Those all live in here. As you can see, I can access them really quickly.
Just grab them, go over to the table, put them back, and of course, right next to it is all of the nails and stuff. On this side, I have all the different sizes labeled on here. I like to have a full set of 18-gauge because this is my most common size nail. Then I've added tape here. The tape actually indicates the size of the nail. If I lay that on the tape, I can match it up really quickly. The reason for that is because a lot of times, I'll just end up with one little thing like this and I'm like I don't know which one this goes into so I can just match it up super quick and drop it into the tray, close it up, and I'm ready to go.
I'm starting to get into the drill press area. This is all drill press accessories, things that I have quick access to. Again, it's all about having it close at hand so that I'm not opening drawers to access this stuff, I just know exactly where it is. I have my main Forstner bits. They live on this side. I just took the plastic case that they came in and screwed it to the wall. I've got Brad Point drill bits as well as Forstner bits up there and a couple more Forstner's down here too. Whenever I go to an estate sale or a garage sale, I always buy spare drill bits.
Usually, they'll either give them to you or sell them for pretty cheap. I don't sort them, I just sort them by small, medium, and large. I found this has saved me dozens of times when I don't have the right drill bit in my shop and I don't want to drive to home depot or whatever and buy the correct size. I just hunt through the bin and I can usually find the size that I need. Those live back behind here. The drill press itself is also a garage sale find and this has been an awesome drill press. I've been looking for one this size for a long time.
I don't like the full pedestal drill pressers just because I usually don't use the space down below. I can't think of a time where I've actually needed that much depth to drill something out. For the stuff that I do, this is plenty of depth. It's a really strong machine. I had the Ryobi smaller version a while back if you saw some of my earlier videos. Just wasn't quite as strong. I could stall it out on some drilling practices. It's got a nice depth stop. It's got all the bells and whistles that I need and it's been a great drill press.
You can see I I sunk it down a little bit, again, is for my chop saw, so I can get a board that runs across here. Also got a whole bunch of additional storage down below, so hole saws and drill indexes. This is what you would see at an old hardware store. See my bench cookies are in there with all the bench cookie accessories, some corner clamps as well. Below that, I have more regular accessories. I've got my bead lock system. I've got the doweling and then some hardware for building jigs and stuff, which is super handy.
Up here, I've got a bunch of woodworking books that I can look at and when I take lunch breaks and stuff like that and go through all the different joints and joinery and get inspiration. I've also got a bunch of sketchbooks down here. These are my old sketchbooks so I can reference old drawings and designs if I ever run out of ideas. Then there's also the storage for dominoes and jigs. I like these talenti containers because they've got a good lid on them. They're nice and flat, they store a whole bunch of stuff.
I like to eat ice cream, too. I've got clamps here. These are made by armor tools and they're auto-adjusting. If I put them down on the drill press, depending on how tall the item is, you can always lock this thing down, which I find I don't want to do. I used to use C-clamps for this and you'd have to adjust them for like an hour to get them just right. These are way simpler to use and I just have two of them that live right up there. Of course, this is the best wood storage that I have. I really like this a lot. I divide it by species, so this is construction lumber. This is all walnut. This is oak and maple. Then I've got poplar and alder I think, down here, exotics down here, and then this will be like MDF and plywood that are longer lengths. Bigger plywood sheets sit up above. Then along this whole area here, I've got plywood scraps. They're shorter and more square. As long as I can see it, I will know to use it. If I can't see it, if it's stuck away inside of a cabinet or something, I'm just never going to use it.
I go through this fairly often. It's funny with the shop projects, I tend to build them when I have too much material around here. A lot of these built-in pieces, you could tell they will look like they're made of scrap because they are. They're just made from whatever it had on hand. I think this is Oak plywood from the big bookcase that I built. This is Birch plywood. This is some cheap like OSB-- no, CDX ply, just whatever I have in the shop when I have it. That's when I'm like, "All right, I'll build some shop projects out of it. Get rid of some of this excess." I think I'm about ready to do that again.
The biggest storage that I have is up top here. This is for longer lengths of lumber, usually solid wood. It can store a whole bunch. I put it in really early on when I got this shop. It was one of the first things that I built and installed, because a whole bunch of links of Walnut came from a job they were like 12, 14 feet long and it was really hard to find a storage spot for it. I built these. They're loosely based on John Peter's design for a lumber rack and just sandwich pieces of plywood with a two-by-two in the center and then a two-by-two that runs up the back and it's all screwed into the studs of the wall.
Super strong. I've never had any concern about stuff falling down. Mostly, I just try not to overload it so that nothing's going to slide off as I'm riffling through. One thing that I would like is some a devoted ladder system. I joked for a long time that I was going to put in the library ladder that just can go back and forth to pull things down. I mentioned dust collection when I was talking about the chop saw, which is not hooked up to dust collection, but I do have a pretty robust dust collection system.
This is the Clear Vue Cyclone CV-1800. It is a cyclone separator. It's a two-stage dust collection system. There are filters back here that filter out the air, but most of the sawdust actually collects into this oil drum at the bottom here. Honestly, I don't have to replace this. It's like nine months between dumping out the sawdust. It lasts for a really long time and it's a great system. I've got a full video on how I installed all the ducting and everything. You can go check that out if you want more detail. The one thing that I don't really use, I've got four drops on it.
The first one is a floor sweeper. I haven't actually found it that useful. I think I may swap it over to a downdraft table or try and run it over to the chop saw later on, but really it just stays closed. The next one over, however, gets used a ton. This one goes to the router lift and the sander and I've made a couple of alterations to it since the video. The main one is that I move the hose up to this higher point here. I like it because even if I don't get all the sawdust, I can sweep it off using this thing.
Further down the line, I'll work on this and make it a little bit nicer, but so far, it works really well. I've got the blast gates back here, which are easy to access. Then the third drop goes over here and this is also multifunctional. It works for my bandsaw right here. Then the other one is a quick connect. It's a rockler quick connect so I can connect it to a floor sweeper, I can connect it into my thickness planter, which I usually roll out. Oh, it's locked. There we go. I can roll out here, connect in here.
It's on a long flex hose. That's the third drop. This fourth drop just goes to my table saw and it ends there. It's got a lot of power. I haven't found myself being like, "Oh, I wish I bought a bigger model or something a little bit more powerful." It's definitely does the job that it's supposed to do for this size shop. As long as we're over here, we might as well talk about all the different tools. Again, my philosophy is to put everything I can on wheels because part of it is when I'm filming, it's really nice to bring these tools out with me and get better shots of them.
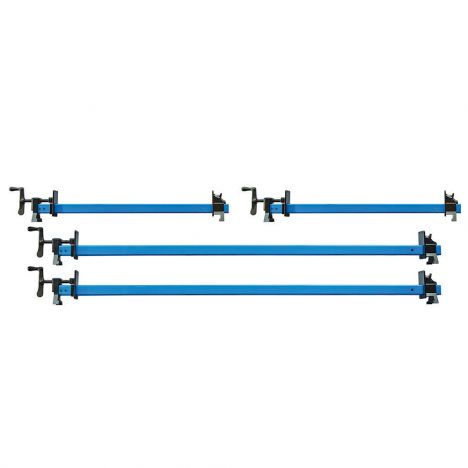
I also find that if I'm working with larger materials, I can roll this out and I've got a bigger area to work in. This quadrant of my shop is intended to be multifunctional. Sometimes a piece of furniture just lives here for a little while I'm putting a finish on it. I'll set up a folding table or something like that. All these different units will roll out here. I also need to have access to this back corner for all of my lamp storage. I've got all of my bar clamps back here, which I use for big glue-up, along with some camera gear.
This is a shop light that I use for construction when I'm on job sites, a couple of saw horses that fold up here, and then some lighting for shooting video and stuff. I also have storage in here. I made a video on this. I think I'm going to probably just build a playlist of all the videos that I'm mentioning here because there's lots of them. This is more tool storage. I built this a little over a year ago. This was the first pattern plywood tambour piece that I made. It's still working great for those who've been asking if it's held up if it's gotten locked up or anything like that. It hasen't, it's great.
This is what I use for storage of like dust-free storage for all my camera gear and stuff that I need quick access to. I've got my pole saws over here. I've got my job site bag here, extra sandpaper, my hand planes, just all the odds and ends. I've got whole saws, my fine multi-tool, and rasps over here. It's been a great unit to have here and I don't think I would change anything about that design, to be honest. Over here, I've got a bun lunch more storage of random tools and stuff. These just didn't really have a home for a while.
I got enough scrap built up that I could build this out. I made these modular, they're on cleats, so I can lift them and move them if I ever want to reorganize the shop. I've been really happy with this location. This is my Arbortech gear right here, so all my carving equipment. This is just the sustainer for my track saw as well as my shaper origin, the sustainer for a whole bunch of shaper origin parts in the shaper workstation. I mentioned this a little bit, but this is my router table. I actually built all the storage for this.
There is a video and some plans on all the storage. The router lives inside of here. It's on a router lift and it's built around the Rockler Pro Lift system. I've got access to everything super quickly, including drawers full of set up bars and all the odds and ends that I use with the router. I find that it accumulates a lot of parts. I've also got additional routers in the bottom palm router and a plunge router as well. Over here is probably the second oldest tool in the shop, is this rigid oscillating, spindle sander. I don't really use it as a spindle sander, but I do use it as belt sander.
I know so many people who have this tool. I find myself using it on just about every project. I don't know how it's so useful, but it just every project requires one little thing that I got to sand up to a line or something like that. You see this a lot in my videos and I'm just hoping that this tool doesn't break because I don't think they make these anymore. This is a great tool. If you could find one used, definitely go for it. This has gotta be like 15 years old. Over here is the woodmaster, which if you follow me on Instagram, I've had a frustrating time with this tool.
It is a hybrid tool. It works as a drum sander and a thickness planer as well as a shaper and some other stuff that you can do with it. It's an industrial-grade tool. I haven't found it very user-friendly. It's nice because it has a big wide bed on it, but I'm still not sold on it. I may sell this tool, but for right now, it's the one that I've got and it's been okay. Over here is the JET 14-inch bandsaw. I've had this for a number of years and it's been a trooper. It's worked really well and I've upgraded a couple of things.
I've got densioner on here that I use. I've also added on the bandsaw fence from Craig. I'm just starting to outgrow this thing because I'm doing a lot more resawing these days and I find that I need a little bit more power and a little bit more height. This may change in the not too distant future, but for right now, it's very functional. It's a great saw. Definitely, when I bought this at the time, it was a big splurge and it's gotten almost a decade's worth of use. I really like this saw a lot. This is probably the least filmed portion of my shop. This is my carving workbench. It's where I make art pieces. I do a lot of detailed carving, which I haven't featured much on my channel. I'm hoping to change that soon. If you saw the video where I made the workbench for Ashley, I based her design off of this because I really like this workbench. It's got everything right in front of me so that I can swap out bits and stuff. I've got all my carving chisels and gauges and knives, as well as a flex shaft carver. This is a Fordham and all these bits are-- I can swap out really quickly.
I've even got spare handles that I can swap in as I need. This is a great space for sculpting. It just doesn't really come up a lot in the furniture making. Again, I'd like to do some sculptures on the channel in the not too distant future, so you might be seeing this a little bit more. Another point I wanted to make about this space is that it's just built up organically. I really have just been rolling things around. Gradually, I'll work on an area and just feel my way through it. I know that that workbench used to be on that wall. My table saw used to be in the middle of the shop.
Everything has shifted around at some point and they've settled. It's taken me about five years to do it. As I bring in new tools, things get reorganized again and again. I'm super happy with the layout at this point. Again, that first order retrievability is super important to me to find things really quickly to move fast through the space. That's the essential quality of this shop that I've been working on for a long time. Other thing I want to mention is that when you comes to buying tools, again, I've bought a lot of used tools over the years, started small and gradually worked my way up to bigger and bigger tools.
For example, the table saw I bought after remodeling a friend's house. I'll often use jobs to buy the tools that I need. That's how I've leveled up this shop over the years. I hope you guys have enjoyed this tour.

Keep the inspiration coming!
Subscribe to our newsletter for more woodworking tips and tricks