Cleaning and Polishing with Hand Tools
Among the expressions we use for the different phases of furniture making, such as "Prepare the stock" or "Mark the joints," "Clean up and polish" is the endgame expression I've always known and taught.
The words are entirely apt when you understand that clean up means making the surface ready to receive the finish, and polish means applying the finish on the prepared surface. If you intend to paint rather than polish the wood, clean up need not be as rigorous.
This article is not intended to describe a variety of ways of cleaning up the surface nor a variety of finishes you could use. Rather, its purpose is to explain the methods I favor. With this in mind there are two stipulations that require explanation at the outset.
The first is that, with a clear finish, my aim is always to keep the natural color of the wood. Therefore, a great deal of time is spent at the beginning of any job selecting each part so that it matches for color and grain pattern with the whole. I consider this a part of the finishing process.
The second is that before gluing up any subassembly, all the surfaces that cannot be planed after the glue-up are cleaned and polished beforehand.
It follows that the finishing process isn't completed as a one-time, compact job like "Prepare the stock" or "Cut the joints" but rather is distributed over the various stages of gluing and clamping.
These methods are derived from the English Arts & Crafts movement whose members devoted considerable time and thought to the most effective use of hand tools. What was adopted and adapted from this movement on this side of the Atlantic were very different techniques — but that's another story.
In a world without machines, we would begin making a piece of furniture by preparing the sawn stock to dimensional and geometric accuracy using a handplane, very likely an 07 trying plane. However, handplanes have been rendered obsolete for this kind of work by jointers and planers, which do a good job of sizing the stock to the required squareness. The downside of stock prepared by machines is the scalloped surface left by their revolving knives. Tearout may also be a problem, the result of reversed grain direction or feeding the stock the wrong way over the cutterhead. Neither scalloped surface nor tearout affects the marking and cutting of joints, nor does it affect shaping, gluing or clamping operations. However, the milled surface and any other imperfections have major implications at the finishing stage. Just as polish highlights the color and grain pattern of the wood, it also emphasizes all its defects. The challenge is to remove those defects so that the piece presents an absolutely flat surface reflection.
Clean Up
To bring the machined surface to a polish-ready state, we have three tools to choose from: scrapers, handplanes and abrasives. The Arts & Crafts practitioners deemed scrapers inadequate for the task. They didn't use them — nor do I.
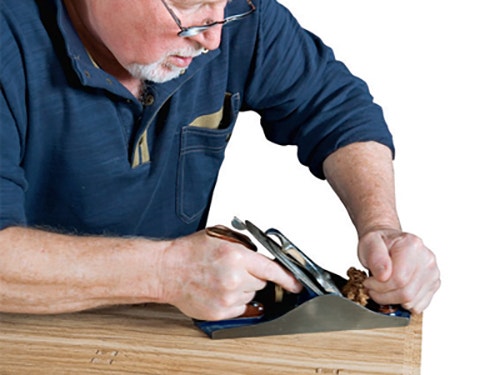
If there is any process in a small shop, of one to five workers, where a hand tool is best suited to a task, it's cleaning up with a smoothing plane.
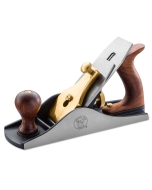
Handplanes: In most cases, faces and edges can be planed using an 04 or 04-1⁄2 smoothing plane, provided the grain is oriented to advantage. If the grain is difficult and prone to tearout, use a blade that has been back sharpened. In extreme cases, even on relatively narrow faces, you may have to resort to planing across the grain.

Assuming that the workpiece is narrower than the plane width, that it's sharp and correctly set, it usually takes four passes to make a machined surface smooth and ready to polish.
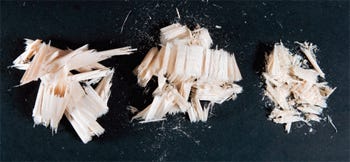
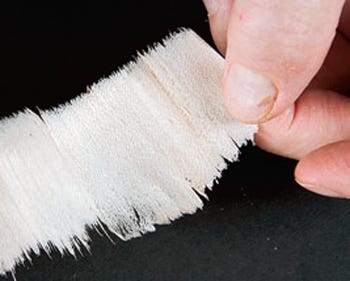
The first pass removes the tops of the scallops, which collect as fine slivers. The second pass removes larger slivers. The third pass removes a near-complete shaving with some gaps across it. The fourth pass removes a complete end-to-end shaving. The result is a smooth surface.

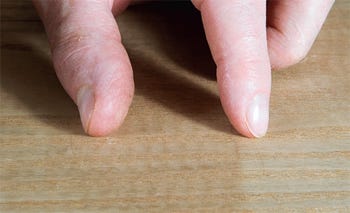
This surface has several desirable characteristics besides smoothness. First, the fibers are cleanly severed, not torn or abraded. Second, the surface retains its geometry: it's flat in length, flat in width, and square to its faces. Third, the very small amount of material removed has not altered the critical dimensions of the workpiece. A smoothing plane is the only tool capable of delivering all these characteristics.
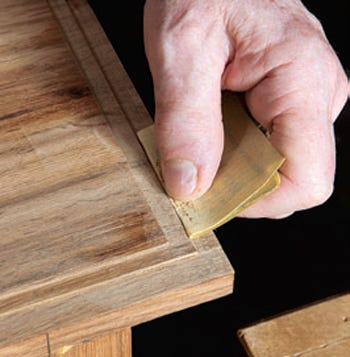
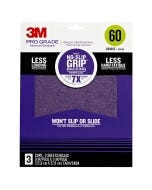
Abrasives: There are situations where a surface is improved by sanding. For example, a small tearout caused by abnormal growth many years earlier in the life of the tree or an area, usually around a pin knot, where the grain goes the opposite way to the rest of the board.

I sand by muscle power using a cork block. Divide the sheet of abrasive paper into six pieces and size the block to permit thumb and finger grip. Other than the cardiac workout, the major benefits of this method are speed and control to prevent the softening of surface edges. Because my polish is beeswax, I usually start with 320- grit sandpaper and go to 400.
Polish
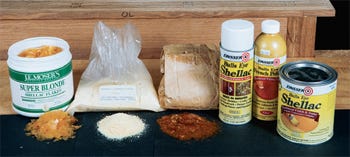
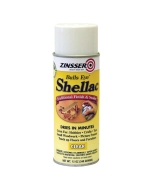
Clear shellac serves as a barrier to prevent the beeswax from soaking into the wood. Without shellac, you would need four or five coats of wax to get the desired body and luster.

Shellac is best applied with a clean, lint-free cloth, preferably old cotton. The procedure is called "ragging on." With the rag formed into a pad, spread the shellac in circles quickly and thinly to wet the entire surface at once, then lay it off by wiping in the direction of the grain. Don't apply a second coat: it will dissolve the first coat and make a sticky mess. You could also brush it on.
Because application by brush leaves a heavy deposit and shellac dries too quickly for continuous brushing, a particular technique is required. Start with a loaded brush and cover the surface quickly, then wipe it off with a dry rag. The result is about the same as ragging on.
The shellac will be touch-dry in about five minutes, but the surface will have been roughed by swollen fibers called "nibs." When the shellac has dried to the point where it won't immediately gum up the sandpaper, usually 30 minutes, de-nib the surface using worn 320- or 400-grit paper.
Unlike normal sanding, don't wrap the paper around a sanding block. Its flat face will develop a shellac buildup on one or two spots on the paper, causing tracks on the workpiece surface. Instead, weave the paper into your fingers.
Be thorough by sanding to the point where it seems you are removing the shellac coat altogether — you won't. The cleanest way to remove the dust is by vacuum. Brushing or blowing puts dust into the air, and a tack cloth loads up too fast to be practical.
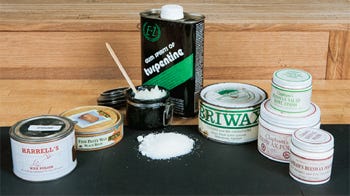
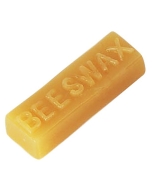
Beeswax: Making your own beeswax polish is a simple procedure. By volume it takes about five measures of pure turpentine to one measure of the pure granulated bleached beeswax dissolved overnight in a container. Its consistency should be like a block of butter just before it loses its shape to melting. The homemade advantage? You know you have pure beeswax, one not extended with a pastewax mix.
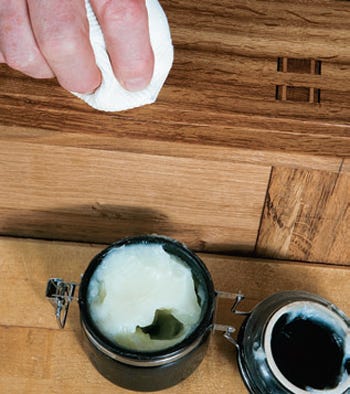
To apply, form a soft, lint-free cloth into a pad and lightly load it by scraping across the wax surface in its container. Rub the pad in circles on the workpiece until you have "rubbed it out" — there's no more free or visible wax. Less wax is better than more. The result should be a surface slightly sticky to the touch. Finish by polishing with the grain, then leave for at least four hours. You will need a second coat, but since individuals will apply at different levels of speed and pressure, a definite prescription is impossible. To heighten the luster, polish without adding more wax. This is called "buffing."
Advantages Summarized: A shellac/beeswax finish is applied quickly. Equally important, you can get the finish off the shelf and polish the inside faces of work before gluing up without a lot of fuss. This means that corners are clean rather than sanded and softened as is the case when they are assembled first and finished later. Finally, glue squeeze-out that is left to dry lifts off cleanly from the waxed faces with a sharp chisel.
Keep the inspiration coming!
Subscribe to our newsletter for more woodworking tips and tricks