Making Non-Permanent Glue Joints
Use a paper joint for joints you can easily take apart.
Most of the time when you glue something together you're hoping that, like love, it's forever. But some applications demand that you're able to eventually disassemble the joint.
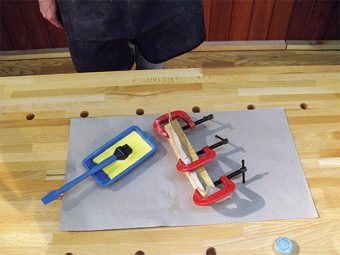
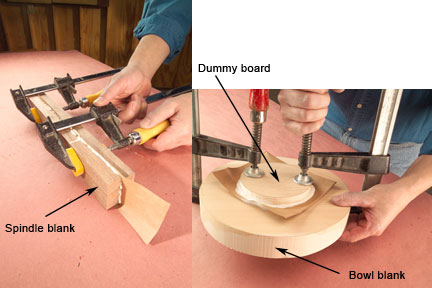
For instance, a dummy board glued onto a bowl blank, or an architectural turning you need to split into two equal halves. Or, the biggest (and strangest) turning I ever did, a foundry pattern that splits into two halves for casting. These are perfect applications for a paper joint.
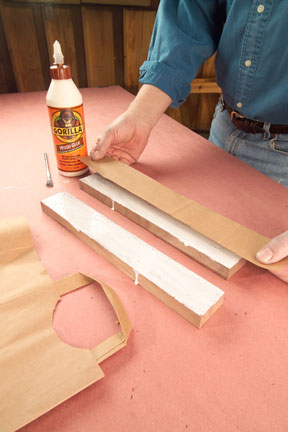
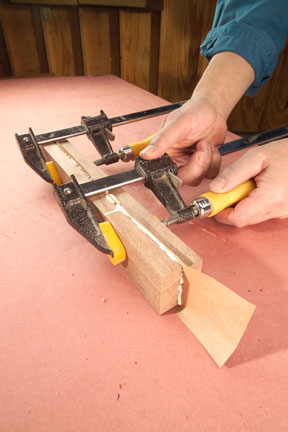
Like any glue joint, start by getting the glue surfaces flat and smooth. Apply glue to both surfaces. Before bringing the parts together, insert a piece of paper into the joint. It's important that the paper is porous. Brown paper grocery bags work great. Shiny non-porous paper, like from a magazine page, won't allow the glue to penetrate the paper, and the joint won't stay intact while you work on the piece.
Clamp the parts and allow the glue to dry. After the glue is dry, work the piece as you normally would.
It's Splitsville, Baby
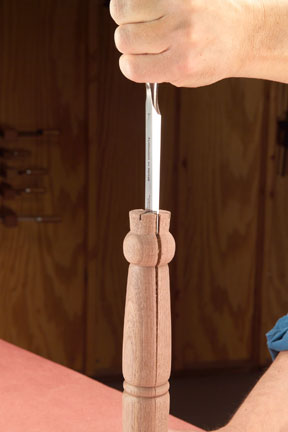
Place the tip of a sharp chisel directly on the paper joint and gently tap the chisel with a mallet. The paper will begin to split, leaving a little paper on each half of the joint. Don't try to pry the joint open. Use the chisel as a wedge, not a lever.
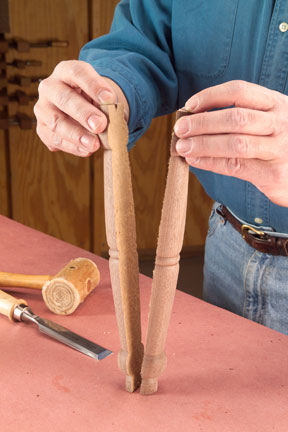
As the joint opens you can complete the separation by pulling on the parts by hand.

On spindle turnings you're left with two identical halves. On bowl turnings, since the faceplate screws went into the dummy board, you've got a bowl with no indications of how you mounted it. The paper and glue residue left on the back of the piece can be sanded off.

Keep the inspiration coming!
Subscribe to our newsletter for more woodworking tips and tricks