Measurement Advice: Accurate Measuring and Marking
Checking the length of a part seems like a pretty straightforward process, but there are several possible stumbling blocks that can mess things up.
First of all, if you're using a tape measure, make sure the tape's sliding end stop yields accurate measurements (see the calibration article) or get rid of it.
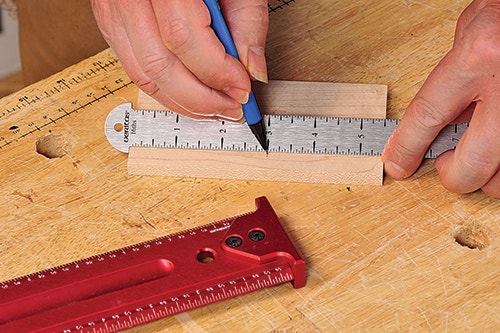
A great alternative to a tape measure for outside measurement and layout work is a hook rule, which is just like a regular rule with a hook at one end, as seen above. The only way a hook rule may yield an incorrect measurement is if the hooked end of the workpiece isn't square; when in doubt, check the end with a try square first. Another handy measuring tool that's a cross between a hook rule and a traditional marking gauge is the Kreg Multi-Mark. Its built-in rule makes it very easy to set precisely.
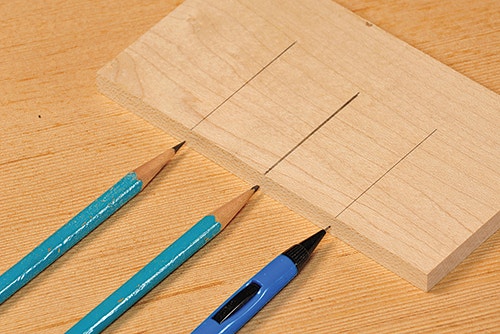
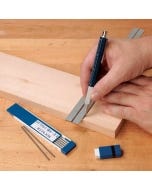
Marking the surface of the work during layout is a pretty straightforward process. But when precision counts, it's important to use the best tools for the job. For best accuracy, don't use a regular taper-pointed wood pencil. Unless you sharpen it religiously, the thickness of the pencil's line gets slightly fatter each time you use it. By switching to a mechanical pencil, which uses a cylindrical lead with a fixed diameter, every marked line has the same width. You can buy mechanical pencils that use lead as thin as .7 mm or .5 mm (that's half a millimeter...about as thick as six pieces of paper). One downside is that mechanical pencil leads are typically of "HB" (medium) hardness, which makes a line that may not be dark enough to see clearly on darker woods, such as walnut or rosewood.
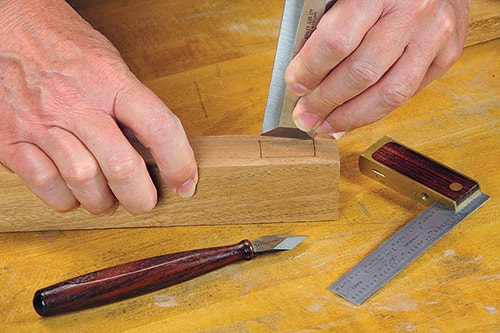
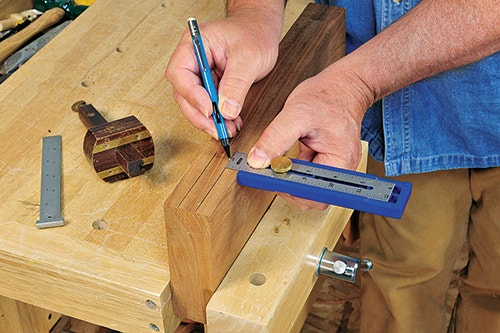
When a project calls for really precise layout work, such as marking out joinery or mortises for mounting hardware, I put the pencils away and reach for my marking knife. I like marking with a knife for two reasons: First, instead of just creating a graphic line on the surface of the work, a knife actually incises the work surface with a very thin groove that shows up well on both light- and dark-colored woods (TIP: to see a knife mark better, shine a light at a low angle across the surface). Second, this physical cut actually makes it easier to register the tip of a chisel or tooth of a hand saw to the marked line when you're ready to cut or machine the part.
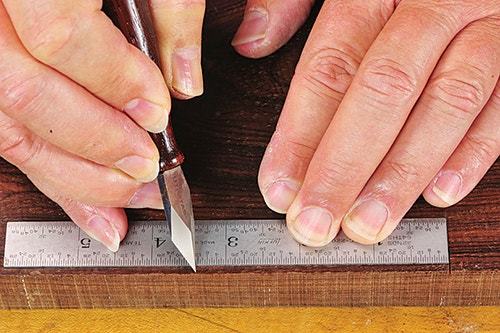
A marking knife is also terrific for marking recesses for mounting hardware: Clamp the hinge, strike plate, escutcheon, etc. to the work, then trace around it with the tip of the knife. To mark a dimension with dead-on precision using a rule, slide the knife lightly across the scale until it "clicks" into the desired graduation groove on your rule, then pivot the blade down to make your mark. The only downside of marking with a knife is that if you make a mistake, you can't erase the mark. But, unless the cut mark ends up in a prominent spot on your final project, it's unlikely anyone will ever see it.
Regardless of whether you use a pencil or knife for your marking tasks, a very common mistake many of us make is to cut on the wrong side of a marked line and end up with a part that's exactly one saw blade thickness too short or narrow. An easy way to prevent this problem is to simply make an arrow or squiggle to remind you which side of the line is the "waste" side.


Keep the inspiration coming!
Subscribe to our newsletter for more woodworking tips and tricks