Project: Pine Kitchen Table and Bench
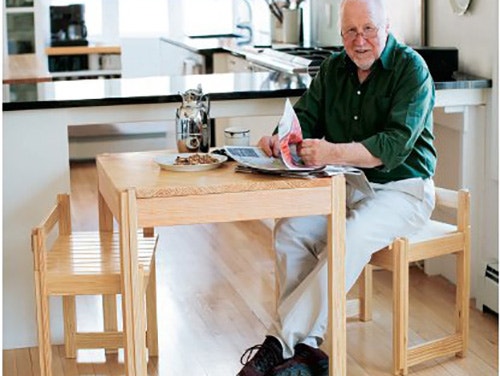
This kitchen table project was designed freeform by expert Ian Kirby out of longleaf pine to fit in a confined space.
A project design without a problem to solve is not much more than an impressionistic doodle in wood. You may get an interesting piece of furniture out of the effort, but where do you put it and how is it to be used? The problem to be solved in this case was to create a table and seating that would be used in a limited space, such as a kitchen or an urban loft. To that original constraint, Woodworker's Journal's Rob Johnstone added that he thought the seating should be contained within the footprint of the table when not in use.

The resulting pieces, made from riftsawn longleaf pine (a subset of Southern yellow pine), offer a practical project which, because of its proportions, line and material, expresses strong graphic impressions.
For the Kitchen Bench Diagrams and Materials List, click here.
Depending on your circumstances, you may or may not be a candidate to build this little project, but read on … because in one of your future projects, you may just make use of the construction methods as a solution to your design problem.
The design and making of these pieces has two things to teach a reader: making "angle-shaped" legs from flat stock, which is necessary for the screwed-together assembly; also, making the jigs required to hold the bench parts accurately and firmly in place while joining them.
Material Thickness
Each component of the table is made of 1"-thick wood, and benches are from 3/4"-thick material. The straight grain pattern on all four faces of the stock is the result of being riftsawn. The simple lines show off the color difference between the early and late wood to great advantage. To hide dings, as well as to be kinder to body parts that may collide with the furniture in cramped spaces, all the exposed edges are softened with a 1/8" radius. The polish ("finish" on this side of the pond) on the table and benches is a combination of salad bowl oil and beeswax, suitable to protect the surface from any epicurean splatters that may occur. This pine, sustainable and plantation grown, finishes very smooth and straight from a plane and takes a finish well. Its lighthearted look seems to epitomize the look of "wood."
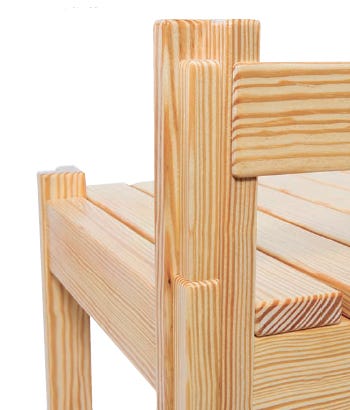
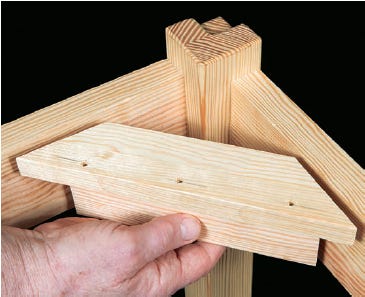
Built-up Legs

The leg and rail subassemblies are the structure upon which the top and the bench seat slats sit. Key to that subassembly are the L-shaped built-up legs. The methodology for constructing the legs is as follows.
- Select the stock for the legs and identify the face of the material that you wish to be on the outside. Mark this face with a "V."
- Plane smooth the face of the wood opposite from the "V."
- Next, square the edge of the board (the edge closest to the point of the "V"). My preference is to use a plane for this task.
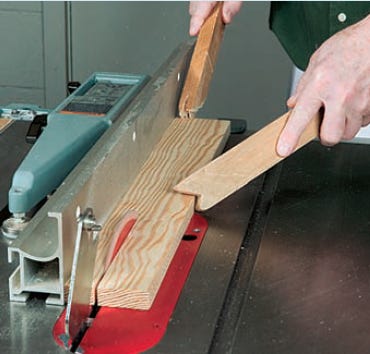
- Stepping over to the table saw, cut the stock in two. Guide the cut with the accurate edge to the fence.
- Now glue the two pieces into an "L" shape. Roll glue evenly onto the planed edge at the point of the "V" and clamp the pieces securely. Allow the glue to cure.

- Remove the stock from the clamps and plane the outside faces square one to the other.
- Moving back to the table saw, set the fence to the proper width of cut and slice both edges of the legs of the L-shaped piece to the proper dimension.
- Plane the sawn edges square.
- Check your table saw miter gauge for square to your saw blade and then square up one end of the leg.

- Set the saw's fence to the proper length of the leg. If your fence does not move fore and aft as mine does, clamp a setoff block to the fence to keep your stock from being trapped between the fence and blade as you cut. This cut squares the second end and cuts the leg to length at the same time.
- Radius all the ends and edges.
- Drill the clearance holes and countersinks in the relevant places.
- Polish the leg, omitting the inside angle where the cover strip will be glued.
There you have it — a leg that is ready for the next step in the building process.
Screw-driven Joinery

All of the joints on the table and benches are achieved with screws. To do this, jigs are required to hold the leg and rail components in their proper position as the screws are being driven home.

There is one more important point — although it seems almost too basic to mention — there must be holes bored for the screws to work as they should.

Taking these steps will ensure that the joints close tightly.

While the location of the various screw holes must be sufficiently accurate to hold the pieces together, they are hidden from view, so don't fret over exact placement.
Joining the Bench Parts

Two benches provide the seating for this set. The subassembly and final assembly of the structural parts is novel in its finality, both figuratively and practically. At this stage, each piece has been shaped and polished. There are simply too many pieces to align, control and assemble freehand.
For the Side Frame Jig Diagram, click here.
The solution is a jig — actually, two jigs. One is used to make the subassembly of a front leg, a back leg and their two rails, which form the end frames. The other is needed to join these frames to the long rails. As is often the case with joinery, its elemental nature exacerbates tiny errors in alignment. The jigs required for these components are not difficult to make, but they will be the difference between a well-made bench and something that is inaccurate and a frustration to assemble.

The idea is simple. You need a base made from 3/4" sheetstock that is larger than the subassembly. Screwed and glued to the base are buttresses onto which the legs and rails are positioned and clamped. Once the parts are clamped in place, complete the pre-drilling process by boring the pilot holes. Next, you drive home the screws. Note that there are four 1/8"-thick spacers that lift the rails off of the surface of the base. This accommodates the radius formed onto the edges of the legs. The second jig positions the long seat rails to the leg frame subassembly.
Building the Table
For the Kitchen Table Diagram and Materials List, click here.
There would be no problem with constructing and using a jig to aid in this construction process — but it is not as necessary as with the benches. Although the legs and rails that make up the table's lower components are similar to those of the benches, they are made of 1" stock. Because the table has three parts to align during subassembly, it can be constructed simply by clamping the parts together and tapping them into proper alignment with careful use of a hammer. Use a dummy rail positioned as if it were a bottom rail. This allows you to clamp together the subassembly and make the fine alignments and adjustments necessary. When all the parts are properly in place, pilot holes are bored and the screws are driven home. Screw the rail and leg subassemblies together to form opposing end frames. Then join these end frames together with the front and back rails.
Tabletop
As with any square top, my preference is to arrange the grain on the diagonal. This I find a more visually cohesive feel to the geometry than the "left to right" grain direction. As well, with this approach, all four edges present a similar end-grain pattern.
The center board in this glued-up table top is particularly wide with a centered cathedral figure going out to a straight-grained pattern on its edges. The remaining pieces making up the top are riftsawn — all are butt jointed together and held with yellow glue. After being cut to size, the top and bottom surfaces were planed flat and the corners were notched out to fit around the legs with a 1/16" gap. All the edges were radiused and the whole was finished with my beeswax and salad bowl oil combination. The top is made to project 3/8" beyond the face of the top rails, making enough of a shadow line to be in keeping with the other radiused edges and the gap shadows.
Because the grain of the top is on the diagonal, it wouldn't be prudent to attach it in the normal way, with buttons, because the shrinkage and expansion is at right angles to the grain. The gap between the leg and the top is sufficient to camouflage the small dimensional changes which may occur. Instead, the top is held to the underframe by screwing through the angled corner blocks. Oversized clearance holes accommodate wood movement. In this way, corner blocks are sort of a two-for-one solution because, cut and attached accurately, they help any corner joint resist stress in addition to securing the top.
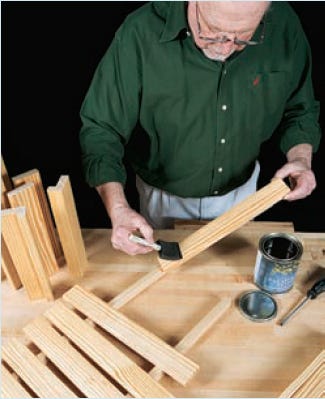
Leg Accents

The legs on the table and benches have square moldings glued to the inside angle. All the show edges of this piece are radiused. The moldings, which fill out the legs, create rabbets, adding highlights and shadows. They also hide the screws. Clamping blocks for the moldings are made from leg cut-offs. Using a wide chisel, it is easy to split off the corners at 45° which proved a clamping face.
Final Details

It always seems that tasks stretch out as you get to the end of a project. One main advantage of the methodology directed here is that the finish is already applied. In this case, when the last screw is driven, you are done with the piece. Ready to put the table and benches in place and begin to enjoy an epicurean delight — with or without splatters.


Keep the inspiration coming!
Subscribe to our newsletter for more woodworking tips and tricks