Project: Turned Multi-bit Screwdriver
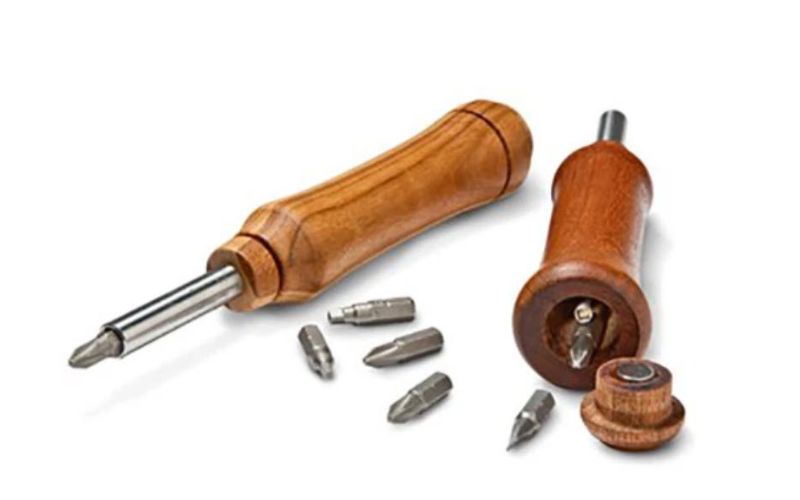
This project shows how to turn a relatively simple screwdriver handle with a hidden storage compartment for several different sized bits.
Until now, woodworkers who have wanted to use a multiple bit screwdriver had to settle for a store-bought version. That’s not such a cool option for people who take pride in working with wood! So, I came up with a hollow-body design (with a press-fit cap) using a bit holder. My screwdriver consists of four parts: the cap, the handle, the bit holder and a locking mechanism for the cap. Its compartment can hold up to eight 1"-screw bits or four 2"-screw bits.
Getting Started
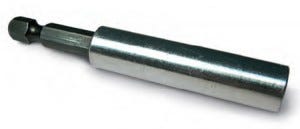
You'll need a hardwood blank of your choice, a screwdriver bit holder, a rare earth magnet, a screw and a photocopy of the full-size template.
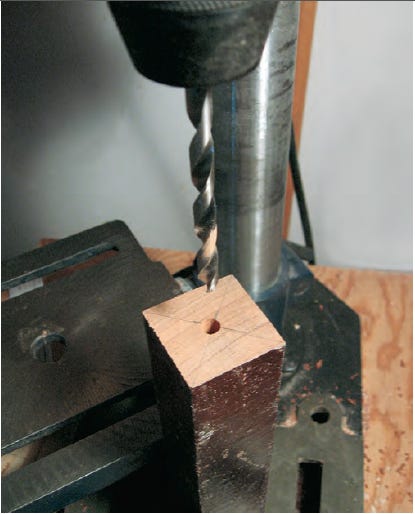
First off, use a drill press to bore a hole for the bit holder on one end of your blank (in my case, the hole was 1-1/8" deep and 17/64" in diameter). Alternatively, you could mount the blank on the lathe in a scroll chuck and bore the hole using a drill chuck; it's your choice. You're now ready to begin turning — first the handle and then the cap.
Turning the Handle
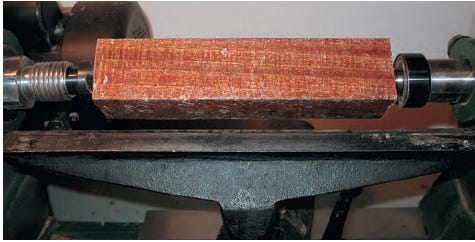
To make the handle, I mounted the blank between centers with the live cup center (tailstock) secured in the starter hole and the other end driven by a spur drive center on the headstock. Again, you may choose a scroll chuck instead of a spur drive center to hold your stock if that's your normal or preferred setup.
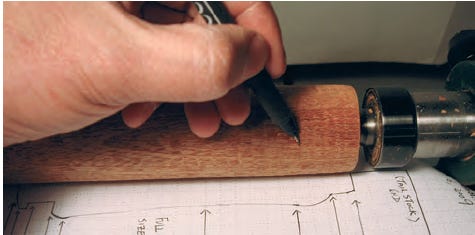
With the lathe set at about 1,600 rpm, I used a roughing gouge to true the blank to a 1-1/2"-diameter cylinder. Then I slowed down the lathe, laid the template on the tool-rest against the cylinder and scribed a circle around the blank at the three contour points for the handle: 7/8", 1-1/4" and 1-1/8". To help locate the handle’s transitions, I made gauging cuts at the contour points with a parting tool.
At the tailstock end, I used a parting tool to form a 3/8" by 7/8" diameter tenon. Next, I used a spindle detail gouge to shape the body of the handle, checking the contour dimensions with a pair of outside calipers.
I blended the contours into each other for a smooth transition along the handle. Stopping the lathe, I ran my hand over the length of the handle to detect any high or low spots which I then smoothed out. Just for decoration, I cut shallow grooves with a parting tool on the handle, one near the top and one near the bottom.
For the full-sized Screwdriver Handle Pattern, click here.
Turning the Handle
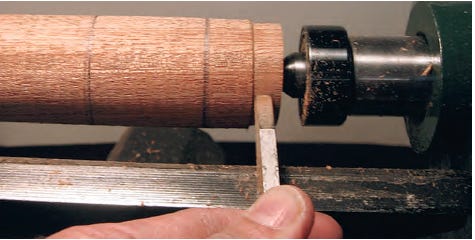
The cap has both a dome-shaped top and a 3/4"-diameter tenon. I laid the template on the tool-rest to guide me and, on the headstock end, scribed a circle around the blank for the 3/4" and 1" dimensions. With the lathe reset at about 1,600 rpm, I used a parting tool to cut a 3/4"-diameter tenon into the cap.

After the tenon was formed, I switched to a spindle gouge and shaped the cap's top to a dome profile.

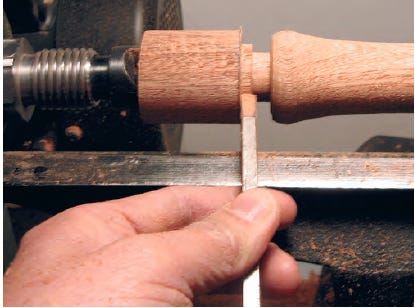
Now it was time to finish-sand the handle and the cap (avoid sanding the cap’s tenon). I set the speed to below 1,000 rpm and worked from 150- to 180- to 220-grit papers. After the sanding was done, I made a deep groove on the top of the cap with a thin parting tool, leaving about 1/4" diameter of material there. I then parted off the whole cap from the handle.
Hollowing the Handle
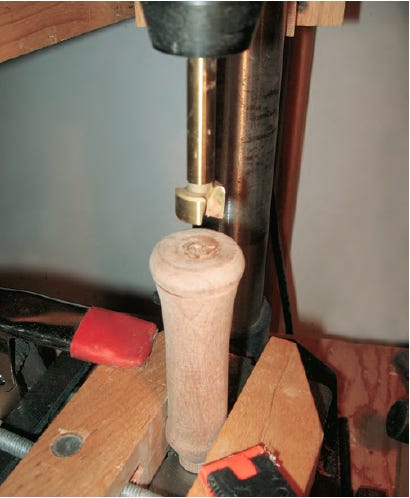
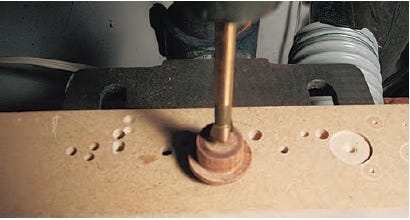
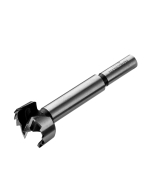
After marking a center point on the top of the handle, I chucked a 3/4" diameter Forstner bit into the drill press and bored a 2-1/2"-deep, 3/4"-diameter hole, forming the compartment in the handle (Figure 9). (Again, you can do this with a drill chuck and scroll chuck on the lathe.) I checked for a good fit of the cap in the hole, light-sanding to resize the inside edge of the hole if necessary. After I was happy with the fit.
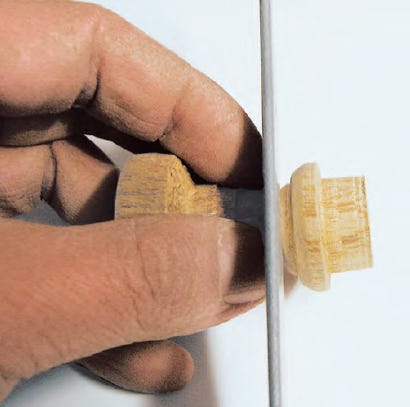
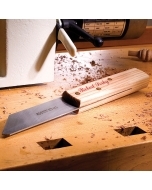
I used a fine-tooth handsaw to saw the cap free of the waste stock. I lightly sanded the freshly cut area to remove all the saw marks. I take pride in the work I do and like to sign it in some way, so I hammered my initial "M" on the cap top with a punch stamp.
Making and Installing the Cap Lock
The press-fit cap alone might fail due to repeated use or changes in temperature and humidity. I addressed that concern with a slick magnetic "lock" that consists of a 1/10" x 3/8"-diameter rare-earth magnet and a 2-1/2" #6 wood screw.
First, on the drill press, I bored a 3/32"-deep x 3/8"-diameter hole, centered on the underside of the cap and epoxy glued the magnet in the hole. Next, I drilled a 1/2"-deep x 1/8"-diameter pilot hole at the bottom of the compartment. As a last step, using a bench grinder, I ground the screw head down to about 3/16" in diameter to provide passage for the screw bits to go into and out of the compartment.

To complete the locking mechanism, I drove the screw into the pilot hole until the screw was about 3/8" (the height of the cap's tenon) below the top of the compartment opening. I adjusted the screw up or down so the magnet was in contact with the screw when the cap was replaced. Finally, I test-fitted the bit holder shank into the hole and, after making sure there was no wood dust in the hole, I epoxy glued the bit holder shank into the handle.
Finishing
I rubbed a few coats of low-luster oil finish (for example, mineral oil or boiled linseed oil) on the handle and cap top, leaving both the cap's tenon and the compartment unfinished. To make it a multi-bit tool, I simply put several 1" screw bits into the compartment. The cool thing is, the steel bits usually come out attached to the cap's magnet, making it easy to select the proper bit for the task at hand.
This is a fun and easy evening shop project, and now you won't have to settle for one of those store-bought screwdrivers!


Keep the inspiration coming!
Subscribe to our newsletter for more woodworking tips and tricks