Removing Cherry's Whitish Haze?

What is causing white marks on freshly sanded cherry?
I'm new to furniture making, and I'm building a small box from cherry panels edge-glued together. I've planed them very smooth and lightly hand sanded with 320-grit paper. Looking down at them at 90 degrees, they look and feel great. However, when I change my vantage point to, say, 20 degrees, I see many "white" areas. It appears as if the sanding dust is embedded into the cherry wood. I am concerned this will wreck my finish. How do I remove these "white" areas? – Bob Forsthoffer
Chris Marshall: One easy way to check wood surfaces for defects that might be problematic under a finish is to wet them with denatured alcohol or mineral spirits. I tend to use denatured alcohol, because it dries much faster. Doing this, you'll get a ballpark idea of how a clear finish will look on the wood without raising the wood grain. It's also helpful before staining to highlight little sander squiggles, scratches, planer snipe and the like that might be harder to notice on dry wood. Wipe your boards down so the surfaces are wet with alcohol or mineral spirits and see if that whitish haze doesn't disappear. If it goes away when the wood is dampened, go ahead and proceed with finishing. It's not going to be a problem.
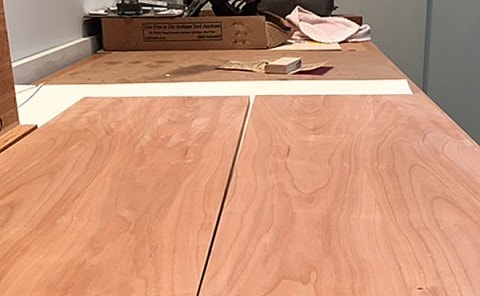
Also, Bob, 320-grit sandpaper is finer than you really need to use for raw wood. While it's hard to tell from the photo, those whitish areas might be a sign that you are sanding the wood so smoothly that you're beginning to polish it so it appears shiny from some angles. Grits finer than 180 or 220 don't really help your surface prep efforts. You're just sanding raw wood more than necessary. However, 320-grit is a good choice for lightly abrading a coat of finish after it dries but before you apply the next coat. It can help cut down dust nibs here or there and flatten other little surface irregularities that you can feel so the next coat lays down even smoother than the last.

Keep the inspiration coming!
Subscribe to our newsletter for more woodworking tips and tricks