Making a Clock with a Router and Signmaker’s Templates
This clock project is fast and easy to make. It's a perfect gift project because once you’re set up, you can make multiple clocks very efficiently. We used the Rockler Compact Router Ellipse and Circle Jig to cut the circle shape and the Rockler Signmaker's Template Kit in the 2-1/2" State Park Font to form the numbers.
Making a clock is a fun project that doesn't necessarily require a lot of tools. You can make the clock face out of just about any piece of lumber. All it needs is a hole for the clock mechanism to fit through. You can also be as creative as you like with the clock face. Keep it simple and clean with a clear finish and no numbers. Or, enhance it with applied numbers or techniques such as carving, painting or woodburning.
Step-By-Step Project Plan: Modern Clock with Large Numbers
 >
>
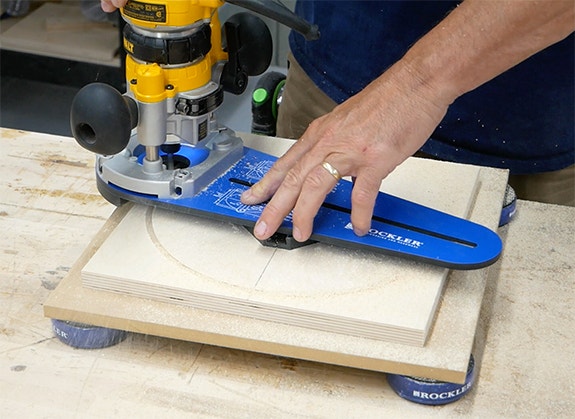
Step 1: Cut a 3/4"-thick x 12" x 12" piece of plywood or glue up a solid panel for the clock face. Use a compact router and Circle Cutting Jig Mount the jig base to the center of the work piece. Attach the circle cutting jig arm to the base of your router. Install a straight-cut bit in your plunge router. Position the pivot point on the jig to cut a 10-1/2"-dia. circle. Set your router to a 1/4" deep cut. Cut the circle in three passes, lowering the router bit depth by 1/4" after each pass.
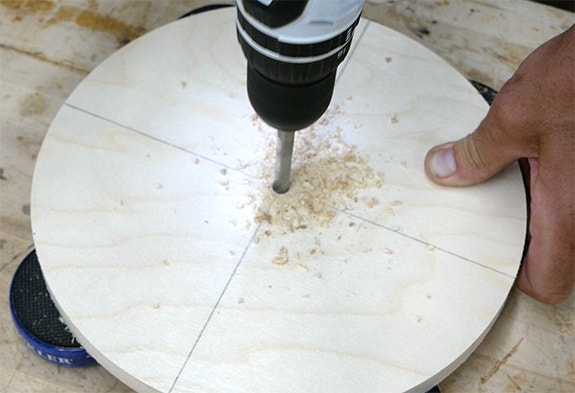
Step 2: Drill a 5/16" diameter hole through the center of the clock face.
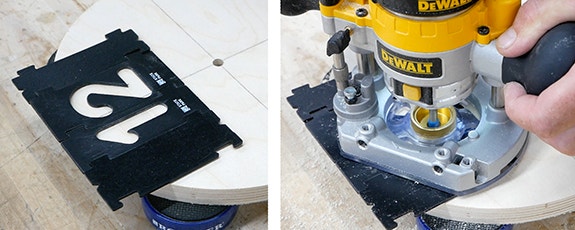
Step 3: Set up the Interlock Signmaker's Templates templates to cut the twelve, three, six, and nine o’clock numbers one at a time. Connect an extra spacer on each side of the numbers to provide additional support for the router base. Position the template so that the outside edge of the number is 1/2" from the edge of the clock face. Secure the templates with double sided tape under the templates or painter's tape over the edges of the template.
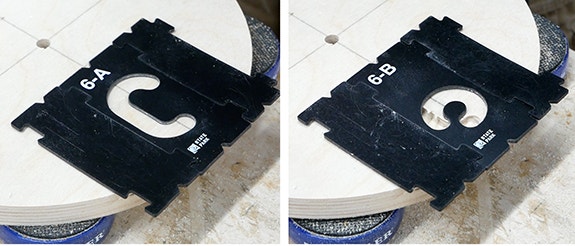
Step 4: The six and nine require two templates and must be cut in two passes. The templates for these numbers are lettered A and B for the two passes.
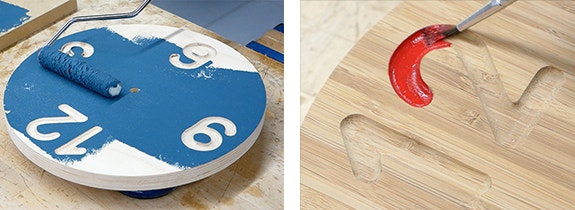
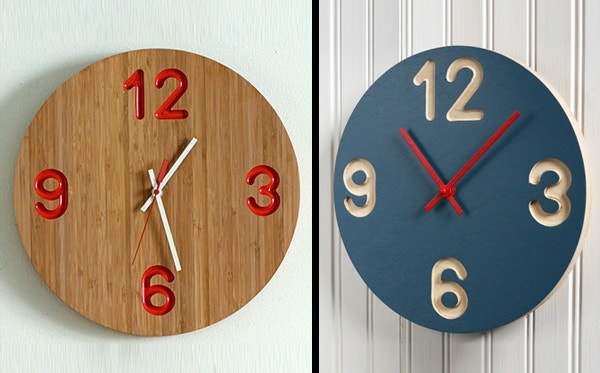
Step 5: Next, apply the finish of your choice. We used a low-nap roller to apply paint to the surface and left the routed numbers natural. We made a second clock (right) out of bamboo plywood and painted only the letters. We then applied two coats of satin water-based poly to all surfaces.

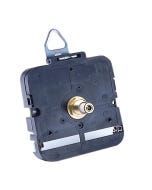
Step 6: The final step is to install the Mini Quartz Clock Movement clock mechanism and hands as instructed on the clock mechanism packaging. The clock hands set that we used were black, so we painted both hands, the washer and the nut to compliment each clock. Insert the stem through the back and attach the hands.
Modern Clock with Large Numbers Project Materials


Keep the inspiration coming!
Subscribe to our newsletter for more woodworking tips and tricks