Making Half-lap Miter Joints with a Table Saw
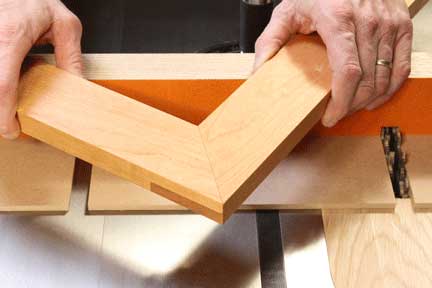
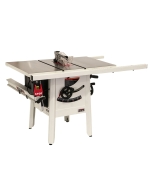
These hybrid variations of a half-lap joint are an effective way to strengthen mitered frames. The result gives you a conventional-looking miter joint from the front, but the back of the joint resembles a half-lap. The trick here is that the tongue of one half of the joint is mitered at 45°, and it nests into a mating half-lap with a shoulder mitered at 45°. There are a number of ways to machine the parts, using a tenoning jig and standard saw blade, a band saw or on the router table. Here, we'll use a simple "L"-shaped platform jig that forms an oversized fence for your table saw miter gauge. Swiveling the jig to 45° or 90° will enable you to hog out the waste safely and accurately.
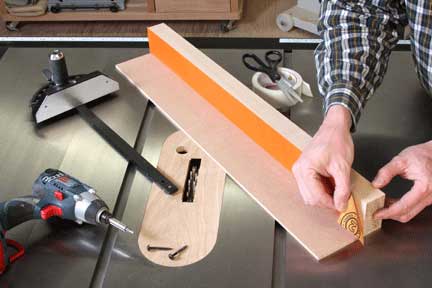
Step 1: Make the fence portion of the jig from a straight piece of scrap stock 1-1/2 in. thick, 2-1/2 in. wide and 28 in. long. This length will enable you to swing the miter gauge 45° right or left and provide ample support for your workpieces up to and past the dado blade. Glue and clamp a 4-1/2-in.-wide piece of 1/4-in. hardboard or MDF to the bottom edge of the fence, forming the "L" platform. In order to prevent your dado blade from potentially cutting into fasteners, do not nail the parts together. Affix long strips of sandpaper to the fence with double-sided tape to keep workpieces from shifting during cutting.
Step 2: Center the jig on your miter gauge, and fasten the two together with a couple of screws. Make sure the platform fence rests against the saw table.
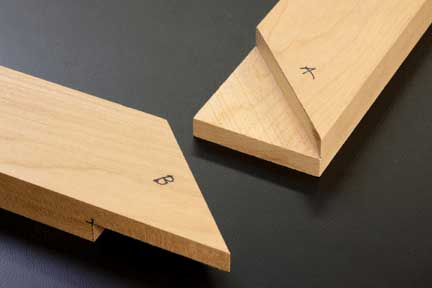
Step 3: Study the photo to become familiar with how the half-laps fit together. You can mill the parts in either order, but we'll make the mitered shoulder laps (pieces "A") first, then machine the mitered tongues (pieces "B"). When you're making a complete frame with this joint, cut the same joint shape on both ends of each part to help keep the overall arrangement of the joints clear.
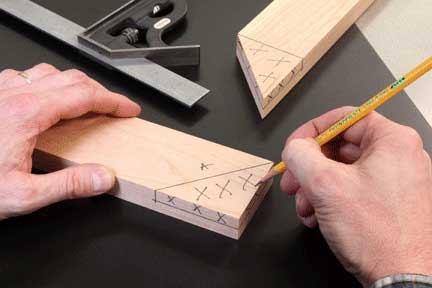
Step 4: Lay out both halves of the joints on your workpieces, marking the waste areas. Otherwise, it's very easy to get confused when alternating between miter and square cuts and cut a half-lap incorrectly.
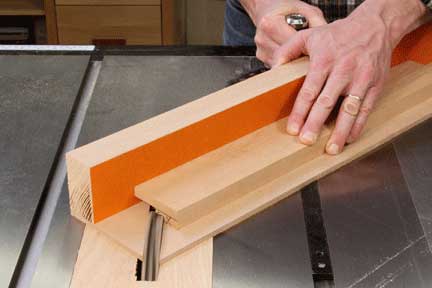
Step 5: Set up the angled-shoulder laps by pivoting your miter gauge to 45° and verifying its accuracy with a combination square. Install a wide dado blade in your saw, and raise it so it will cut exactly halfway through the workpieces when they are resting on the jig platform. Check your blade height setting by making a few test cuts on scrap. Then, saw away the waste on one end of your first "A" workpiece in a series of nibbling cuts up to the outside corner.
Step 6: Swivel the miter gauge to 45° in the opposite direction, move the gauge to the other miter slot and cut the second angled-shoulder half-lap on the opposite end of the same workpiece.
Step 7: Repeat Steps 5 and 6 for the other "A" workpiece of your mitered frame.
Step 8: To make the "B" half-laps with mitered tongues, first miter-cut the ends of these workpieces to 45° on a miter saw. Check their accuracy with a combination square.

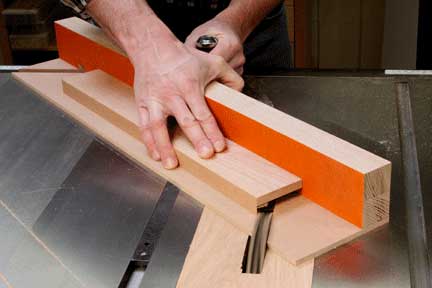
Step 9: Reset the miter gauge to 90°, and nibble away the waste area up to the inside corner of the miter. Start these dado cuts on the pointed outside corners where the wood is most fragile, working your way in toward the final square shoulder cut.

Step 10: Once all the joints are machined, clean away the saw blade marks with a shoulder or rabbeting plane set for fine shavings. Glue and clamp the joints. Since half-lap miters present a cross-grain gluing situation, it's a good idea to drive small nails, screws or dowel pins through the back of the joints to reinforce the glue bond.

Keep the inspiration coming!
Subscribe to our newsletter for more woodworking tips and tricks