Video: Concrete Coffee Table With LEGO Inlay
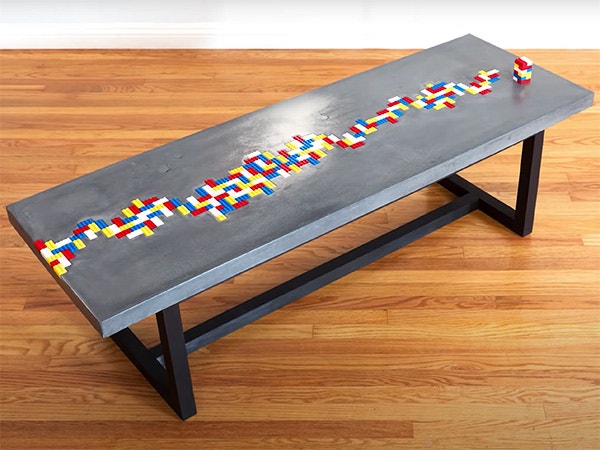
In this video, Chris Salomone builds a coffee table with a concrete top and a unique inlay.
Looking for an alternative to the popular epoxy river pours, Chris Salomone chooses a different medium and a different type of inlay.
You can find more great projects and techniques from Chris Salomone at his website.
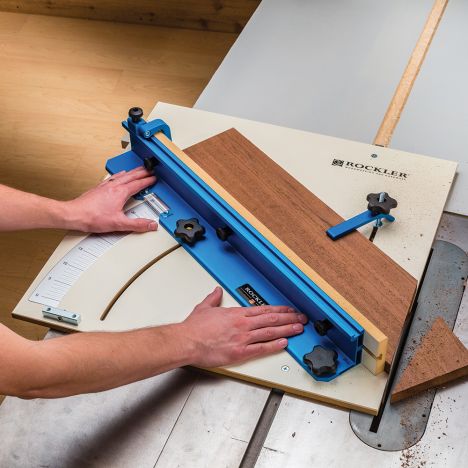
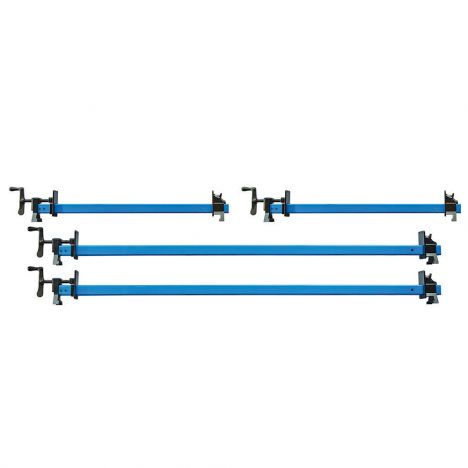
Featured Tools:


Chris Salomone: River tables are pretty cool, right? Glass, epoxy, whatever. At a certain point, I've got to admit, I'm sick of seeing them. What if we did something new like that one using Lego?
The first order of business was making my river pattern out of the Lego. I started this is where I pretty much start every project on the computer, coming up with a few different ideas until I landed on one that I liked. After I had my pattern down, I separated them out by color to figure out how many of each Lego that I need. Then, I headed down to the Lego store to get them. This is where I ran into my first problem. I base most of my design off of bricks that are four by two, but at the store, they didn't carry every color in four by two. For example, all of my blue bricks are two by one bricks.
Luckily, you can put four of them together and mimic the shape of a four by two, but it just made putting the whole thing together a little bit more tricky. Oh, and I'm sure I'm going to get this question a lot, so $45. I'll let you figure out what that's the answer to. Anyhow, what you see me doing here is building up my pattern upside down and using these black flat pieces to lock everything together. With that out of the way, I started building the form for casting my concrete, which is going to be made out of melamine. I started off by breaking down a big sheet using my track saw. Then, once it was a little bit more manageable of a size, I took it over to the table saw to cut it to the finished size.
This went perfectly, absolutely zero problems, not even one mistake. Actually, the form is pretty simple. It's just five pieces that make up a box like this. The one tricky thing that we're going to need to do is create a recess in the bottom of the form for the nubs of the top of the Lego to sit in. This way, the top of the Lego not counting the nubs, are flush with the bottom of the form and will in turn wind up flush with the top of the concrete. Does that make sense?
Basically, otherwise, the concrete would flow right over the Lego or under it when you're pouring. Here I've added a lot of extra Lego and some hot glue to keep everything really rigid while we trace out the shape of what we're going to need to carve into the form. It's really important that nothing moves at this stage of the game, but all those Lego are going to get removed before we pour the concrete. Next, I set the cut depth of my router so that it matched the height of a Lego nub. Then, I went about carving the recess for my pattern.
This was probably the single most tedious part of the entire build. If you're wondering why I'm just like a Cholo on Easter in the shot is because MDF makes me itch. I guess I'd just rather be hot than itchy. Later that night, we could start putting the form together. We screwed in one side, laid the Lego slab in, and then use silicone in all the corners where the Lego is going to meet the concrete. I know right here, it just looks like a huge mess in the shot. Just know that it's the same principle as what you're going to see in some later shots where the corners of the form meet. It just looks more confusing here.
Anyhow, the next day the silicone was dry. We removed it all from the form so that we could start casting the concrete. Here you can see the purpose of the silicone. How it's going to give the concrete a really clean round overlook. Onto the concrete. Here, we're mixing up our dry with some black pigment because we're going to go for a darker look. Then, we're going to do an initial face coat that'll get sprayed on. Now, I've never done this, and it seemed like a really bad time to test, so we just had Mike take the lead. By the way, that's who you've been seeing me collaborating with here. Mike Clifford from industrial maker.
We actually built another project for his channel during this collaboration, a really awesome curved bench. Definitely, go check that out after this one. I'll put a link at the end and in the description for you. Anyhow, after we had the face coat on, we mixed up another batch that had our alkaline-resistant glass fibers in them and used it to backfill everything. By the next day, the concrete was set up enough that we could start grinding it. Here I'm using the form as a guide to flatten what will be the bottom of the slab. By the time I was finished I had a serious case of concrete crotch. I'll let you make your own joke.
Finally, that night, it was time that we could de-mold this guy. I think this was my favorite part about concrete work. It's like Christmas morning for bad kids where you're not sure if Santa is going to bring you what you asked for or a lump of coal. Honestly, I was probably 50/50 as to whether I was going to be happy with the outcome. Looks good. Anyhow, the next day the final thing that we had to do the top before I could start working on the base was a little wet sanding and then seal it.
Since a buddy who owns a drum came to visit, we had to get at least one shot with that. Having the top out of the way, and starting in on the base, which is made out of wood was a huge sigh of relief. It felt like the work was done and now it was just time to bring it home. Actually, going in, I wasn't really sure what I was going to do design-wise. I came up with a couple of ideas and ultimately landed on this one, which is probably the most simple.
Basically, I wanted something that complimented the top but didn't compete with it. The base's job was to be invisible. That doesn't mean clear or as thin as possible or anything like that, but rather as un-distracting as possible. With a solid plan in mind, I started off over at the jointer to flatten my workpiece and then moved over to the planer to bring it down to a finished thickness of just over an inch and a half thick. Then, over the table saw, I took my board and cut out some strips that are also just over an inch and a half wide.
The reason I like to do this, especially when I'm working with harder woods, this is maple, by the way, is that you can get a much cleaner result having your last pass be where you're just removing a tiny bit of material. Here now in this shot, the fence is set right to the finish thickness, which is going to be an inch and a half. I suppose the downside to doing it this way is it takes a little bit longer and ends up producing way more sawdust. The good thing is that sawdust looks good in slow motion. Next, I got out my crosscut sled and put a clean edge on one end of each piece, then measured out the length of the finished pieces I need. I use the crosscut sled again to finalize everything.
Question, have river tables jumped the shark yet? I'll be honest, I hope so. If not, maybe this video can serve as a ramp to provide a little more lift. I'm half-joking. In all honesty, here's what I really think. The initial idea was brilliant. That's evidenced by how many people have made versions of their own. It can't be denied. Plenty of people have had new takes on them that have been really great too.
The thing about them that bugs me, and I fully realize that this has more to do with me and my psyche than the people making river tables. Anyway, the thing that bugs me is that I see it as a crutch for creativity. I see it as doubting your own ability to be creative and thus letting the material be creative for you. Again, I know that isn't the truth. It's more of a window into my head, I guess. Here's why I think, it's because I get scared. I have moments where I'm afraid that I'm never going to have another good idea or something that excites me. I guess this is just me projecting that fear onto other people.
Here's the thing. Every time I get that feeling, I'll get depressed for a couple of days, but it's almost always followed up by a surge of new ideas. I don't know why. It's just always been the way things have gone for me. For whatever reason, I think it just makes me overly sensitive to people doubting their ability to be creative. I just hate seeing that. I hate hearing people say that about themselves. I truly do think that anybody can be creative if they're able to just get out of their own way. I don't know, maybe I'm not alone. Maybe somebody out there feels the same.


Keep the inspiration coming!
Subscribe to our newsletter for more woodworking tips and tricks