Video: Modern Coat Rack and Storage
In this video, Shaun Boyd designs and builds a wall organizer and coat rack.
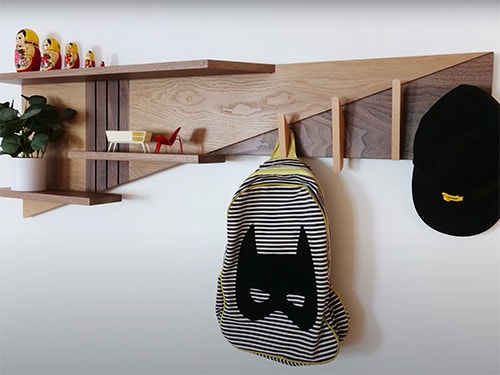
You can use this piece as a wall organizer, coat rack, hat rack, or even just as an art piece. As you can probably imagine, this piece can be used to organize your most used things like coats, hats, and more!
You can find more great projects and techniques from Chris Salomone (and Shaun Boyd) at his website.
Featured Tools:


Shaun Boyd: Let's be honest, most, if not all, famous duos have a main person and a sidekick, a number one and number two, Batman and Robin, Mario and Luigi, K-Ci & JoJo. Some might not be obvious or even meant to be that way, but that's just how it is. Even just the order in which names are said or written can be enough to convey the hierarchy, but sometimes if the sidekick really understands their role and embraces the spot they have been assigned, the story's enhanced because of it. What would Paul Simon be without Art Garfunkel? Okay, maybe that's a bad example but you get the point. Maybe, just maybe, if everything goes just right, even the sidekick gets to have the spotlight for a minute at some point.
Last week, Chris made the Pico entryway console, Paul Simon, if you will and we wanted to design a companion piece to go with it. Not necessarily meant to be a sidekick, but more an Art Garfunkel. Sure, both pieces could go solo, but honestly, we all know they're better together.
I came up with this one, which we're calling the Pico wall organizer, a simple piece that's meant to complement the entryway console. We made full-length plans for both pieces and they're available right now on our website. Yes, you can get them separately, but like I said, they're better as a duo. There's a link to these plans, as well as all of our other pieces in the description and we even have a sample chapter that you can view, so you know exactly what you're getting. It might not be apparent so far, but the nice thing about this piece is that it doesn't require a lot of material. Honestly, if you plan it right, you could probably make the wall organizer from leftover material from the entryway table or at least, get pretty close.
At this point, I have everything milled and I making panels for the main section of the piece, which is made up of three sections of white oak. I did it like this to help with material efficiency and it just made a little bit more sense from an assembly perspective. For now, I can glue up the three panels. Two of them were rectangle panels and one of them was the longer angled panel. The two smaller panels were pretty straightforward and the angled panel needed a bit of help to allow the glue-up to go smoothly. Because of the angled edge, I needed to cut in some notches, so that the clamps could pull straight across the glue seal.
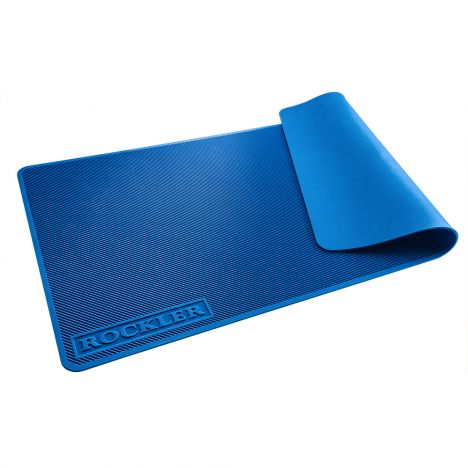
Chris is always giving me flack for how messy my assembly table gets, so I figured I'd use these Rockler glue mats to get him off my back. With the main sections of the panel all glued up, I then started to work on the wall mount accent pieces. I needed to create a second angled panel, which was very similar to the oak section I just did, only this time, it was a bit thinner walnut and it was walnut, which is different than oak. I also needed a few strips of thinner walnut, which would go on top of the center white oak section. These were milled down to match the center section white oak thickness and both of them together would equal the thickness of the other two adjacent white oak panels.
I know gluing two pieces of wood with perpendicular grain direction is going to be worrying to some people, but given the size of these pieces and how it all comes together in the finished piece, I'm really not concerned about having any issues in the long run. At this point, I had all of the main panel parts ready to go and I could start getting everything glued up, which I did in two stages.
I first needed to trim all the joint edges on each panel to make sure everything was square and I had cleaned glue surfaces. I also trimmed the long angle panel to get it close to finish dimension, then cut in some more notches for this first glue up. Once the main panel had dried, I could trim the entire angle, which followed the angled panel down through the other two panels and with that cut, I could attach the walnut accent panel.
With that, the main panel is completely assembled and I can get to work on the shelves, I designed the piece to have three shelves, one along the top edge and two lower shelves placed pretty arbitrarily on the left side of the main panel. Besides milling some walnut down to finished thickness, the only other thing I needed to think about was how wide to make each shelf and I needed to factor in the joinery methods that I would be using for each shelf to determine the final width. With that in mind, I could trim each one to its finish width.
The top shelf also needed a bit more work beyond that since I was going to be cutting an angle onto one end of this one and I needed to make sure the angle was cut accurately, so that it lined up with the top edge of the main panel and sometimes with a cut like this, you have to make it in a couple passes to get it just right. No shame in that.
With all the shelves done, I could get to work on the joinery for each one and I started with the top shelf. I decided to connect this one with a butt joint, that would be recessed into the upper edge of the main panel, so that the shelf sat flush with that edge. This required removing a large section from the main panel, which I was able to do on the table saw and with a bit of chisel work to get it just right.
I could then cut in some dominoes and glue the shelf into place. I just needed a couple of clamping blocks to ensure I had parallel edges to pull everything together evenly. Now that I had the top shelf in place, I can get to work on the lower shelves, which would be attached with a tongue and groove-type joint, as well as some screws from behind for a little extra strength.
I could first start by placing and marking out where I wanted the grooves to be. Using those marks, I could set my router in place and measure the distance to the router base from the bottom of the upper shelf. With that measurement, I could cut a spacer piece of plywood, which would reference the top shelf and create a straight edge to cut the grooves for both shelves.
With both grooves cut, I just needed to cut the corresponding tenon onto the back edge of both shelves and I could easily do this on the table saw. By removing slightly over a blade-width from each side of each panel, I could sneak in on a good fit for the shelves. As you can see here, the tenon hits the end of the groove, so I needed to trim the ends of the tenons, to allow the left side of the shelves to slot over the ends of the groves.
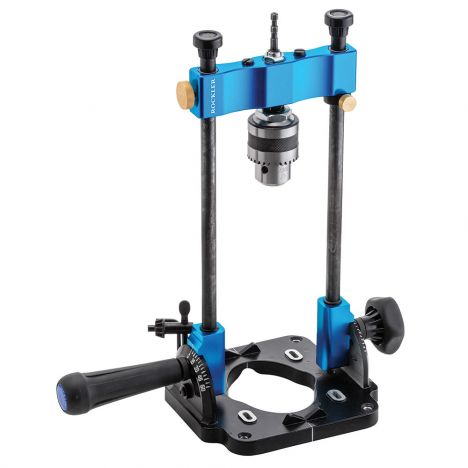
With those fitting well, I could drill a few holes into each grove, so that the shelves can be reinforced with screws once they're attached permanently. I wanted these holes to be as close to vertical as I could get. I'm not great at the old freehand 90-degree drill, so I use this Rockler vertical drilling guide, which is great to have around for stuff like this.
With the holes drilled, I could mark the screw locations on the back edge of the shelves, then take them to the drill press to drill the corresponding pilot holes. From there, I could temporarily put them into place. Having them screwed into place, now allowed me to trim the other ends of the tenons. This isn't totally necessary but I felt like leaving the tenons as is looked a little funny. By funny, I mean bad. I marked the line where the edge of the main panel met the shelves and I could then take them to the table saw and trim away the excess tenon to as close to the line as I could get. I could then reattach the shelves and using a chisel, I could square up the last little bit of excess material.
All right. The last thing I needed to make was the hooks that would be attached to the walnut corner panel. I actually went through a bunch of iterations of different hook designs and even went as far as making four hooks of a different design, only to not like them and try something different. I'm going to throw these away.
Chris Salomone: Yes. No, no, no.
Shaun: I ended up with a simple design that I felt fit with the aesthetic of the piece as a whole and I came up with a simple sled that could make all the cuts for each hook perfectly repeatable and quick to do. The first setup would cut the upper edge of the hook. The second setup would use the first cut as a reference to then cut the bottom end of the hook.
The third setup would cut the second long edge, which is opposite from the reference I had jointed earlier. Doing it like this made it quick and easy and allowed me to keep everything organized by cutting each hook completely from start to finish, instead of having to switch setups in between each cut. I also used a hold down for the last cut, which made it a lot safer as there really wasn't space to hold the piece with my hands.
At this point, everything had been fabricated and it was really just a matter of some final sanding and getting everything assembled. The shelves were glued and screwed into place, this time with some longer screws and the hooks were attached with some glue and screws as well, after I spaced them out to my liking.
With the entire piece fully assembled, I could add some finish then work on getting it hung on the wall. I made a simple French cleat using half-inch thick plywood. Then with a few simple measurements-
Chris: You could be a half inch off and I think you'll be okay.
Shaun: It's got to be perfect. After finding a few studs. Stud finder. We could get it mounted to the wall. Seeing both pieces together was a nice way to finish this one off.


Keep the inspiration coming!
Subscribe to our newsletter for more woodworking tips and tricks