Video: How to Make Three Different Planters
In this video, David Picciuto explains how to build three different types of planter stands that are easy to replicate.
Learn how to make and batch out three different planter stands. This is an easy woodworking project that can done with few tools.
You can find more great projects and techniques from David Picciuto at her website.
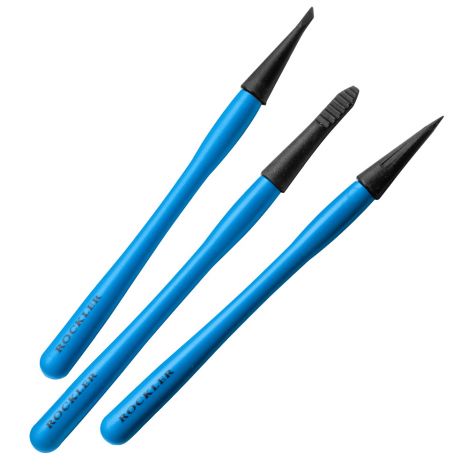
Featured Tools:
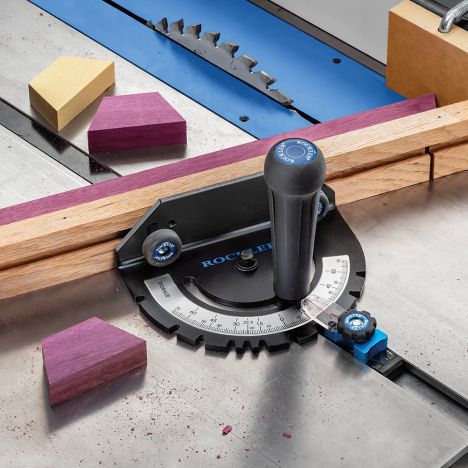

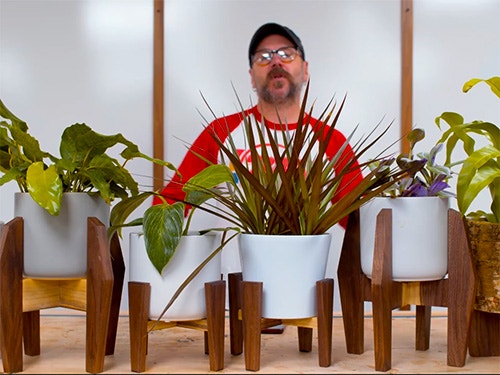
David Picciuto: Welcome to Make Something with me, David Picciuto. We love to buy and cure houseplants here at Picciuto farm. Today we are going to make three different planters stand styles. Today's video is brought to you by Rockler and today we're going to be highlighting their small parts, tapering jig. We've got three different planter designs. I've made two of each, each one has four legs. That's 24 legs in total, all 24 legs have tapers on them. We were able to quickly and easily batch these out. Without further ado, let's get started with design one.
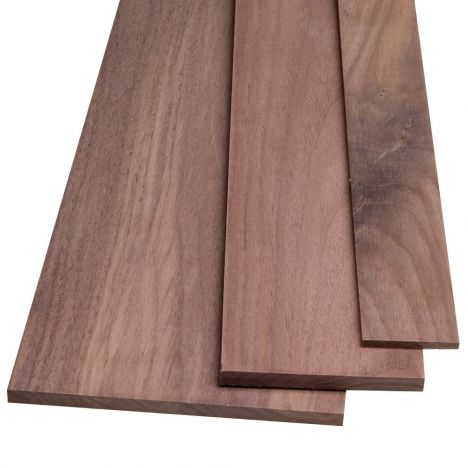
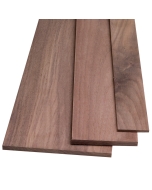
I'm going to start off with this piece of Walnut. These planters don't take much wood, so this is a great project to batch out either for yourself or for Etsy or for gifts. We're going to do nearly everything over here on the table saw. This Walnut that I have has the sapwood right here, and I think I'm going to use that for the little cross beams on this platner as a contrasting piece. It's going to get covered up by the plant, but I'll know it's there and I'll know that it's cool.
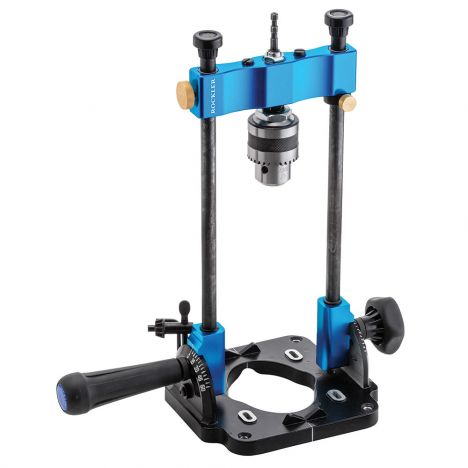
Now, I'm going to take these two cross pieces and do a half lap joint here in the middle. I'm just going to set my blade at half the height of the piece and then-- If you were doing a whole bunch of these, you'd want to set up a stop system on your miter fence here so you could batch them out very quickly. For my purposes, I'm just cutting right up to that line. Now we're going to drill a hole in the center of the ends of all these pieces here. If you don't have a drill press, Rockler has a great drill guide that will help you drill perpendicular holes straight up and down. We've highlighted this jig before, but I want to show you again how cool it is. The bearings on there, just buttery smooth.
I can put my drill up here and turn this into a drill press. I can lock that so it stays up there. This has the optional vice here and allows you to drill directly in the center. Now we're just going to put some glue in that half-lap joint and glue these guys together, no clamps or anything, just going to let that sit. I went ahead and I cut all four legs for this planter stand now.
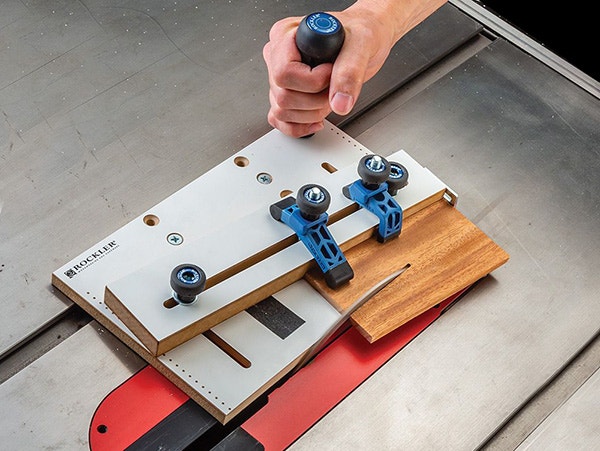
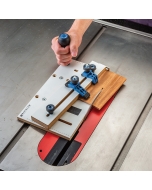
Instead of having boring parallel lines, I thought, why not make a taper on there? I drew my two taper lines and we're going to use this really cool small parts tapering jig by Rockler. The really cool thing about this jig is once you get it together, you run it through your table saw and you get a nice zero clearance line on there, and then you can take that, knowing that your blade is going to kiss up against this. I can then take that line that I drew and line it up with the edge of the board and lock down my fence, and because it's a small parts jig, I can also clamp the piece down to keep my hands away from the blade.
There's also this little adjustable lip here on the back. You can register each piece up against that and then clamp it down, and now my hands are nowhere near the blade and I can cut the same taper on each piece. Now I've done one side of all the pieces. I've reset the jig to do the other side, and we'll just run them all through again. This isn't necessary, but I'm going to put a chamfer around the edges of all the legs. It really lightens up the leg a little bit, and then it just helps amplify the beauty of all the angles because it adds another angle to that.
A couple of tricks you might want to do before chamfering is sand everything first, and then chamfer. That way you don't sand away the chamfer later and make it a round over. If you do get burning on there, raise up your bit, just a hair and do one more pass around everything that should take care of the burning. I'm going to do it at the router table. If you have a palm router, our handheld router, you can also do that, but these small pieces, make sure you have them clamped down in a way to keep your hands free.
You got to be safe. It's 2020. We got to be safe. Now we're going to mark where we're going to drill the hole to put the dowel, to attach it to the little cross beams. Now you do want to be pretty precise with your placement of the hole. That way all the feet are in the same height and you don't have a lot of sanding to do so it doesn't wobble. Then I'm going to take an ice pick and just put a little dimple in there. That way that drill bit goes right where I want it to go, went ahead and cut some dowels over on the bandsaw.
We're just going to glue and pound these in there and then attach the legs. All that strength is going to come from the dowel. I got lucky. I don't have any wobble in mind. I expected a little bit. If you do, you just want to sand down the feats or put some felt on there and that felt well do its thing.
This next one is even more simple and it's going to go together really fast, check this out. Now we're going to cut a dado in the middle of the long piece for the short piece to fit into. You never want to use a miter gauge and your fence at the same time when you're doing a cut that cuts all the way through the wood. We're just cutting partway a quarter inch through the wood. This is one of those rare times that I can use both of these.
I will register up against the fence, run it through and then flip it over the other way, run it through and keep nudging my fence over until I get that perfect fit. Really good fit. But before we glue this together, why not do some more tapers with that same tapering jig. Once again, I routed just the outside edges of all the pieces. Now we're going to glue this together. This is long grain to long grain gluing, and so this is really, really strong. Even if you don't have a tight fit, this ain't coming apart. I don't even think I need clamps. I'm just going to let that sit and dry.
For this third design. Again, all four legs are going to have a taper, but this time we're going to have two different tapers on one side, and again, we can use the same jig.
That really only took like 15 minutes to cut. Now, I'm going to glue these pieces together and I've got my combination square, one of my favorite tools, and then just use that to line them all up perfectly. For this clip, I'm going to use wood glue, but I'm also going to use CA glue instead of clamps. The wood glue is for strength, and then if you use the CA glue, it dries really fast, and that can be the clamp to hold everything together, and I can move on to the next step, the next thing, move on with my life. This is all long grain to long grain. You won't be able to break this apart. The wood will break before this joint will break. This will be nice and strong, and it's a plant holder. How strong does it have to be?
What are you guys growing out there? So I got some wood glue on there, and then also a little bit of CA glue, CA glue dries really fast. You could hold it together for like a minute and it'll it'll bond. You can also use this activator, which activates the CA glue even faster. I'll put that on the mating piece and we should have an instant bond. I got to operate the camera by myself today because Dan who is supposed to be here is not because he got a really cool gig.
He's actually filming one of the playoff baseball games today. How freaking cool is that? That's how good Dan is. He's operating a broadcast camera for ESPN today. Dan, camera Dan that's so freaking cool. Now, to glue this all together, I have this little piece right here and I'm going to glue that to that, and that to that, and that to that, and so on. This is all long grain to long grain. This is going to be a really, really strong joint. I'm not worried about this coming apart or breaking at all. All of these planters were made with that small parts tapering jig. Not only does it keep you safe because it keeps your hands away from the blade, but I was able to batch out a whole bunch of these really quick.
Using angles in your projects and your designs, breaks away from that boxy look that I find myself just getting stuck into. I also use the miter gauge at the table saw, you can get an optional fence for that, and it's all really high-quality stuff, I'm not even joking. The drill guide over here, I don't want to touch it because my hands are all oily. You don't have a drill press, this is what you want right here.
Thank you Rockler for sponsoring today's video. I think you can even get this Odie's oil at Rockler as well. I'm not using this oil for any particular reason other than, I like the way it looks on walnuts, and it's just really quick, and fast, and easy to work with. I don't have to wait for any drying time, I just wipe it on, and then wipe it off. All right, so let's throw some plants into these guys and see how they look.
You can also make your own planters. I got a video on this segmented planter here. I made one with a lathe, and one without the lathe. Yes, you don't need a lathe to do segmented turning. When you look at that, you're like, "This got 200 pieces on here, that must be complicated." It's not, so go check out that video. Let's get some plants in there.
I've got plans for all six of these planters on my website at makesomething.com. Like all of my plants and books, I encourage you to make those things and then sell them either online or at craft shows. If I can help you make a little bit of extra money, that makes me feel good about what I do. Not everything has to be about making money, if you just want to batch out a whole bunch of things so you can give them away to your friends and family for holiday gifts. I love making these videos, hopefully, you got something out of today's video. We'll see you next week with a brand new project. As always be safe, have fun, stay passionate, and make something.

Keep the inspiration coming!
Subscribe to our newsletter for more woodworking tips and tricks